Issue Decals and Stamps
Navigate:Business Revenue > Decal and Stamp > Decal and Stamp Transaction Maintenance > View Decal and Stamp Transactions > Issue Decals and Stamps
OR
Business Revenue > Business Maintenance > Search for a Business > Maintain a Business > Common Action: Decals and Stamps > Issue Decals and Stamps
Description
Issue a new decal/stamp, create the charges for a bill, edit charges of one that was previously issued, and print a bill.
SETUP: See Business Revenue, Business Setup, and Business Maintenance for any applicable prerequisites, dependencies and setup information for this task.
Steps
-
Specify the decal/stamp inventory to use if you are issuing a new decal or stamp.
NOTE: If you are editing an existing decal/stamp transaction, skip to step 4.-
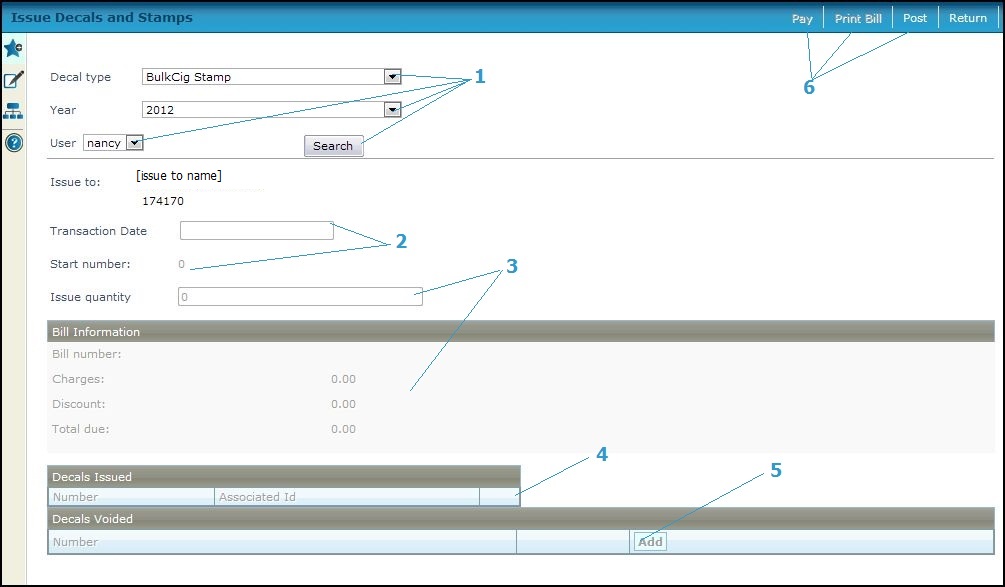
Select the Decal type.
-
Select the Year of the inventory, if the decal type requires a year.
-
Select the User associated with the inventory, if the decal type requires a user.
-
Click Search. If an inventory exists for these criteria, any previously issued decals/stamps are displayed, or the rest of the fields become available for you to issue a new decal or stamp.
-
-
Change the Transaction Date, if necessary. The Start number is tracked internally by Aumentum and displayed.
-
Enter the number of decals/stamps you are issuing in the Issue quantity field. The system automatically displays the charges and discounts in the Bill Information panel.
-
View or edit the previously issued decals/stamps in the Decals Issued panel. The decal/stamp number and any associated identification number can be corrected.
-
Click Add in the Decals Voided panel to add voided decals.
-
Click Post save the information and to create any charges associated with the decal/stamp. The inventory is also updated.
-
Click Print Bill to create the bill. The bill serves as a receipt when charges are paid at the time of issuance.
-
Click Pay if you are using Aumentum Cashiering and want to accept payment now on Collect Payments. This button is available only after posting.
-
Click Return to go back to the previous screen, regardless of whether you have performed any other actions here.
-
Edit Decals Issued
Steps
-
Click Edit in the Decals Issued panel associated with the decal you want to edit.
-
Edit the Number and Associated ID as applicable.
-
Click Apply.
Void a Decal or Stamp
Steps
-
Click Add in the Decals Voided grid.
-
Enter the Number of the decal to void.
-
Click Apply.
-
Click Post to save the changes.
Report Sample
The Pay button is available only if you are using Aumentum Cashiering and the application setting indicating that is enabled.
Corrections to charges are made using the Common Action Process Corrections available via Info Center > Tax Detail.
The type determines the fee and discount, numbering, requirement of an associated id type, and whether the decal/stamp inventory is associated with a user.