Maintain Audits
Navigate:Business
Revenue > Audit > Audit Maintenance
OR CM Audits > search/select > Maintain Audits
AND
Personal Property Appraisal
> Audit Administration >
search/select > Maintain Audits
Description
Update information for an existing audit and enter information for a
new audit. Also, navigate to the Maintain PPA Accounts screen from
the Audit Findings tab to maintain account/asset information. Also, you
can attach documents to an audit using the attachment icon ![]() from the sidebar (see Attaching
Document Attachments).
from the sidebar (see Attaching
Document Attachments).
SETUP: See Business Revenue, Audit, and Business Setup for any applicable prerequisites, dependencies and setup information for this task. see also the Personal Property Appraisal Audit Administration task.
NOTE: If you are not set up as an auditor or do not have administrative privileges as an auditor, the message You are not an authorized user. This page is read only. displays. You can still view the audit information but not maintain it.
![]() Jurisdiction
Specific Information
Jurisdiction
Specific Information
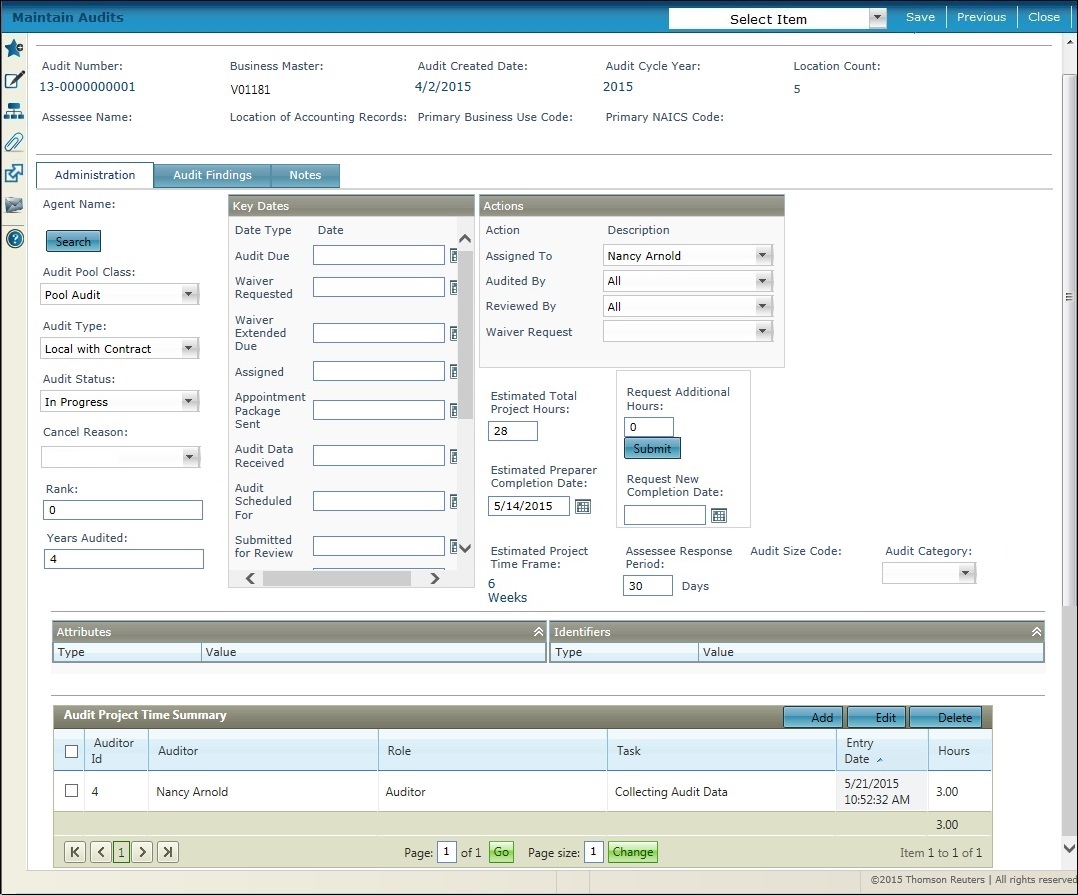
Administration Tab
-
Define any details in the Agent Name column on the Administration Panel.
-
Click Search to return the results.
-
Define any details as applicable to the audit in the Key Dates column.
-
Define any details as applicable to the audit in the Actions column.
-
Enter any Estimated Total and Estimated Preparer hours.
-
Enter any additional hours needed for the audit in the Request Additional Hours field and define a Request New Completion Date.
-
Define an Assessee Response Period, in days.
-
Select the Audit Category.
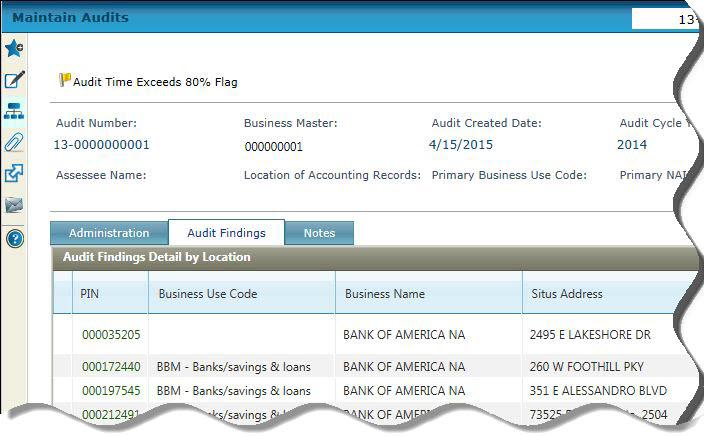
Audit Flags
If the audit has a flag associated with it, for example, the audit time has been exceeded, a flag icon and description display at the top of the screen.
-
Click on the Flag hyperlink to advance to the Manage Audit Flags screen for the purpose of managing any flags associated with the audit. When finished, you return to this screen.
Attributes and Identifiers Panels
-
Optionally select the Expand/Collapse toggle button in either of these panels to view any attributes or identifiers associated with the selected audit.
Audit Project Time Summary Panel
-
Click Add to add any audit times in the Audit Project Time Summary panel:
-
Select the Auditor (if set up and if applicable to your jurisdiction)
-
Select the Role, such as Auditor, Assessor, etc.
-
Select the Task that incurred auditing time.
-
Enter the time in hour and minute increments and click Apply.
-
Click Edit to edit any row
-
Click Delete to delete any row.
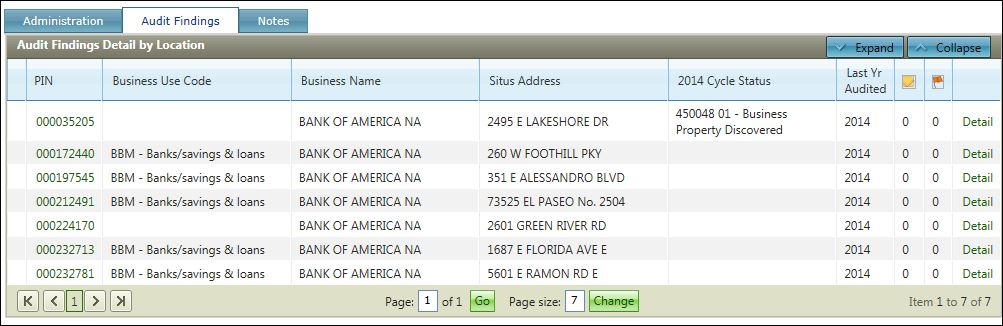
Audit Findings Tab
-
Click the Audit Findings tab to maintain and view audit findings.
-
Click the PIN to navigate to the Maintain PPA Accounts screen to maintain account and optionally asset information.
-
Click Detail to advance to the Maintain Audited Costs screen.
-
Click the Expand/Collapse toggle buttons to display/hide additional information.
-
Click the Notes or Flag icons to sort and view the number of notes and flags.
Defining UDF Information
If User-Defined Field (UDF) fields are defined for this screen for your jurisdiction (Configuration > UDF Fields), an additional UDF panel displays on this screen for the purpose of defining any required UDF fields.
-
Define the UDF field data as applicable to your jurisdiction.
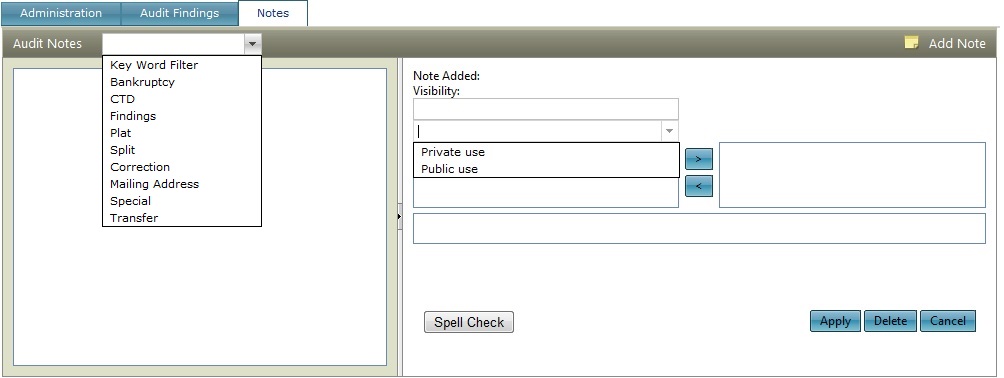
Notes Tab
-
Click the Notes tab to view, enter, and maintain notes related to the audit.
-
Select the Audit Notes by key word when creating or viewing notes.
NOTE: The Engineering/Implementation Teams set up key words, which may be unique for each jurisdiction. -
Define the Visibility for each note, either Private use or Public use and then click the right/left arrow buttons to move the note in the applicable use column.
-
Enter the note and click Spell Check to check the spelling.
-
Click Apply to apply the note to the audit record.
-
Click Delete to delete an existing note.
-
Click Cancel to cancel the note add or change.
Saving the Audit
-
Click Save.
-
Click Previous to return to the previous screen, depending on your navigation path.
-
Click Close to end the task.
Attaching Document Attachments
This screen includes the option to add attachments to the audit record by selecting the paperclip attachment icon from the sidebar to navigate to the Add Attachments popup from which you can define the attachment.
Common Actions
None.