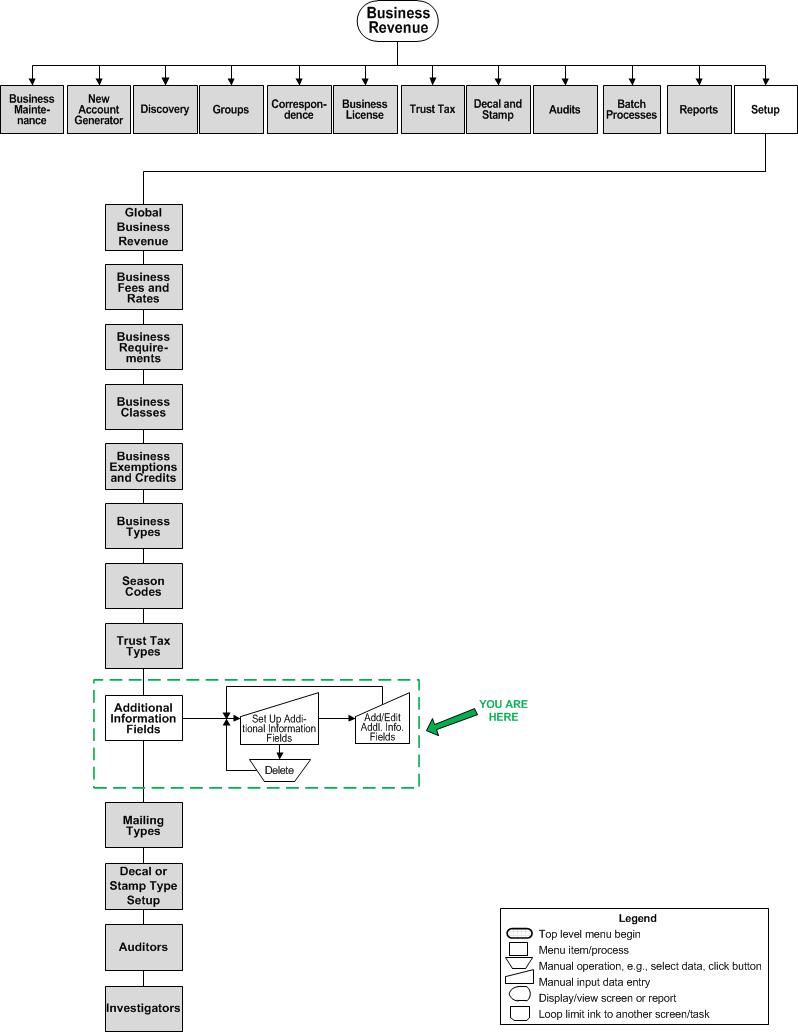
Set Up Additional Information Fields
Description
Create user-defined fields for collecting information for your jurisdiction. These are used in the Maintain Additional Business Information and Maintain Additional Location Information screens. These fields allow you to define and capture any other information about a business or location that may not be part of the standard Aumentum screens.
You define the label for the field, the order on the screen, and the type of control and editing to use. If the additional information field is a dropdown, you may define a list of valid values for the field that will be available in the dropdown list.
SETUP: See Business Revenue and Business Setup for any applicable prerequisites, dependencies and setup information for this task.
Steps
-
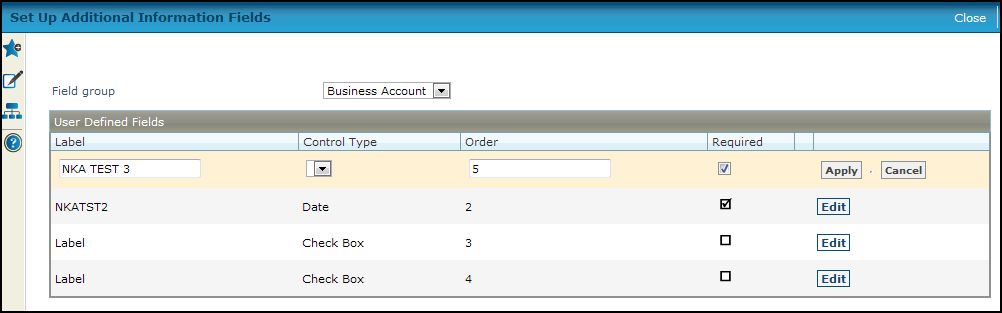
Select the Field group for the additional fields you are setting up. Selections may vary depending on your jurisdiction. Examples are Business Account, Business Location, Business License, and Trust Tax Account.
-
Click Add to define a new field or Edit to change an existing field.
-
Enter a unique Label which will display on the screen next to the field.
-
Select the Control Type for the field. The options are as follows:
-
Checkbox - boolean, true or false.
-
Date - formatted based on your international location and initial installation and setup, for example MM/DD/YYYY or DD/MM/YYYY.
-
Decimal - integer with 2 decimal places, for currency.
-
Dropdown - provides a list of choices. If you choose this option, then a List button appears on the grid line after you click Apply. Click List to go to Set Up List for Additional Information, and you can set the choices that you want to appear in the list.
NOTE: When you finish setting up the dropdown choices there, click List to return to this screen. -
Integer - whole number.
-
Text - a free text area where information can be typed.
-
-
Set the Order in which you want the field to appear on the screen among the other fields.
-
Select the Required checkbox if the user should be required to make an entry in this field.
-
Click Apply to save the grid row. Repeat these steps for other information fields.
-
-
Click Delete to remove a field.
-
Click Close to end the task.
-