Administrative Data Export
Navigate:  Reports and Interfaces > Administrative Data Export
Description
Use the Administrative Data Export to schedule a batch process to export data from Aumentum to an XML output file. You can use the output file to provide Aumentum data to an independent CAMA or other processing system. The Reports and Interfaces menu and tasks are governed by role security. If you do not see the Reports and Interfaces menu or the Administrative Data Export task, see your system administrator.
The Export generates the following three output files:
-
.xml – Aumentum data
-
.xsd – Schema
-
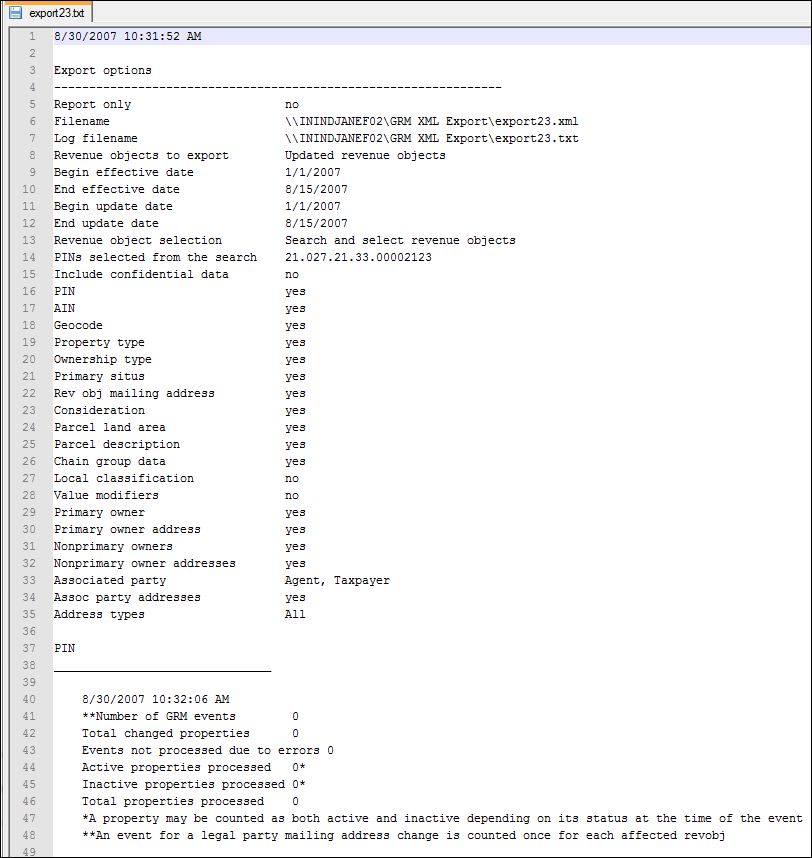
.txt – Edit Report; includes a list of the selected run-time options, every PIN processed, any errors found, and a count of the parcels processed.
You can run the Administrative Data Export for any time period you require (i.e., daily, weekly, monthly). There is a report-only option that produces only the Edit Report (.txt).
IMPORTANT:
-
Because batch processes require system resources, consider scheduling them to run during off-peak hours.
-
Verify that the codes set up in Configuration > Criteria Groups for the Records Export are valid. If the codes are not valid, an exception error occurs on the Run Administrative Data Export screen.
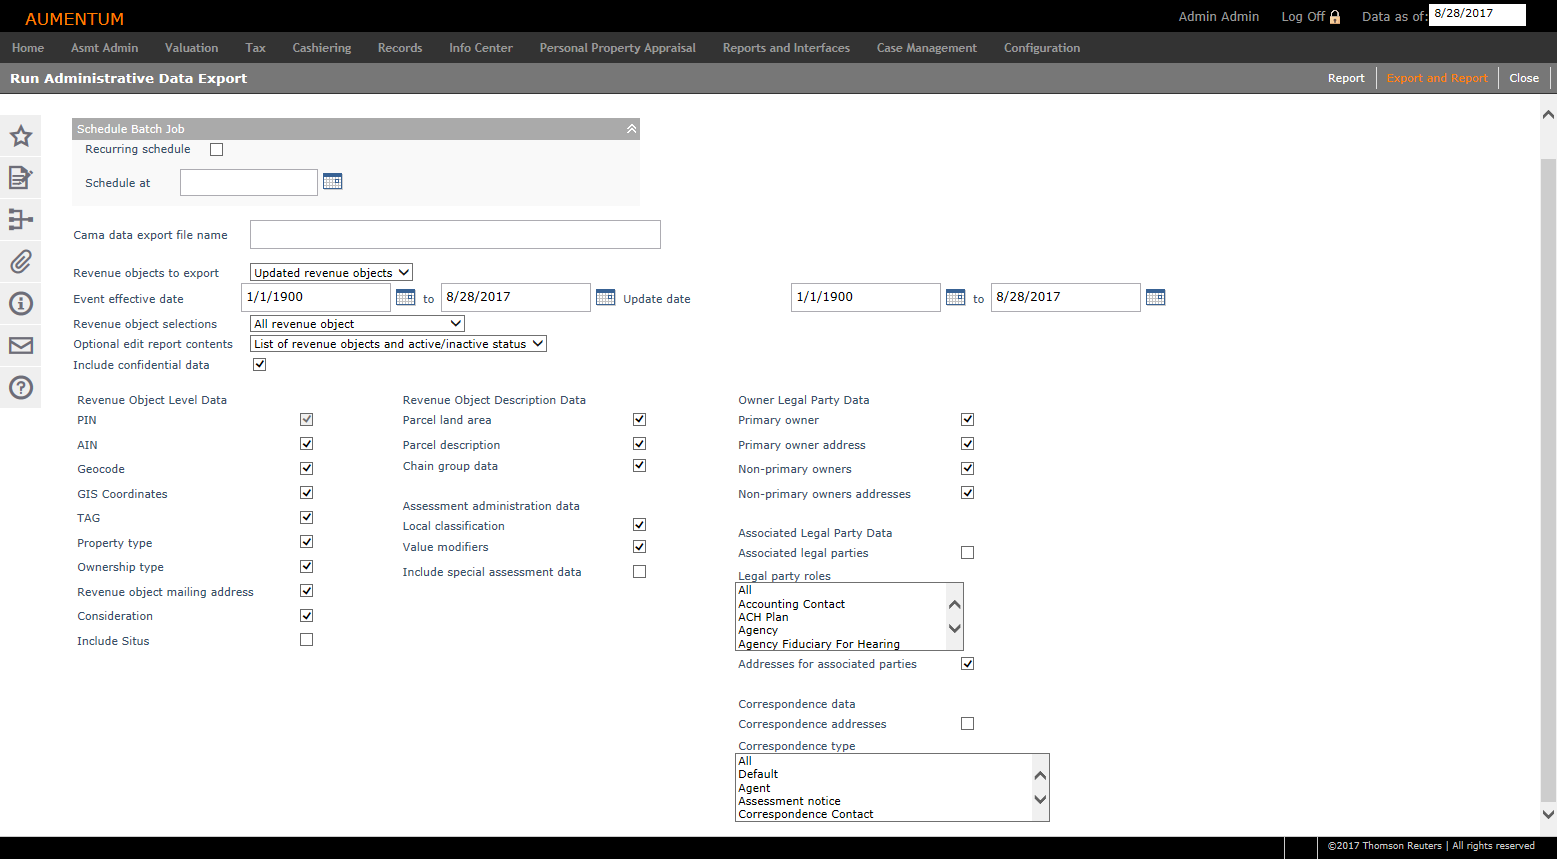
Steps
-
On the Run Administrative Data Export screen, enter or select a date in the Schedule Batch Job panel. If left blank, the default is now (today's date and the current time).
OR
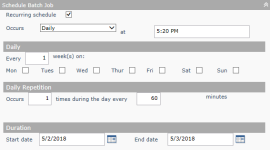
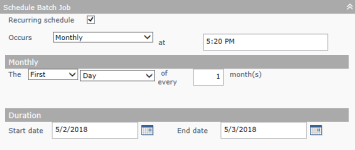
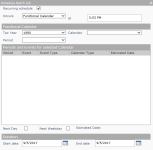
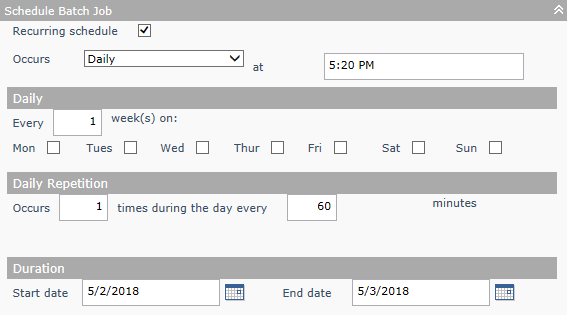
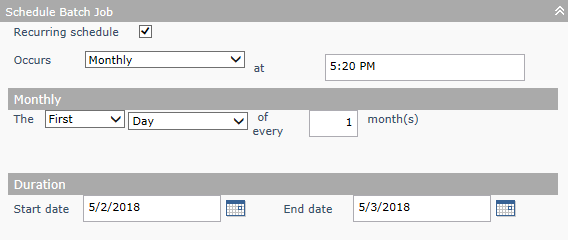
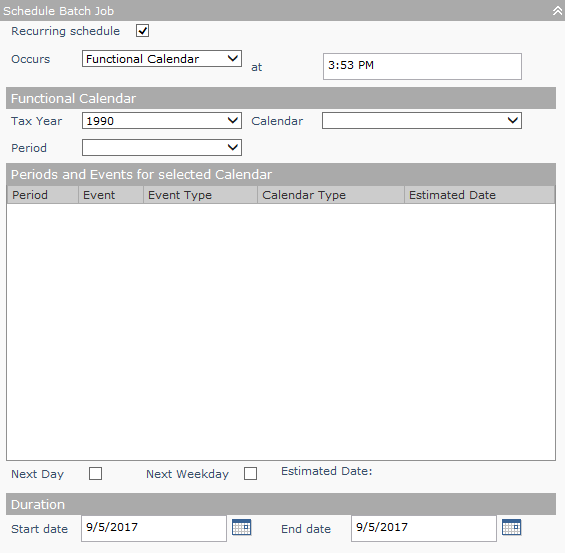
Select the Recurring schedule checkbox and make a selection from the Occurs drop-down list to define a recurring schedule.
Daily
Monthly
Functional Calendar
-
Enter or verify the Cama data export file name. The path and file name values for the previous export are automatically displayed.
NOTE: This is the path\name of the export .xml file (you must include the .xml file extension in the file name). The file name you enter is used for all three output files, but each will have a separate extension (.xml, .xsd, and .txt). The path can be a folder on a server or on your local PC. If the folder resides on your local PC, make sure it is shared and includes update permissions for everyone. See your system administrator if you are receiving invalid path exceptions from your export run.
-
Make a selection from the Revenue objects to export drop-down list and the date ranges to include in the output.
-
Updated revenue objects – Select this option to export revenue objects that have changes effective during the Event effective date range and were entered during the Update date range. For example, to export changes made during January 2019 that are effective for tax year 2018:
-
Set Event effective date from 01/01/2018 to 12/31/2018
-
Set Update date range from 01/01/2019 to 01/31/2019
-
All revenue objects – Select this option to export all revenue objects that have changes effective on or before the date you specify in the Event effective date range.
-
-
Make a selection from the Revenue object selections drop-down list to apply a second filter to the revenue objects that are exported. This lets you apply a predefined criteria group filter or search for and select specific revenue objects.
-
All revenue objects.
-
Filtered - A list of criteria groups that were previously defined for Record exports is displayed. Choose a criteria group from the list. See Criteria Groups for more information.
-
Search and select revenue objects – Click Search to open the Records Search for Revenue Object screen to search for one or more revenue objects to include in the export.
-
-
Make a selection from the Optional edit report contents drop-down list.
-
List of revenue objects and active/inactive status – Lists all PINs and specifies the active or inactive status next to the PIN.
- List of revenue objects – Lists all PINs without active/inactive status.
-
-
Select the Include confidential data checkbox to include confidential legal party/owner information in the output file.
- Confidential data is not included in the output when this checkbox is not selected.
- The checkbox is disabled and not selected if the user requesting the export does not have security rights to confidential legal parties.
- If the user does have rights, the checkbox is enabled and automatically selected.
- When confidential parties are exported, the actual names are used.
- If the actual name is not available, the display name is followed by the text Confidential; no actual name available is exported.
-
To designate the data to include in the output, select the checkbox for one or more of these items.
-
PIN
-
AIN
-
Geocode
-
GIS Coordinate
-
TAG
-
Property type
-
Ownership type
-
Revenue object mailing address
-
Consideration – not implemented.
-
Include Situs
-
Parcel land area
-
Parcel description – When selected, the description type (metes and bounds, detail, platted, RSS unplatted) is included in the output.
-
Chain group data – not implemented.
-
Local classification – not implemented.
-
Value modifiers – When selected, the AA site and exemption information, if available, is exported for the PINs, and the appraisal class code is included in the output in two fields: site appraisal code (i.e., 100) and site appraisal code descr (i.e., 100 Res 1 Unit).
-
Include special assessment data – When selected, special assessment value groups are included in the export. When not selected, the values are excluded.
-
Primary owner
-
Primary owner address
-
Non-primary owners
-
Non-primary owner address
-
Select the Associated legal parties checkbox to include associated legal parties in the export.
-
Select one or more Legal party roles to include in the export. Hold the Ctrl key on your keyboard and use your mouse to select more than one item in the list.
-
Select the Addresses for associated parties checkbox to include mailing addresses for the associated legal parties.
-
Select the Correspondence addresses checkbox to include correspondence mailing addresses in the export.
-
Select one or more Correspondence types to include in the export for interested parties. Hold the Ctrl key on your keyboard and use your mouse to select more than one item in the list.
NOTE: Owner addresses are exported when the Primary Owner Address and/or Non-Primary Owner Address checkbox is selected in the Owner Legal Party Data options.
-
Click Export and Report in the Command Item bar. The export process runs according to the data and time selected in the schedule date. All three output files (.xml, .xsd, and .txt) are generated, and your export options will redisplay on the Administrative Data Export screen the next time you enter this task.
-
Click Close to end the task without processing.
Revenue Object Level Data:
Revenue Object Description Data:
Assessment Administration Data:
Owner Legal Party Data:
Associated Legal Party Data:
Correspondence data:
OR
Click Report to initiate the report-only process. The Edit Report (.txt) file is the only output using this option. It runs according to the date and time selected in the schedule date.
NOTE: To open and view a report of the export, you will need to specify the UNC Path to base folder for Aumentum File Uploads file path.
- Click Configuration > Application Settings.
- On the Maintain Application Settings screen, select Effective Date from the Setting type drop-down list, and select Framework from the Filter by module drop-down list.
- Locate UNC Path to base folder for Aumentum File Uploads and click Edit.
- Enter the file path (for example: \\your_server\your_folder_name) and click Apply.
- Click Save in the Command item bar.
Events Exported
The following events are exported.
|
Event ID |
Event Name |
Description |
|---|---|---|
|
430025 |
Transfer |
Change of Ownership/Transfer |
|
430026 |
SplitRetired |
Parcel Split/Partition Retired Parent |
|
430027 |
SplitSurvive |
Parcel Split/Partition Surviving Parent |
|
430028 |
SplitChild |
Parcel Split/Partition Child |
|
430029 |
PlatRetired |
Retired Plat Parent |
|
430030 |
PlatSurvive |
Surviving Plat Parent |
|
430031 |
PlatChild |
Plat Child |
|
430032 |
MergeRetired |
Retired Merge Parent |
|
430033 |
MergeSurvive |
Surviving Merge Parent |
|
430034 |
MergeChild |
Merge Child |
|
430037 |
UndoTransfer |
Corrections - Undo Transfer |
|
430038 |
Retire/Survive |
Corrections - Retire/Survive |
|
430039 |
ChangePrimary |
Corrections - Change Primary Owner |
|
430041 |
StatusChange |
Corrections – Rev Object Status Change |
|
430043 |
WOutSubdivision |
Redescribe without Subdivision |
|
430044 |
AdminCorrection |
Redescribe by Administrative Correction |
|
430046 |
LPAssociation |
Legal Party Associations |
|
430047 |
NewParcel |
Create New Parcel |
|
430049 |
ChangeTAG |
Change TAG |
|
430050 |
NewFiling |
Create New Filing |
|
430053 |
LPMailingAddress |
Legal Party Mailing Address |
|
430076 |
NewNonAdValorem |
Create New NonAdValorem |
|
430083 |
PINChange |
Revenue Object PIN Change |
Events Not Exported
The following events are not exported.
|
Event ID |
Event Name |
Description |
|---|---|---|
|
430040 |
CorOfficialDoc |
Corrections - Official Document |
|
430042 |
TransferDetail |
Transfer Detail |
|
430045 |
Recordation |
Recordation |
|
430048 |
RelatedRO |
Related Revenue Objects |
|
430051 |
Subdivision |
Build/Maintain Subdivision |
|
430052 |
ROMailingAddress |
Revenue Object Mailing Address |
|
430055 |
CountyTable |
County Table Maintenance |
|
430056 |
GeoDates |
Geo-Entity Dates |
|
430057 |
GeoAddRO |
Geo-Entity - Add Revenue Objects |
|
430058 |
GeoRemoveRO |
Geo-Entity - Remove Revenue Objects |
Report Sample
Export.txt
Tips
See Batch Processes for more information about running and monitoring batch processes.