Receiving Agency
Navigate:  Case Management > Queue Management > Receiving Agency
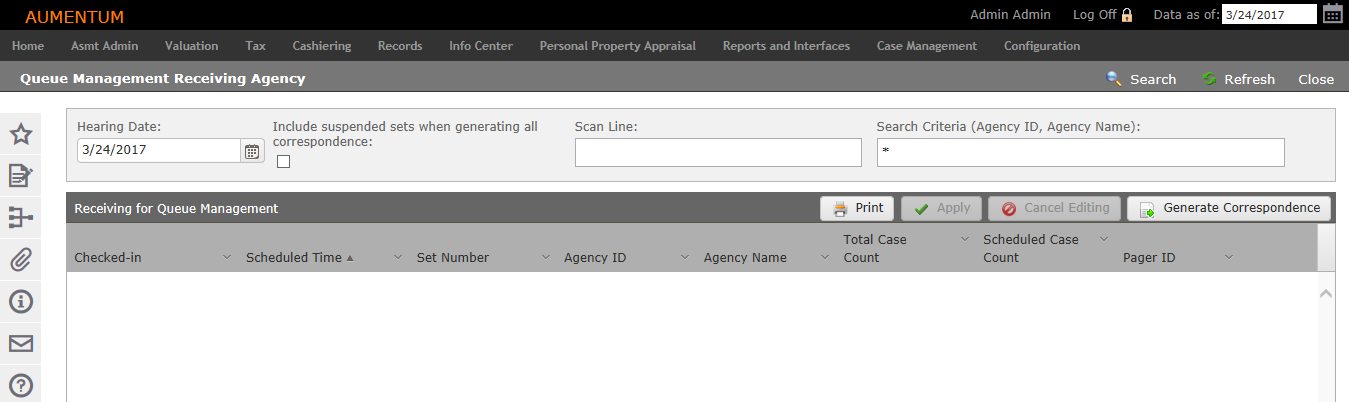
Description
The Queue Management Receiving Agency screen is used to check in cases by associated property agencies as each arrive for their scheduled meeting/hearing. You have the option to receive (check in) an entire set of cases, or you can receive cases individually.
NOTE: Role security can be applied to specific fields for this task via Configuration > Security and User Maintenance > Roles. Select a row and edit as necessary.
Search by Hearing Date
- On the Queue Management Receiving Agency screen, enter or select the Hearing Date to return results in the Receiving for Queue Management panel.
- Optionally, filter the hearings by defining search criteria and click Search.
Using a Scanner
- If using a scanner, place the cursor in the Scan Line field.
- Scan the barcode found on the property owner/agents/participant hearing notice to return the results in the Receiving for Queue Management panel.
NOTE: A scanner must be configured to your workstation to complete this task. However, you can manually enter the barcode in the Scan Line if you do not have scanning capabilities.
Print Reports and Correspondence
- Select one or multiple records from the Receiving for Queue Management panel.
- Click Print in the panel header to generate a Receiving for Queue Management Agency report in a new window, which summarizes the selected cases, such as scheduled time, appellant, etc.
- Click Generate Correspondence to show all the details of the case as well as areas in the correspondence for both the appellant and the jurisdiction to complete. If the hearing has already occurred, the correspondence shows the case decision.
Expand and Collapse Results
- Select one or multiple records and click Expand from the Receiving for Queue Management panel header or click the Expand > button from the second left column to show details about the case.
- Click Collapse to collapse the details.
Check-in a Case
- Select the record and click Edit in the panel header to activate fields for editing. This is also the process for receiving (checking in) an Owner.
- Select one or more records and select the Checked-in checkbox to receive the case into the Aumentum Platform.
- Click Apply. The cases update to display a checked-in status.
- Click Cancel to cancel the changes.
- Click Save.
Common Actions
Tips
Configuration settings for the Queue Management task are set up via Case Management > Configuration > General.
- Locate the Receiving Settings.
- Set the Late Hearing Check-in Allowance. The number entered represents the number of minutes beyond the scheduled hearing time that an owner can be checked in.
- Select the Late Hearing Check-in Standby. The number entered represents the number of minutes beyond a scheduled hearing time that a standby can be added. For example, if an owner is 35 minutes late for his or her hearing, and your Late Hearing Check-in Standby setting is set to 30, a standby hearing can be added to fill the time of the no show hearing.