Receiving
Navigate:  Case Management
> Queue Management > Receiving
Case Management
> Queue Management > Receiving
Description
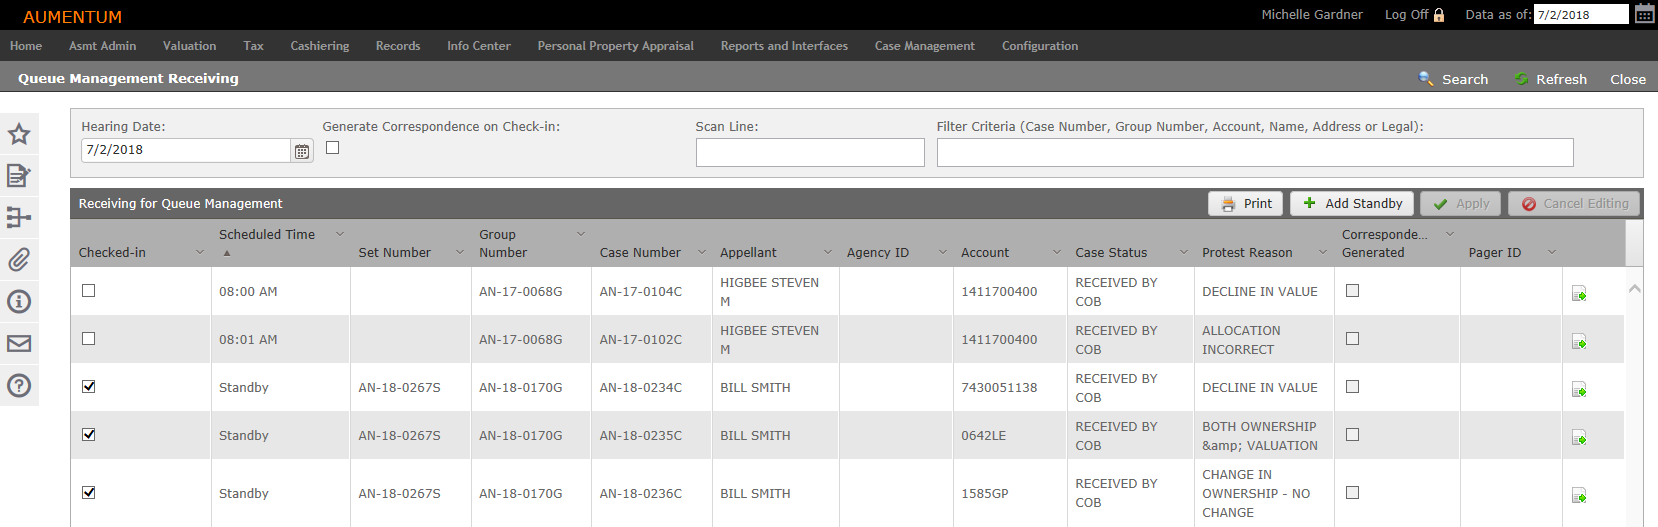
The Queue Management Receiving task allows you to check in property owners/agents/participants as each arrive for their scheduled meeting/hearing. You have the option to receive (check in) an entire set of cases, or you can receive cases individually.
NOTE: Role security can be applied to specific fields for this task via Configuration > Security and User Maintenance > Roles. Select a row and edit as necessary.
Setup
The following configuration settings should be set up prior to using the Queue Management Receiving task. Click Case Management > Configuration > General. Locate the Queue Management - Receiving Settings panel.
-
Correspondence Report Setup – Make a selection from the drop-down list.
- Late Hearing Check-in Allowance – Indicates the minutes allowed for a late check-in, after the scheduled time (default is 15 minutes).
-
Late Hearing Check-in Standby – Indicates the number of minutes beyond the scheduled hearing time that a case is moved to standby (default is 30 minutes).
-
Generate Correspondence on Check-in – When selected, correspondence are automatically generated for cases upon check-in via the Queue Management Receiving task.
-
Exclude Continuous Hearings – When selected, continuously scheduled hearings are excluded from Queue Management Receiving results and from the Batch Status Update process.
Steps
-
On the Queue Management Receiving screen, search for cases to check in using search criteria at the top of the page. Options include:
-
Hearing Date – Enter the date for which you want to view and check in cases (defaults to today's date). NOTE: If you select a date that is prior to today's date, the information displayed is read-only.
-
Scan Line – Optionally place the cursor in the Scan Line field and scan the barcode found on the property owner/agents/participants' hearing notice, if applicable, for quick check in. A scanner must be configured to your workstation to complete this task. You can manually enter the barcode in the Scan Line if you do not have scanning capabilities, however.
-
Filter criteria – Select how to search and enter the information for your selection in the text box.
- In the Receiving for Queue Management panel, filter the grid by selecting a checked-in status and/or the scheduled time. Also:
- Click the column header to sort in ascending or descending order by that column.
- Click the arrow to the right of the column name to select columns to show and hide in the grid.
- Click Configuration > Application Settings.
- On the Maintain Application Settings screen, select Effective Date from the Setting type drop-down list, and select Case Management from the Filter by module drop-down list.
- Locate Personal Property: Use AIN? and Real Property: Use AIN? and click Edit.
- Select the checkbox in the Setting Value column to set it to True and click Apply.
- Click Save.
-
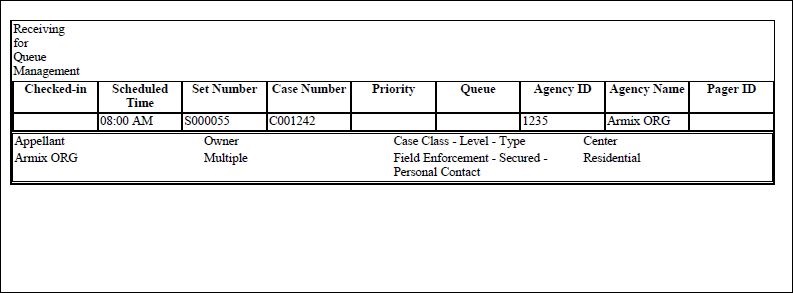
Click Print to view and print a receiving summary report for any selected case in the list.
NOTE: The Account column displays the PIN or AIN, depending on your application settings.
Click here to learn how to use PIN or AIN label.
Add Standby
-
Click Add Standby to open the Standby Eligibility pop-up.
NOTE: A single case from a Group cannot be checked in individually. If all cases in the Group can be checked in, enter the Set Number for the Group.
-
Make a selection from the Look up by drop-down list and enter a number in the available field.
-
Click Validate. A confirmation message appears. Click Next to proceed with the standby process.
-
Complete the Receipt of Required Hearing Information and the information receipt waiver (this must be check-marked to accept the standby).
-
Click Accept Standby.
-
Click Cancel to exit the Standby Eligibility pop-up.
-
Click OK.
-
Select one or more sets/cases in the grid and click Edit. The Agency ID and Pager ID fields are active for editing. This is also the process used for receiving (checking in) an Owner.
NOTE: The Generate Correspondence Upon Check-In checkbox is only enabled once a case has been received.
- Select the checkbox for one or more cases in the grid (in the Check-in column) for receiving.
-
Click Apply. The case(s) update to display a checked in status.
-
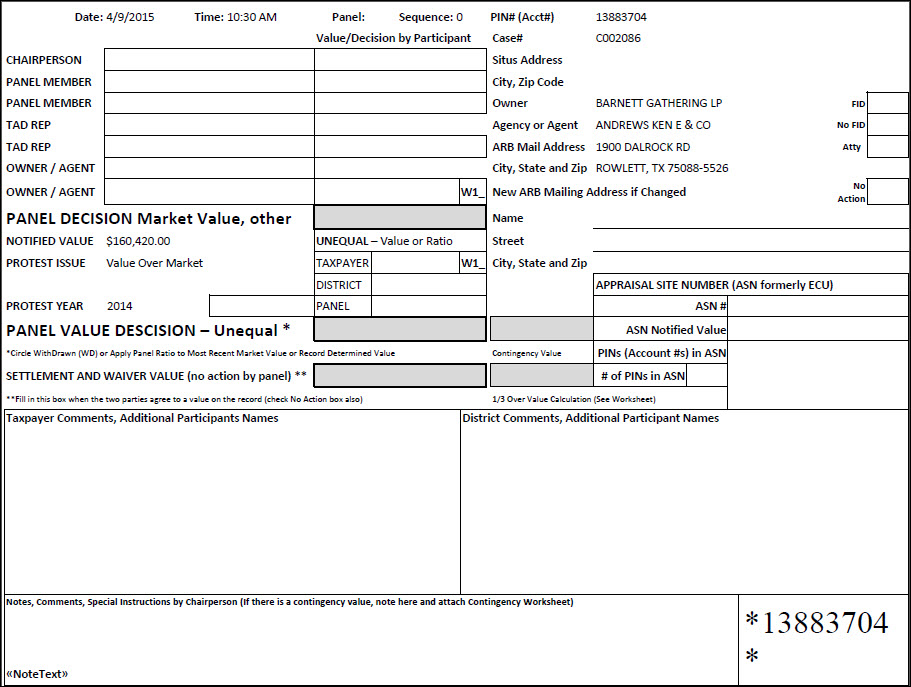
Click Generate Correspondence at the end of the row to view and print a receiving summary report for any selected case in the list. When a correspondence is created for a case, it also becomes an attachment to the case which can be accessed later from Case Detail.
-
Click Save.
-
Click Close to end the task.
OR
Click Reject Standby.
Report Samples
Receiving for Queue Report Management Report
Correspondence Sample
Common Actions
Tips
Cases can be received independently, if not part of a multiple case group from an established set. When this occurs, the independent case receives a unique set identifier to leave the original remaining set and associated cases intact without impacting remaining scheduling/hearing processes.