Land Model Maintenance
Navigate:  Valuation > Valuation Management > Land Model Maintenance
Description
Land Model Maintenance is used to create and maintain land models.
NOTE: Only users with proper permissions can modify information on this screen.
Adding a Land Model
-
On the Land Model Summary screen, click Add New in the panel's title bar, or click the Pencil icon for an item in the grid.
-
On the Land Model Maintenance screen, there are two tabs:
-
Model Information – Define a new model's basic characteristics and add notes, or edit an existing model's characteristics.
-
Model Details – Add or edit model details (e.g., Land Type, Land Calculation Method, Model Type, etc.).
-
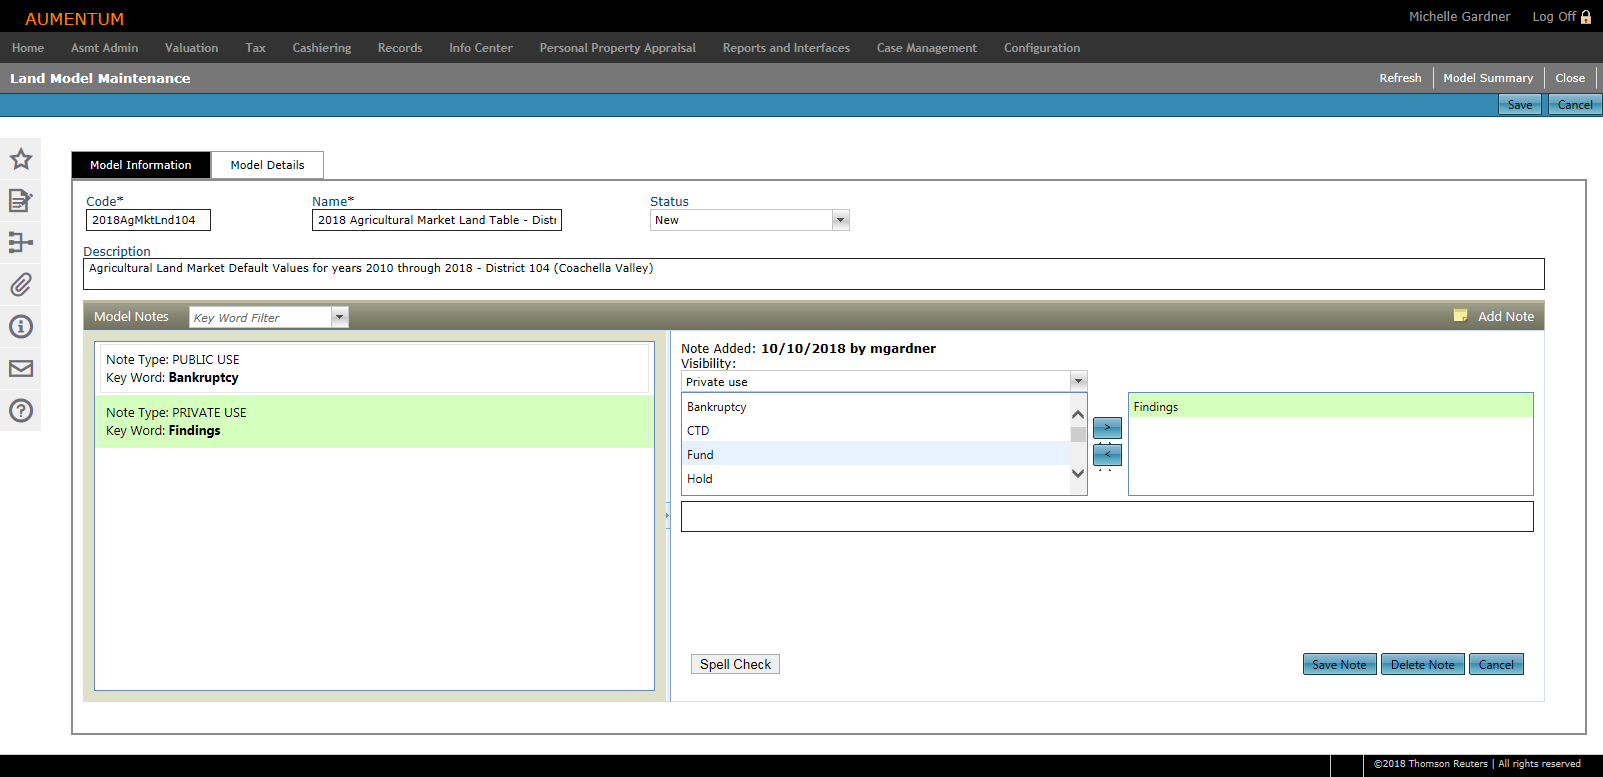
Model Information
-
Enter or edit the model's basic information.
-
Code – Enter a code representing the model (space are not allowed).
-
Name – Enter the name of the model.
-
Status – Select the status of the model. The Status of the model indicates whether or not the model is available for use throughout the system.
-
Description – Enter a description of the model.
-
-
Optionally, click Add Note in the Model Notes panel. Notes are displayed on the left side of the panel
-
Make a selection from the Visibility drop-down list.
-
Click to select a keyword for the note and click the right arrow. Repeat as needed.
-
In the field below, provide additional information, if necessary.
-
Click Save Note.
-
Or, click Cancel to discard the note.
-
-
To delete a note, highlight it in the left panel and click Delete Note.
-
Click Save at the top of the screen.
-
Or, click Cancel to discard your changes.
-
-
-
Click Refresh in the Command Item bar to update the screen.
-
Click Model Summary to return to the Land Model Summary screen. NOTE: You must first save your changes.
-
Click Close to end the task.
-
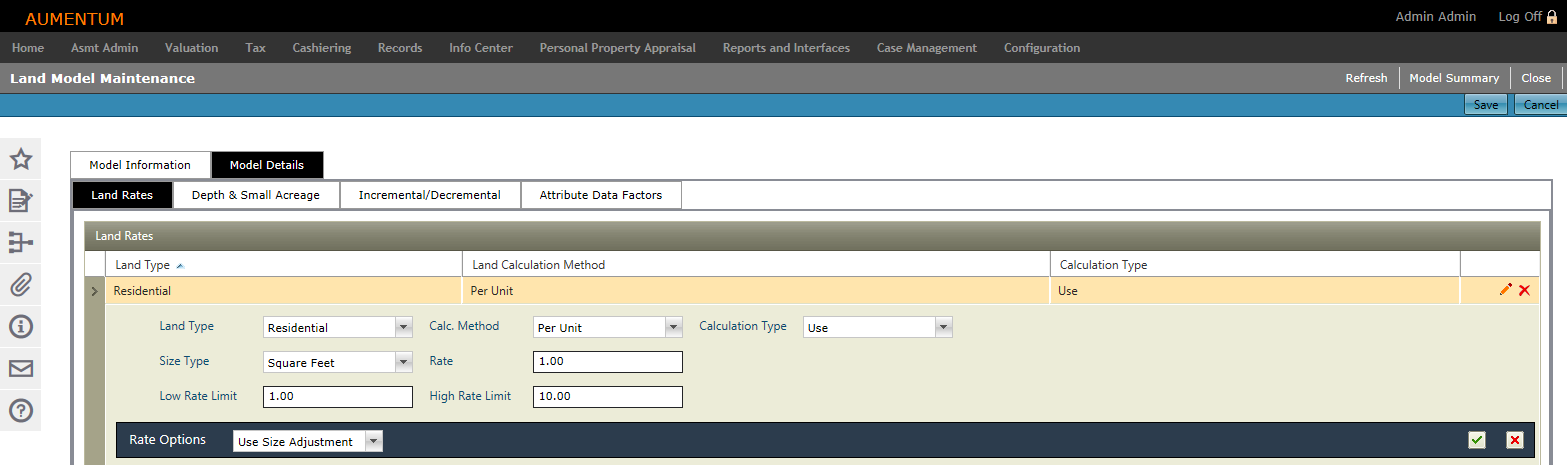
Model Details
The Model Details tab contains four sub-tabs.
In the Land Rules panel, click the Pencil icon to edit an item in the list.
Click the Add New icon. A new line is active for editing.
Land Type – Make a selection from the Land Type drop-down list. Available types are defined in Land Configuration.
Calc. Method – Make a selection from the Calc. Method drop-down list. Available methods are defined in External Rates Configuration. Additional fields are displayed, depending on your selection.
If you select a method that uses Size Rate tables, make a selection from the Method Options drop-down list to determine the calculation method of the sizes.
If you select a method that does not use Size Rate tables, make a selection from the Rate Option drop-down list.
If you select Per Unit by Another Unit, make a selection from the Lookup Options drop-down list.
Calculation Type – Make a selection from the Calculation Type drop-down list.
Click the green check mark to add the rate.
Click the red X to discard your changes.
Click Save at the top of the screen.
In the Global Depth Table panel, click Add New.
In the pop-up, enter the depth and make a selection from the Unit Type drop-down list.
Enter a description.
Enter the Depth and Depth Adjustment information as needed.
Click OK to save your changes and close the pop-up. Or click Cancel to discard your changes and close the pop-up.
Click Save at the top of the screen.
In the Model Depth Factor panel, click Add New. A new line is active in order to add factors to the item selected in the Global Depth Table panel.
Enter the necessary information in the Standard and Factor fields.
Click the green check mark to save your changes. Or, click the red X to discard your changes.
Click Save at the top of the screen.
In the Global Depth Table panel, click the Pencil icon for an item in the grid. The line is active for editing.
Make the necessary changes and click the green check mark to save your changes. Or, click the red X to discard your changes.
In the Model Depth Factor panel, click the Pencil icon for an item in the grid. The line is active for editing.
Make the necessary changes and click the green check mark to save your changes. Or, click the red X to discard your changes.
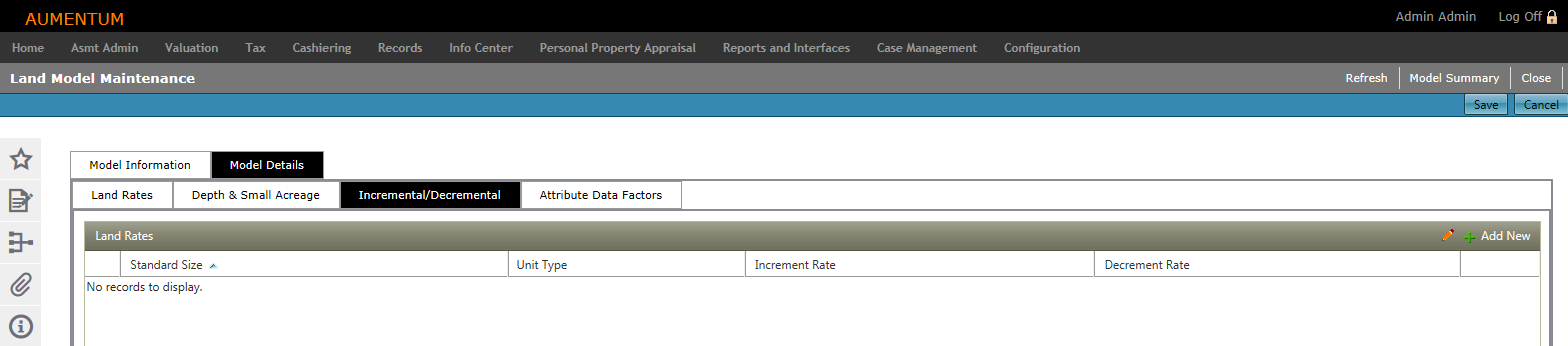
In the Land Rates panel, click Add New. A new line is active for editing.
Define the rate.
Standard Size – Define the standard size.
Unit Type – Select an associated Unit Type.
Increment Rate – The rate applied to each square foot/acre greater than the standard size.
Decrement Rate – The rate applied to each square foot/acre less than the standard size.
Click the green check mark to save your changes. Or, click the red X to discard your changes.
Click Save at the top of the screen.
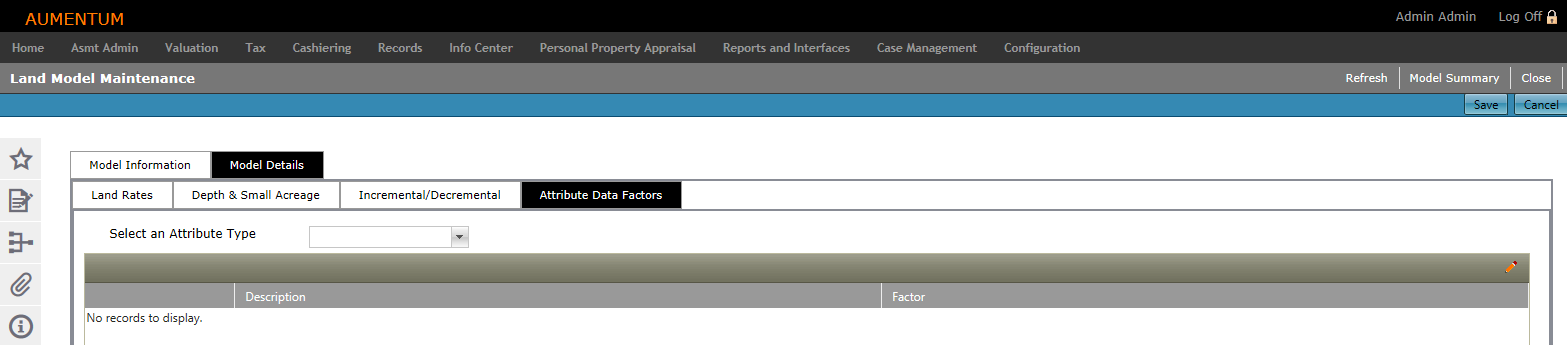
Make a selection from the Select an Attribute Type drop-down list. Data populates in the grid based on your selection.
Click the Pencil icon in the panel's title bar to activate the Factor column for editing.
Click the green check mark to save your changes. Or, click the red X to discard your changes.
Click Save at the top of the screen.
Land RatesEstablish rates for valuing land. Click the chevron next to a rate in the list to expand its details.
OR
Click the Delete icon to delete a rate in the list.
Depth & Small AcreageUse the Depth and Small Acreage tab to create the Global Depth Table used in land pricing. Define the factors to apply when a land line's effective depth differs from the standard which has been applied to its related neighborhood. When the effective depth for a land line differs from that of the neighborhoods, Aumentum uses the Global Depth Table to apply a factor to that land line.
The Model Depth Factor grid is available for use when the Use Size Adjustment option is selected as an available method when creating a land mode.
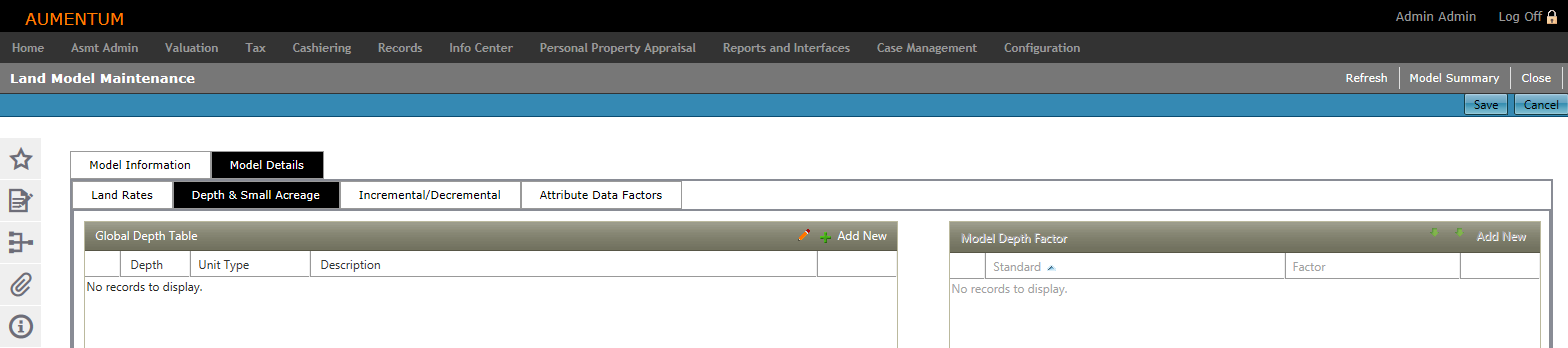
Adding Depth and Small Acreage
NOTE: If you click OK without entering any values, an empty depth table is created without any adjustment factors associated with it. To add Depth Adjustment Factors to an empty depth table, click to select a table in the Global Depth Table panel and add the factors in the Model Depth Factor panel.
Editing Depth and Small Acreage
OR
Click the Pencil icon in the panel's title bar to activate all line for editing.
OR
Click the Pencil icon in the panel's title bar to activate all line for editing.
Incremental/DecrementalThis tab is used in conjunction with the Use Incremental/Decremental Rate selection from the Rate Options drop-down list in the Land Rates tab.
OR
Click the Pencil icon for an item in the grid. The line is active for editing.
NOTE: Click the Pencil icon in the panel's title bar to activate all items for editing.
Attribute Data FactorsUse this tab to define factors that regulate the associated Land Rates based on deviations between the base and subject land.
-
Click Refresh in the Command Item bar to clear all selections and refresh the page.
-
Click Model Summary to return to the Land Model Summary screen.
-
Click Close to end the task.
-
Copying a Land Model
-
On the Land Model Summary screen, click the Copy icon for an item in the grid.
-
Select the Include Notes checkbox if you want to also copy the notes from the original land model.
-
In the pop-up, enter a code and name.
-
Optionally, make a selection from the Status drop-down list.
-
Enter a description for the copied land model, if desired.
-
Click OK and the bottom of the pop-up.
-
Click Cancel to discard your changes and close the pop-up.
-
Delete a Land Model
To delete an item in the Land Model Summary panel, click the red X for an item in the grid.
Next Steps
Once all Land Model configuration is complete, the Land Model must be set up in Model Control, which then needs to be added to a Neighborhood that is used in valuing land lines.