Document Received API Test Page
Navigate:  Configuration > Doc Received Test
Description
This engineering task simulates the creation of documents from Documentum to generate workflow items to provide a method to test the workflow process and to test eGov Services.
Steps
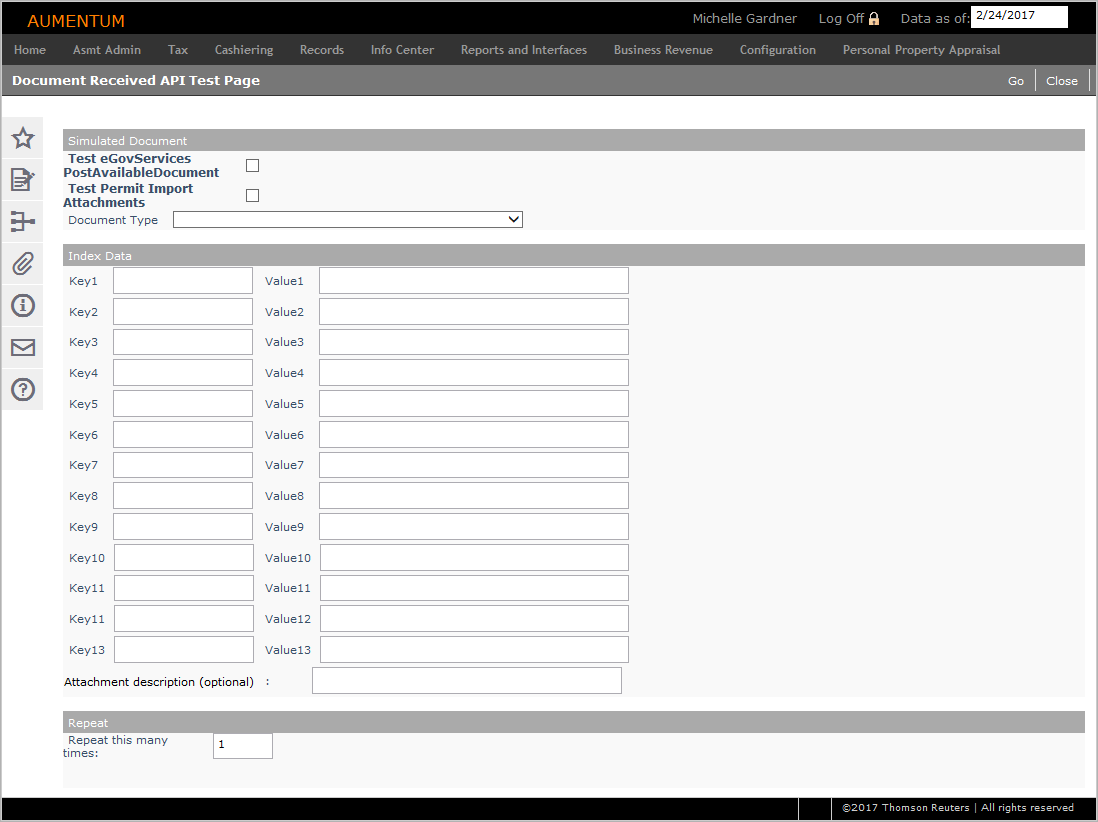
-
On the Document Received API Test Page screen, make a selection from the Document Type drop-down list.
To test eGov Services, select the Test eGovServices PostAvailableDocument checkbox. Two additional fields become available in the File Uploads section. Browse to select the applicable files.
-
In the Index Data panel, enter the applicable keys and values for the document received test. For example, enter ROPIN in the Key 1 field and enter the PIN in the Value 1 field.
NOTE: The only required field on this screen is Document Type. The other data elements can be entered on subsequent transfer processing screens.
-
In the Repeat section, enter a number in the Repeat this many times field.
-
Click Go to execute the test. Once executed, a message displays at the top of the screen indicating a document was created.
- Click the Workflow icon in the sidebar.
- On the View My Worklist screen, enter your search criteria and click Search.
- In the Results panel, select the workflow you just created.
-
On the Parcel Verification screen, the Document type, Document sub-type, Source office, Subtask, Transaction type, and Ownership type drop-down lists are all systypes.
The Document number, Document date, and Recorded date fields, plus the PINs from Document and Grantee panels contain information defined in the transfer setup.
- In the Revenue Object(s) panel, you can click Add from Revenue Object List to add PINs using a list, or click Add from Search to add a single PIN to the transfer.
- Click Remove for a PIN to remove it from the transfer.
- In the Revenue Object Details for panel, modifiers applied to a PIN can be marked to expire when the transfer is complete.
- In the Grantees panel, click Edit for an owner name to open the Maintain Legal Party screen. Make changes as needed and click Save to return to the Parcel Verification screen.
- Optionally, click Add from Search to open the Search screen to locate and select an existing legal party. Click Return to go back to the Parcel Verification screen and add to the selected legal party to the transfer.
- Or, click Add New to open the Maintain Legal Party screen and add another legal party. Click Save to return to the Parcel Verification screen.
-
Click Next.
- On the Beneficial Interests screen, click Add in the Grantees panel to add another owner name. Or, click Remove, if needed, to remove an owner from this transfer.
-
In the New Ownership panel, you can add or remove legal parties as needed, edit mailing addresses, and identify how interest and percentage are gained.
- Click Next.
- The Transfer Verification screen is read only. To make changes, click Previous to return to the Beneficial Interests screen. Click Finish to move to the next screen.
- On the Maintain Transfer Detail screen, make the necessary selections from the drop-down lists.
-
Click Finish to complete the transfer.
-
Click Close in the Command Item bar to end the task.