Split/Merge
Navigate:  Sidebar > Workflow
Description
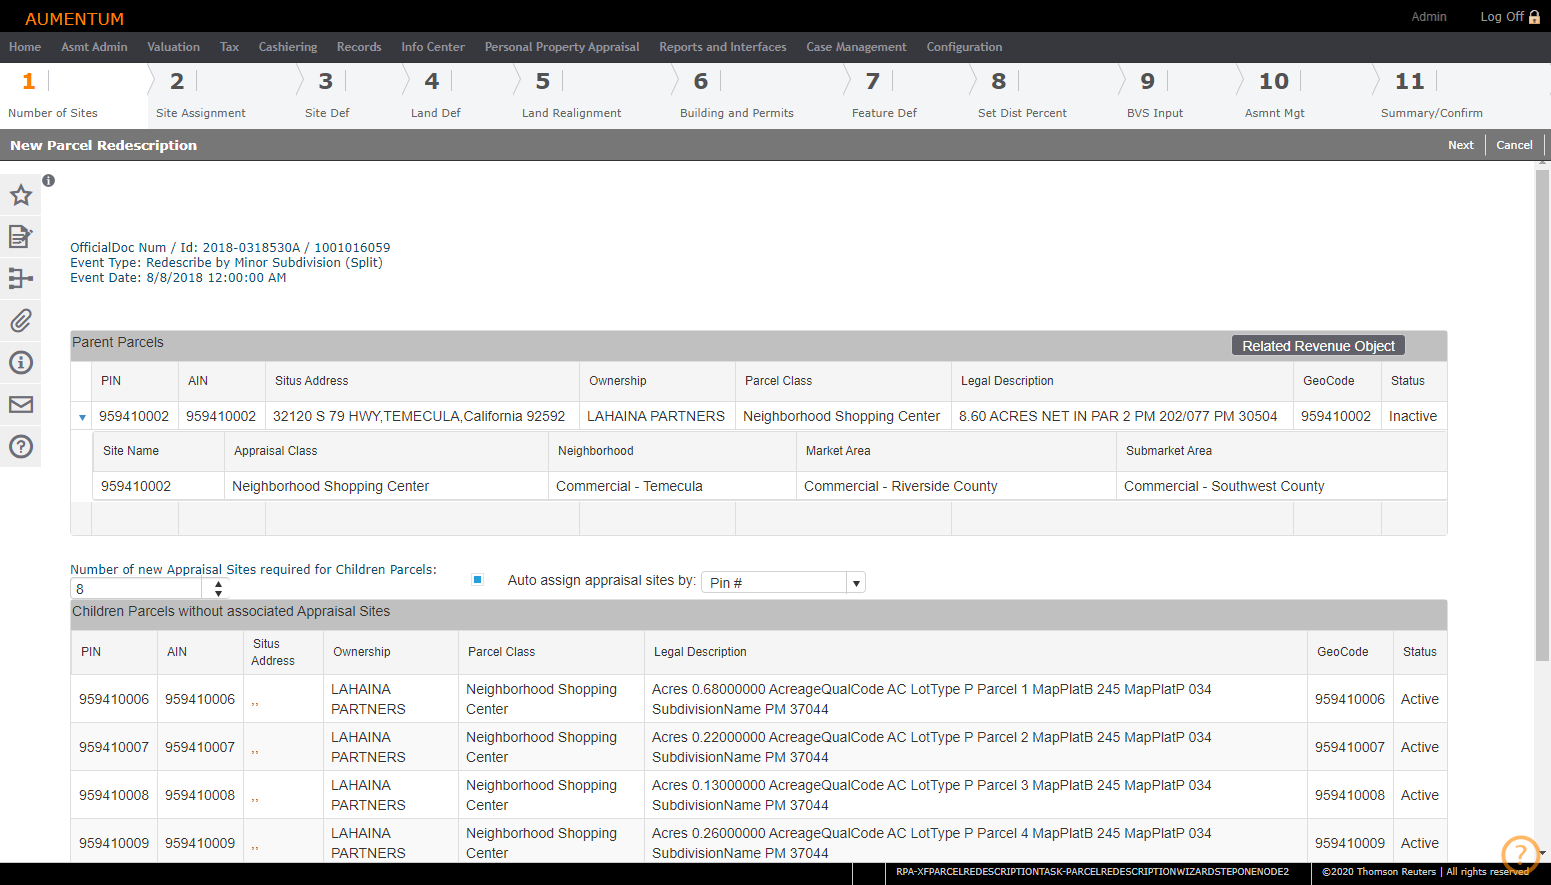
The New Parcel Redescription screen displays the Parent Parcels panel and the Children Parcels panel.
Steps
- On the View My Worklist screen, enter your search criteria and click Search.
- In the Results panel, click the hyperlink for the split workflow you want to work with.
- On the New Parcel Redescription screen, there are several steps. Click Next in the Command Item bar to advance through the steps, or click Previous to go back to the previous screen.
- Number of Sites: Specify the Number of New Appraisal Sites Required for Children Parcels under the Parent Parcels panel. By default, the number of new appraisal sites to create is the number of new children parcels created in the Records module.
- Optionally, select the checkbox for Auto assign appraisal sites and make a selection from the drop-down list.
- Site Assignment: In the Appraisal Site Assignment panel, make a selection from the drop-down list in the Site Name column to associate a child PIN to an appraisal site. Click Next.
- Site Def: In the Appraisal Site Definition panel, one of the parent appraisal sites is cloned by default (first retired if any exist, then first surviving) to create a child appraisal site. Click Next.
- Land Def: In the Land Definition panel, distribute the parent appraisal site’s land line to the children appraisal sites. See Dependencies, Prerequisites, and Setup at the end of this topic for application setting information.
-
Optionally, you can select Undistributed or Public Taking. Selections in the drop-down list depend on systypes and whether you have attributed Undistributed or Public Taking land. See Dependencies, Prerequisites, and Setup at the end of this topic for more information.
-
When Factored Base Year Values (FBYVs) exist in AA for land objects, they show all the land object FBYV values for the Parent for a split and for a merge. They are the same values found in the BVS Input step.
- Land Realignment: In the Land Realignment panel, select one or more items in the grid and click Combine Selected in the panel's title bar.
- Building and Permits: In the Move Buildings panel, distribute the building improvements from the parent to the children. Permits associated to the parent PIN and appraisal site also can be moved to the children.
- Feature Def: In the Features Definition panel, distribute the feature improvements from the parent to the children.
- Set Dist Percent: In the Set Distribution % panel, make a selection from the drop-down list in the title bar, which allows you to change the Valuation Code and Distribution %.
- BVS Input: On the Base Value Segment Input screen, review the Parent Parcel Summary.
- Asmnt Mgt: On the Assessment Management screen, make a selection from the Value Display drop-down list to review the summary.
- Summary/Confirm: In the Summary/Confirmation panel, click Finish to run an Override By Object conclusion, then make a selection from the Conclude Change Reason drop-down list.
NOTE: If this checkbox is not selected, you must manually associate the PINs to an appraisal site in the next step. Also, if the number of new PINs does not equal the number of new appraisal sites, then this checkbox is disabled and manual selection is required in the next step.
NOTE: If a new appraisal site does not have an associated parcel, then that new appraisal site is deleted from the collection when you click Next.
NOTE: The distributed values may be used as the Override By Object values when concluding.
NOTE: If the totals in the Parent Parcels and Children Parcels panels do not match on the New Parcel Description screen, a message is displayed at the top of this screen. After updating, you must recalculate the totals.
Tips
-
If a Parent object is retired and there is only 1 child, then the only option is Move.
-
If the Parent is retired and there are multiple children, then the option should have Divide and Move.
-
If the Parent survives and there is only 1 child, then the options should be Stay and Move.
-
If the Parent survives and there are multiple children, then the option should be Stay, Divide and Move.
Dependencies, Prerequisites, and Setup
Systypes
NOTE: If there are features attached to the building, they need not be made inactive when the building is lost to public taking.
To add the Public Taking systype for the Land Definition step:
- Click Configuration > Systypes.
- On the Select or Add a Systype screen, enter or select the effective date.
- From the Systype category drop-down list, start typing Appraisal Change Reason and select it.
- Click New in the Command Item bar.
- On the New Systype screen, type PublicTaking in the Short Description field.
- In the Description field, type Public Taking.
- In the Additional Information panel, click Add in the column header row.
- From the Description drop-down list, select Public Taking.
- Select the checkbox in the Value column.
- Click Save in the Command Item bar.
To allocate base value segments from parent to children by lot:
- Click Configuration > Application Settings.
- On the Maintain Application Settings screen, select Effective Date from the Setting type drop-down list, and select Real Property Valuation from the Filter by module drop-down list.
- Locate Use undistributed value in Redescription Wizard and click Edit.
- In the Setting Value column, select the checkbox (set as True) or clear the checkbox (set as False) as needed.
- Click Accept, then click Save in the Command Item bar.
To hide or display Factor Base Year Values (FBYVs) in the Land and Feature definition steps of the Split/Merge wizard:
- Click Configuration > Application Settings.
- On the Maintain Application Settings screen, select Effective Date from the Setting type drop-down list, and select Real Property Valuation from the Filter by module drop-down list.
- Locate Redescribe Wizard - CA: Show Static FBYVs and click Edit.
- In the Setting Value column, select the checkbox (set as True) or clear the checkbox (set as False) as needed. This setting applies to both Land (Step 4) and Feature (Step 7).
- When set to True, the FBYV column is displayed in Steps 4 and 7 of the Split/Merge wizard.
- When set to False, the FBYV columns are not displayed in Steps 4 and 7 of the Split/Merge wizard.
- Click Accept, then click Save in the Command Item bar.