Property Characteristics
Navigate:  Valuation > Property Characteristics
Description
Use Property Characteristics to view and edit the main characteristics of a property, which may consist of one or many PINs. The information displayed is based on the Effective Date. Additionally, any information entered, including new buildings and any value calculations, will be effective as of the Effective Date.
-
The site's account information (PIN, Legal Party, Parcel Area, Related Revenue Objects, etc.)
-
The appraisal site
-
Workflow information
-
The value of the appraisal site
-
The permits associated with the appraisal site
-
Sales history of the appraisal site
Property Characteristics begins with the Real Property Search to search Aumentum data and get a detailed and specific list of search results to complete property characteristic maintenance.
Steps
-
On the Real Property Search screen, enter your search criteria and click Search.
-
See GeoAnalyst for more information about searching using the GIS tab.
-
-
In the Results panel, select one or more items in the grid and click Next.
-
On the RPA Main Page, there are several tabs.
-
At the top of the screen, click the link under Neighborhood to open the Neighborhood Maintenance screen. When finished, you return to this screen.
-
You can click arrows in the panels under Site Summary to expand the panel and see more information.
-
Click the arrow next to an item in the Distribution Matrix to expand the item.
-
In the Distribution Matrix panel, click to select an item, then click the Pencil icon header to change values or click Add New to add a new item.
-
The Distribution % is the percentage of the object's value that is distributed to the appraisal site's value. The total distribution percentage for an individual land detail line or improvement (e.g., buildings and features) must equal 100. The percentage of the last allocation record is always the difference between the total of all other distribution records on the improvement/land detail line and 100.
-
Click the green check mark to accept all changes and click OK when asked, "Update Changes?" Or, click the red X to cancel editing.
-
Click Save at the top of the page.
-
Click the Pencil icon at the top right side of the Site Data panel to edit the appraisal site's basic characteristics.
-
In the Site Assignment panel, click the Pencil icon to override the Appraiser, Supervisor and/or Division Chief assignments initially set up via Configuration > Security and User Maintenance > Users.
-
Click the Add New icon at the top right side of the Situs Address panel to access data fields for adding a new address.
-
Information in the Site Information sub-tab is optional:
-
Appraisal Site Flags – Add a new flag to the appraisal site or edit an existing flag in the list.
-
Characteristics – Edit characteristics in mass. The characteristics displayed are User Defined Fields that have been configured via the Appraisal Site Configuration task.
-
Area Data – Add new appraisal site area data or edit existing data in the grid.
-
Adjustments & Obsolesence – Add new adjustments or edit existing site-level adjustments in the grid, which displays only adjustments related to the appraisal site, including land, building and features.
-
-
The Notes sub-tab is read-only.
-
Click Save at the top of the RPA Main Page.
-
In Land panel, click Add New. Or, click Add from Template, which takes you to the Advanced Search screen to search by Template Header.
-
Click to expand the sub-head in the Land panel. From this sub-head, you can use the icons on the right to edit, add, move up, or delete Land Use records.
-
Click on a record to see its related Characteristics and Size Records and Adjustments sub-tabs (information is read-only).
-
Click Save at the top of the page.
-
In the Building Characteristics panel, click Add New.
-
Enter a Building Name.
-
Make a selection from the Improvement Type and Shape Type drop-down lists. Based on your selections, related information is displayed in the Size Records tab. Available Improvement Types are based on the Site Class.
-
Related Land Lines can be added. Available options are populated from data on the Land sub-tab.
-
Optionally, enter relevant information in the remaining tabs.
-
Click Next.
-
Make a selection from the Improvement Style drop-down list.
-
Enter the year built.
-
Make a selection from the Construction Class, Quality, and Condition drop-down lists.
-
The % Complete drop-down is an optional configuration which can be used to assign percent complete to construction phases. The user has the option of entering a value, or selecting from the list, if it has been configured.
-
Select the Exclude checkbox to exclude this information from the RPA Buildings tab, which displays this checkbox as a view-only field.
-
In the Section Detail panel, click Add New in the panel's title bar.
-
In the pop-up, select Floor & Use and click OK.
-
In the Section Detail panel, select or enter relevant information.
-
In the Size Records tab, enter appropriate sizes in the Use Sizes panel.
-
Optionally, enter the appropriate information in the remaining tabs.
-
Make a selection from the Change Reason drop-down list.
-
Click Finish.
-
-
Click Save at the top of the screen.
-
In the Building Sections panel, click Add New.
OR
Click the Pencil icon to edit an item in the grid.
NOTE: If you click the red X to delete an item in the grid, a Change Reason pop-up appears.
-
Follow instructions as described in Adding a Building Record, starting at step 6.
-
Click Finish to complete the new building/section information.
-
Click Back to return to the previous view.
-
Click Cancel to cancel the addition.
-
-
Click Save at the top of the screen.
-
In the Building Characteristics panel, click the Copy icon for the building you want to copy.
-
In the pop-up, enter a PIN and make a selection from the Appraisal Site drop-down list in the Copy From section.
-
Select the checkbox for the buildings you want to copy.
-
To include notes in the copied building, select the Include in Copy checkbox.
-
In the Copy To section, enter the PIN and # of Copies, and make a selection from the Appraisal Site drop-down list.
-
Make a selection in the On Exit Lookup section.
-
Make a selection from the Change Reason drop-down list.
-
Click OK.
-
Click Save at the top of the screen.
-
In the Building Characteristics panel, click the Move icon for the building you want to move.
-
In the pop-up, enter a PIN and make a selection from the Appraisal Site drop-down list in the Move From section.
-
Select the checkbox for the buildings you want to copy.
-
Make a selection from the Change Reason drop-down list (specific to Move From).
-
In the Move To section, enter the PIN and make a selection from the Appraisal Site drop-down list.
-
Make a selection in the On Exit Lookup section.
-
Make a selection from the Change Reason drop-down list (specific to Move To).
-
Click OK.
-
Click Save at the top of the screen.
-
In the Building Characteristics panel, click the red X for the building you want to delete.
-
In the pop-up, make a selection from the Change Reason drop-down list.
-
Click OK.
-
In the Feature Characteristics panel, click Add New in the panel's title bar.
OR
-
Enter a feature name.
-
Make a selection from the drop-down lists.
-
NOTE: In the Relationship Type drop-down list:
-
Select Attached To; attached features are copied and moved with the object they are attached to.
-
Select Related To; relationships are displayed as a value grouping on the Site Value tab. Related features are not copied or moved with the object they are related to.
-
-
In the Size & Unit Counts tab, enter appropriate sizes in the Size Records panel.
-
Optionally, enter the appropriate information in the remaining tabs.
-
Make a selection from the Change Reason drop-down list.
-
Click OK.
-
-
Click Save at the top of the scree.
-
In the Feature Characteristics panel, click the Copy icon for the feature you want to copy.
-
In the pop-up, enter a PIN and make a selection from the Appraisal Site drop-down list in the Copy From section.
-
Select the checkbox for the features you want to copy.
-
To include notes in the copied building, select the Include in Copy checkbox.
-
In the Copy To section, enter the PIN and # of Copies.
-
Make a selection from the Appraisal Site, Relate to Object Type, and Object Name drop-down lists.
-
Make a selection in the On Exit Lookup section.
-
Make a selection from the Change Reason drop-down list.
-
Click OK.
-
Click Save at the top of the screen.
-
In the Feature Characteristics panel, click the Move icon for the feature you want to move.
-
In the pop-up, enter a PIN and make a selection from the Appraisal Site drop-down list in the Move From section.
-
Select the checkbox for the features you want to copy.
-
Make a selection from the Change Reason drop-down list (specific to Move From).
-
In the Move To section, enter the PIN.
-
Make a selection from the Appraisal Site, Relate to Object Type, and Object Name drop-down lists.
-
Make a selection in the On Exit Lookup section.
-
Make a selection from the Change Reason drop-down list (specific to Move To).
-
Click OK.
-
Click Save at the top of the screen.
-
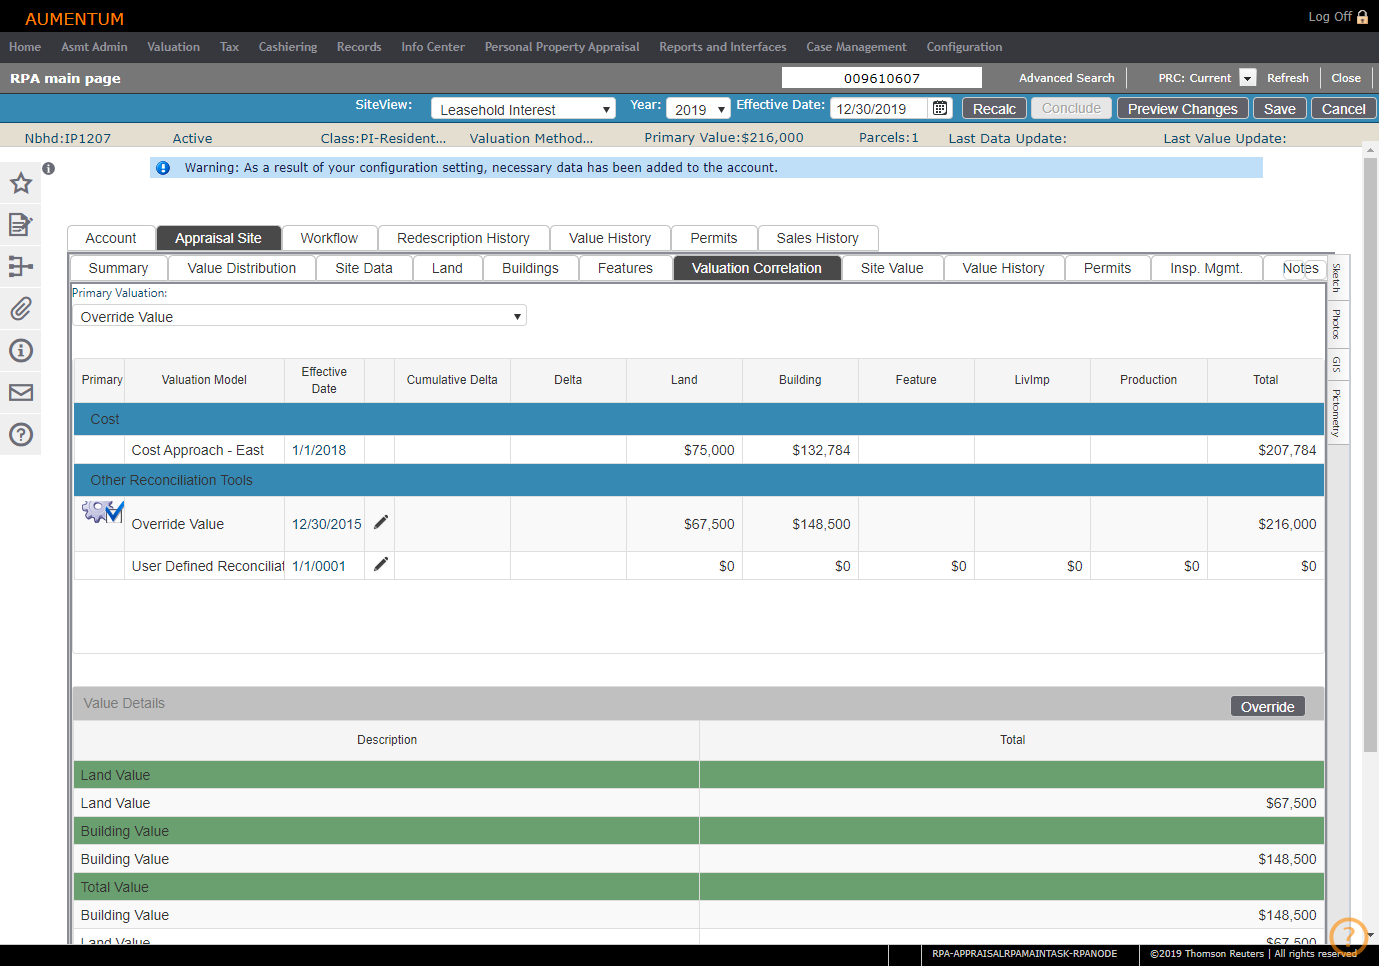
Click on any method in the summary grid to display its corresponding value details.
OPTIONAL: Click Override to edit the valuation method, and click Apply.
-
Make a selection from the Primary Valuation drop-down list, which is identified as the final value in the application.
NOTE: Only configured methods of valuation associated with the neighborhood of the selected parcel are available for selection. The selected valuation method displays a blue check mark in the summary grid.
-
To edit an Override Value or Reconciliation Value, click the Pencil icon to open the Override Value panel. When making changes, you must make a selection from the Override Change Reason drop-down list. Add notes as needed.
NOTE: If the override value is negative, a warning message is displayed and the value is converted to zero.
-
When you delete an object from an appraisal site and recalculate, the lost value is displayed as a row in the Value Details panel under the appropriate summary group column.
-
Make a selection from the View Detailed Value By drop-down list.
NOTE: A Recalc must be performed using a valuation method before that method will display in the list.
-
When a new case is opened in Case Management, Taxpayer Opinion of Value is available in this drop-down list.
-
-
Optionally, select the Override checkbox, if available.
-
Make a selection from the Method and Model Code drop-down lists.
-
Click Apply.
-
-
Click the arrow to expand the Value Component details.
-
Value Collection – Displays the various components that are part of the total value.
-
Valuation Level – Identifies the category assigned to each object (e.g., land, buildings, features, etc.).
-
Description – Either a name assignment or the object's type (e.g., Land/Building/Feature Type).
-
Override – When selected, indicates that a value has been overridden by a user.
-
Value – Represents the value allocated to the object from the total calculated value of the value collection.
-
Alloc % – Indicates the percentage of the total calculated value that is attributed to the object.
-
-
Click to select a Value Component. Details are displayed in the Value Buildup grid to the right, which may include some or all of the following elements, based on the selected method:
-
Calculation Methods and Models
-
Depreciation Rates
-
Size/ Area
-
Size Type
-
Value
-
Adjustments – Displays any associated adjustments, where applicable
-
Adjusted Value – Displays the calculated value after the application of any adjustments.
-
-
Click the Pencil icon to edit Value Buildups. All items in the list are active for editing.
-
Click Save at the top of the page.
-
Click Apply.
-
Click the View Parcel AA Assessment History link to open the View Assessment History screen.
-
Click Export to send this data to a Microsoft Excel worksheet.
-
Click anywhere in the Primary Working Values or Last Concluded Values columns to open the Value Details table.
-
In the Value Details panel, click the arrow to expand the selected value's distribution details.
-
In the Distribution sub-tab, click Export to send the Value Details to a Microsoft Excel worksheet
-
Click the arrow to collapse the details grid.
-
Click to select any Permit associated with the appraisal site.
-
View the permit's General details, Characteristics and associated Notes in the tabs.
-
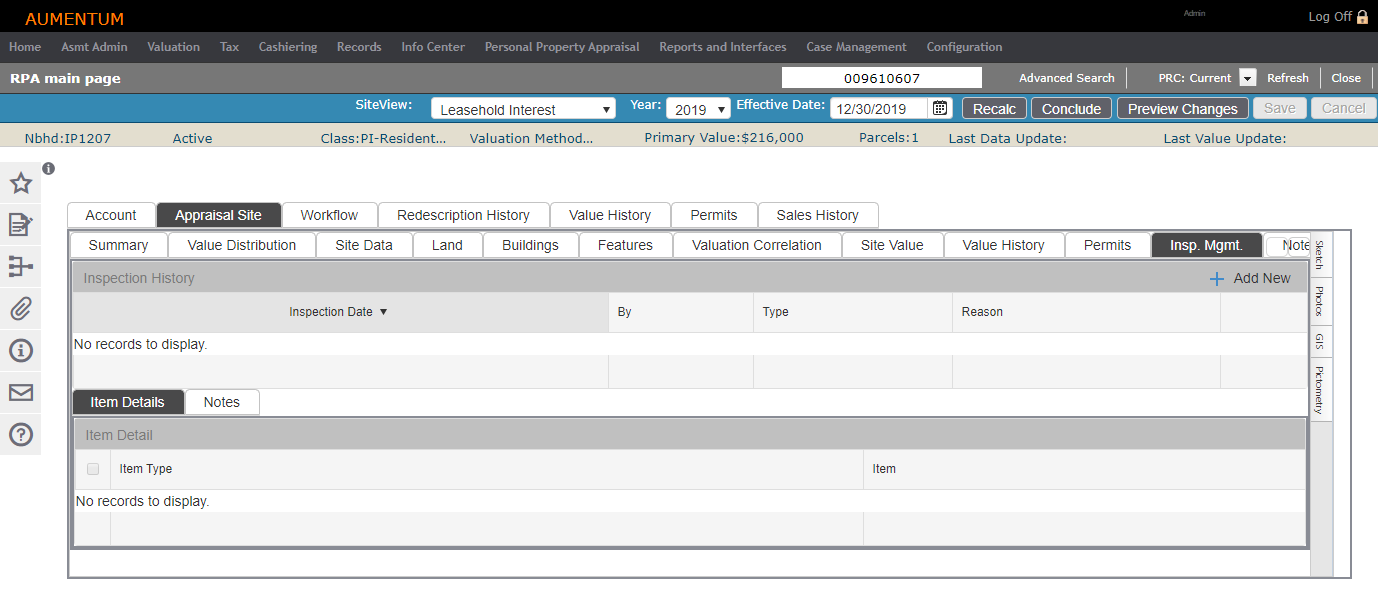
Click to select an inspection instance in the Inspection History grid to display its Item Detail below.
-
Click Add New to add an inspection. A new line is active for editing.
-
Click the Pencil icon to edit an existing inspection. The line is active for editing.
-
Add or edit the inspection details.
-
Inspection Date
-
By – Select who performed the inspection.
-
Type – Select the type of inspection performed.
-
Reason – Select the reason for the inspection.
-
Item Type – Select one or more items in the Item Detail grid that were included in the inspection.
-
-
Click Save at the top of the page.
-
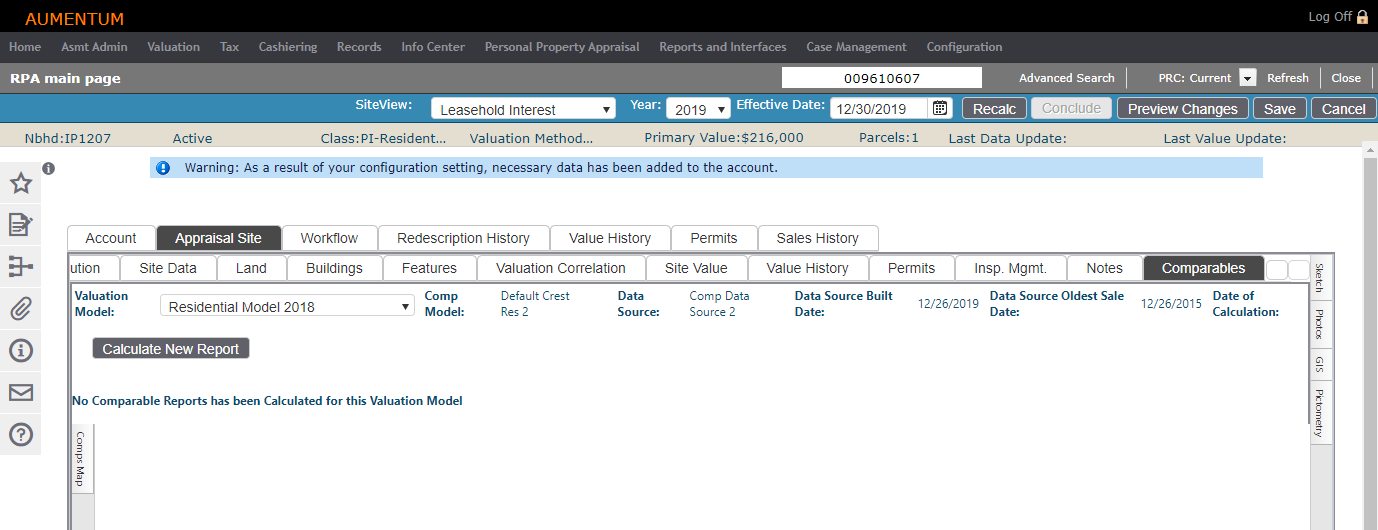
Select a Comparable Sales Model, if more than one model is available. The number of models available depends on configured Model Control and Neighborhood Maintenance.
-
Click Calculate New Report. If no comparable reports have been calculated yet or if an insufficient number of comparables have been run for the selected account, the screen displays messages indicating that and the OK button and the Error sub-tab displays by default.
-
Edit, add, remove and/or select the preferred criteria.
-
Add to or Replace Existing Comparable Candidate List determines if the comparables sales returned by the updates criteria will be added to the existing report or will replace the report entirely.
-
Selection Parameters are pulled from the selected Comparable Sales Model. Parameters can be added, edited or removed here.
-
Comparable Selection Additional Filters determines such factors as the geographic proximity of eligible comparable sales and the window of time before and after the subject sale (Effective Date) that determines eligibility.
-
Once the Parameters and filters are set, click Apply and Calculate.
-
Click OK to return to the first display. Then click Calculate Report again to generate the results.
-
On Comparable List sub-tab, select the checkbox for each comparable sales to be used in value calculation.
-
Click Next.
-
Options and Settings button:
-
Adjust Comparable Report Options
- Click the View Comp Model Definition hyperlink to open the Comp Model View screen.
-
-
Calculate New Report button:
-
Calculate a new report if options have been adjusted.
-
-
Report Overrides button:
-
Opens the adjustment fields for editing.
-
A change to a field in the Rate column will automatically update the associated Adjustment field.
-
A change to a field in the Adjustment column will automatically update the associated Rate field.
-
Click Apply Overrides when all overrides have been made.
-
Click Cancel to undo all overrides and revert the adjustments to the previous values.
-
-
Click Notes to enter any notes about the newly calculated selections and report.
-
Make a selection from the Print Report drop-down list.
-
View the following fields within the Active Worklist section:
-
Workflow – The name of the selected account's active workflows
-
Task – The selected account's active worklist tasks to be completed
-
Description – The legal description of the selected account's active workflow
-
Event Date – The scheduled dates of the active workflow event
-
Assigned User – The name of the user assigned to this workflow.
-
Create User – The name of the user who created the active workflow
-
Queue – The current active workflow phase
-
Status – The status of the active workflow
-
Create Date – The date that the active workflow was created
-
-
View the following fields within the Completed Worklist section:
-
Workflow – The name of the selected account's completed workflows
-
Task – The selected account's completed worklist tasks
-
Description – The legal description of the selected account's completed workflow
-
Event Date – The scheduled date of the completed workflow event
-
Create User – The name of the user who created the completed workflow
-
Queue – The current completed workflow phase
-
Status – The status of the completed workflow
-
Create Date – The date that the completed workflow was created
-
-
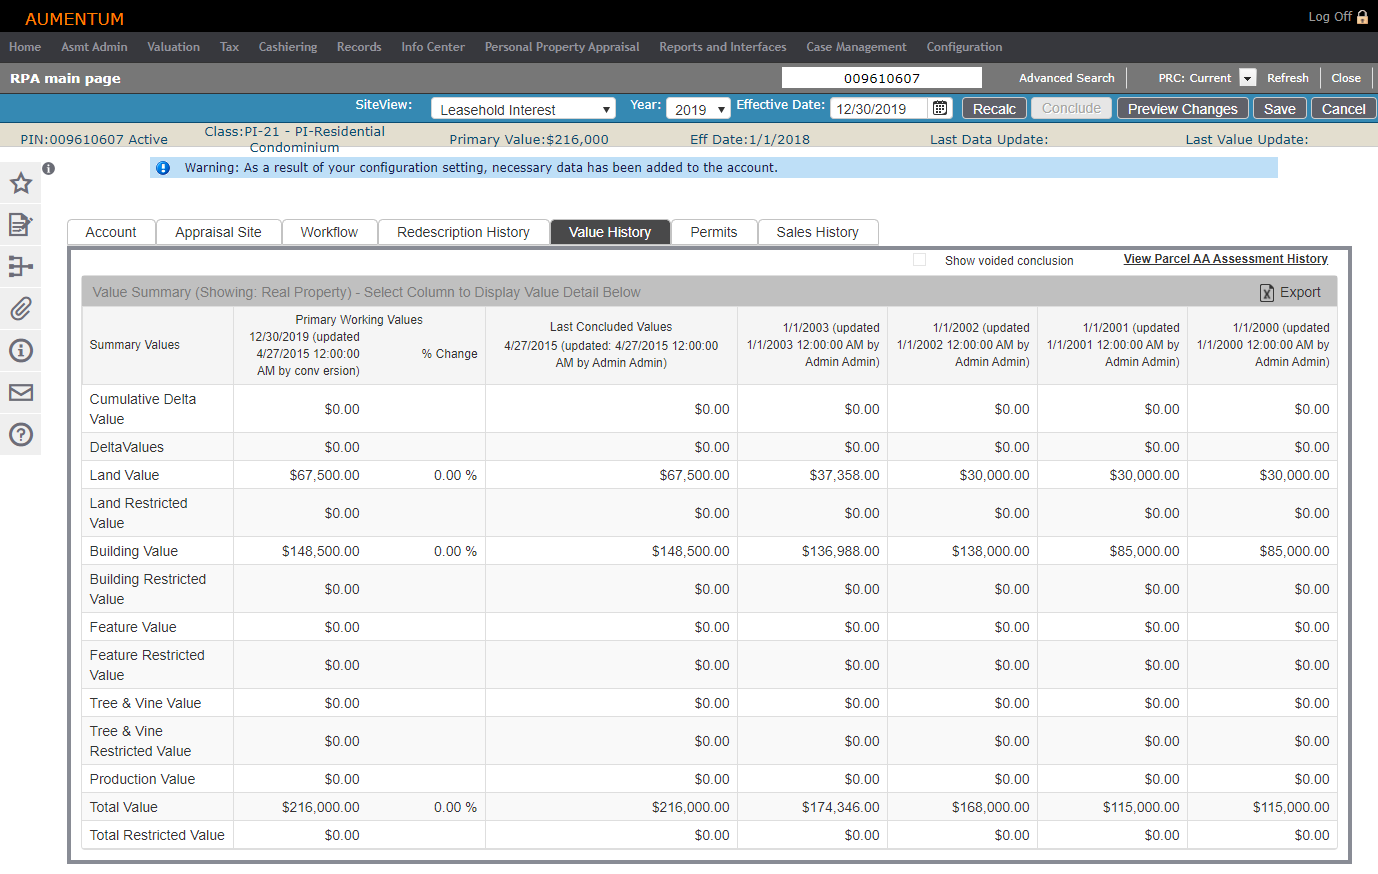
Click Export to send the Value Summary history to a Microsoft Excel worksheet.
-
Click anywhere in the Primary Working Values or Last Concluded Values columns to see the Value Details panel.
-
Click the arrow next to an item to expand it and see the Value Distribution details.
-
Click Export to send these values to a Microsoft Excel worksheet.
-
panel.
-
-
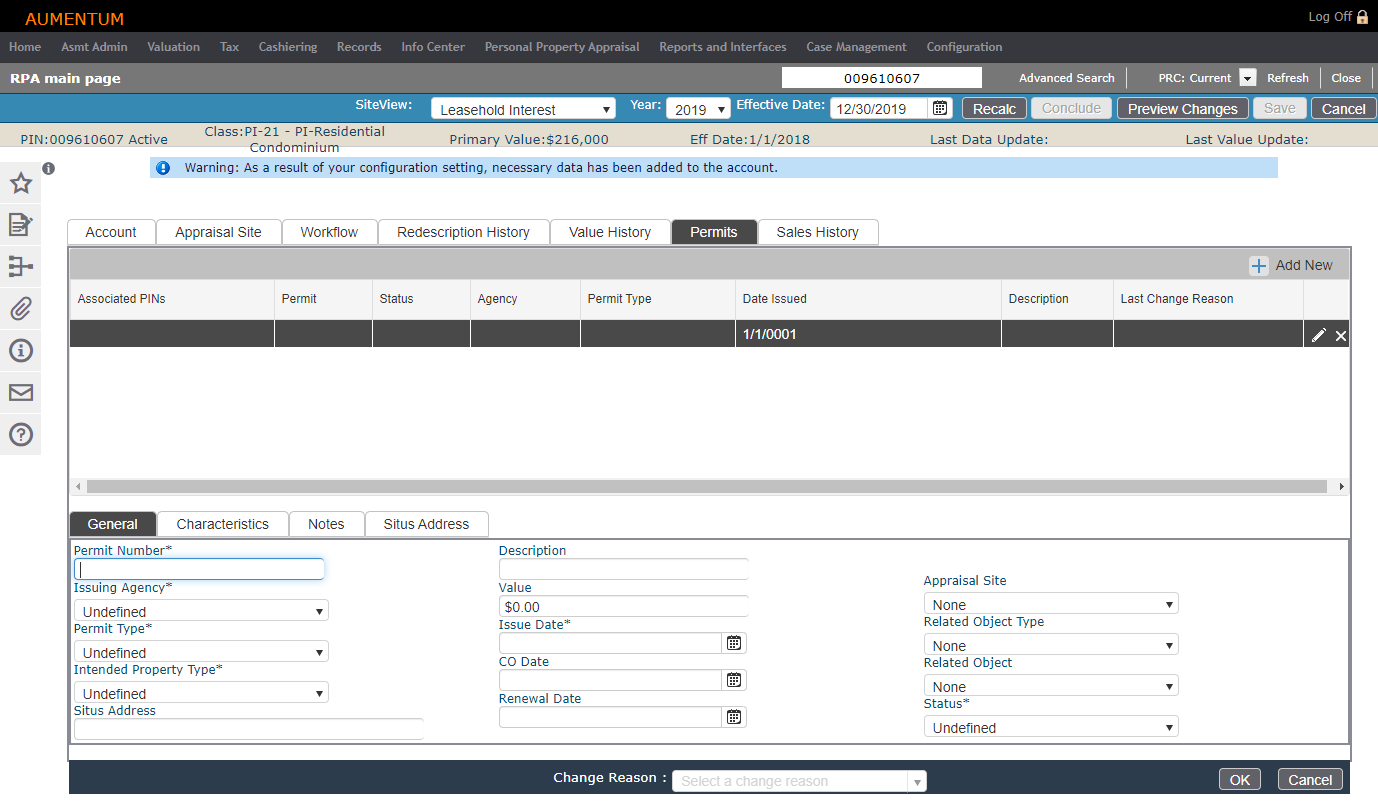
Click Add New to enter a new permit for the selected account or click the Pencil icon to edit an existing permit associated with the appraisal site.
-
Add or edit these fields in the General tab. Fields with an asterisk (*) are required:
-
Permit Number – An automatically assigned reference number. Can be overwritten or manually entered
-
Issuing Agency – The applicable agency associated with the project for which the permit is being created
-
Permit Type – The applicable type of permit associated with the appraisal site
-
Intended Property Type – The type of property that the appraisal site is to be used
-
Situs Address – The physical address of the appraisal site for which the permit is being created
-
Description – A brief description of the project associated with the permit
-
Value – The appraised value of the appraisal site
-
Issue Date – The date that the permit is being issued
-
CO Date – The intended Certificate of Occupancy date
-
Renewal Date – The date on which the permit must be renewed if the project is still underway
-
Appraisal Site – The documented appraisal site associated with the permit
-
Related Object Type – Any structures associated with the project for which the permit is being created
-
Related Object
-
Status – The current status of the permit
-
-
Add or edit fields in the Characteristics tab. This tab is populated with User Defined Fields. The creation and configuration of these fields is covered in another topic.
-
Add or edit these fields in the Notes tab:
-
Permit Notes – Freeform field to enter comments in reference to the permit
-
Visibility – Privacy setting field options for the selected permit
-
-
Select a Change Reason. A Change Reason is only required when editing a permit, not when creating one.
NOTE: The last, previous Change Reason displays on the screen, if applicable. -
Click OK to save the new permit or to save changes made to the selected permit. Click Cancel to delete the new permit or to delete changes made to the selected permit.
-
Click Configuration > Application Settings.
-
On the Maintain Application Settings screen, select Effective Date from the Setting type drop-down list, and select Real Property Valuation from the Filter by module drop-down list.
-
Locate Auto Snap Transfers and click Edit.
-
Select the checkbox in the Setting Value column and click Apply.
-
Locate Default Snapshot Type and click Edit.
-
Make a selection from the drop-down list in the Setting Value column and click Apply.
-
Click Save in the Command Item bar.
-
Click Close to end the task.
NOTE: (UMV only) When performing a non-GIS search, click the GIS tab to see your search results on a map.
Account tab
This tab is displayed by default and is mostly read-only information for the selected account.
In the Header area, click the Pencil icon next to Class Code to open the Change Revenue Object screen. Make any necessary changes and click Save in the Command Item bar.
In the Records Situs Address panel, you must have security rights to add or edit a situs address. See Dependencies, Prerequisites, and Setup at the end of this topic.
Appraisal Site tab
Maintain detailed information about an appraisal site from the Appraisal Site tab, which is comprised of multiple sub-tabs.
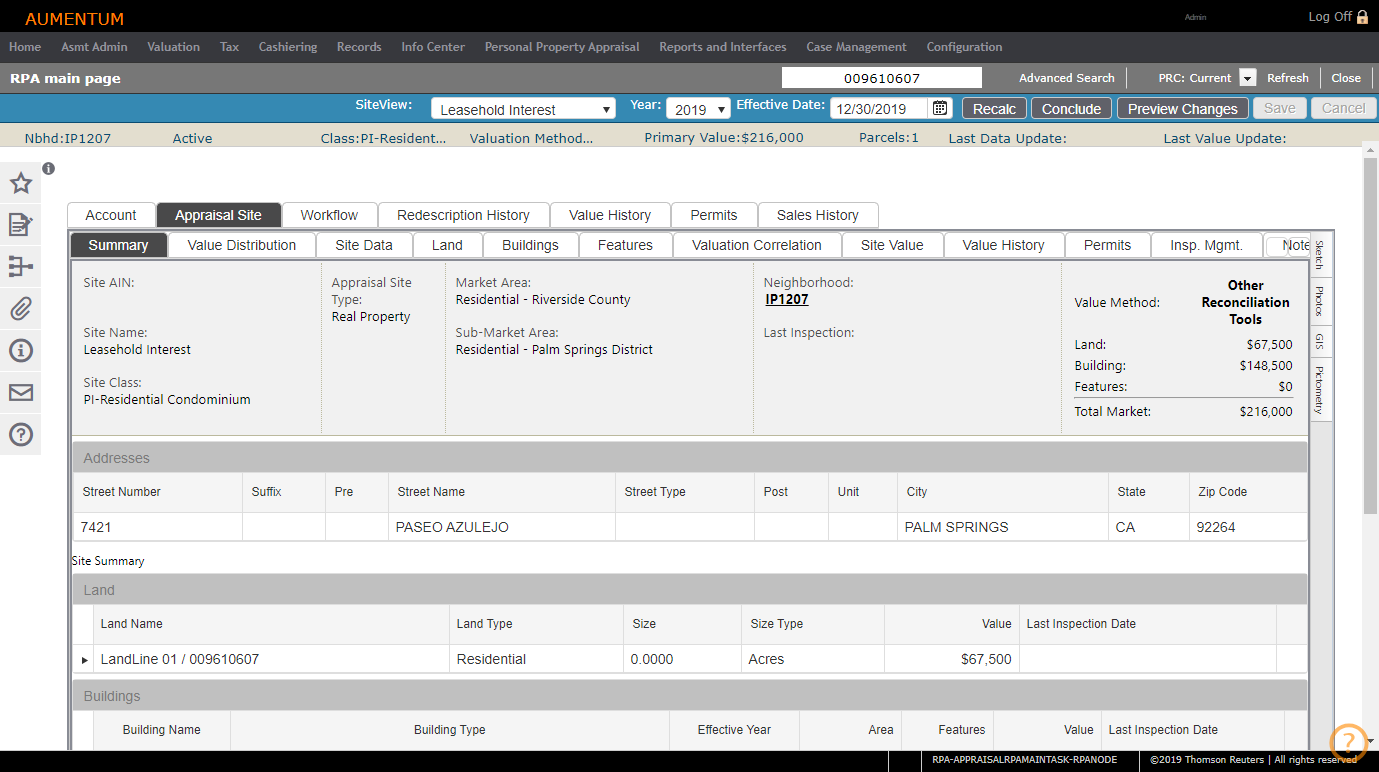
Summary
View the high-level information for the appraisal site. The information on this screen is read-only.
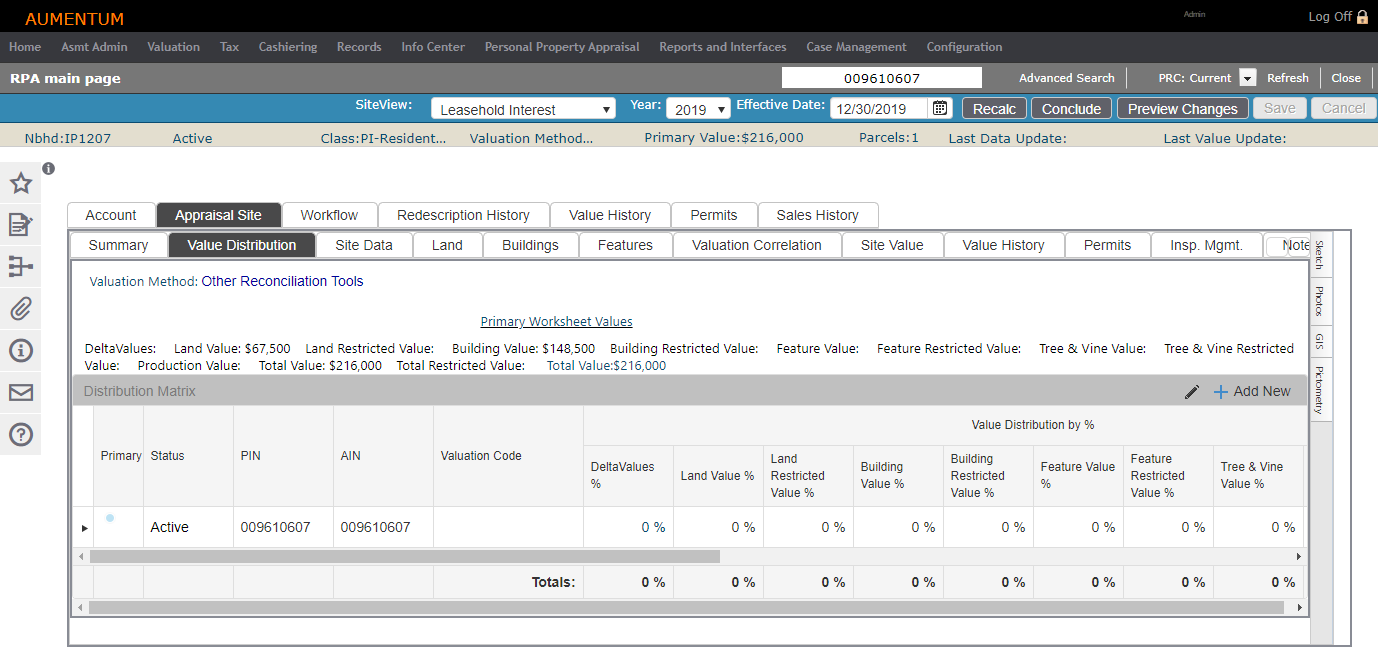
Value Distribution
Provides a breakdown of how value is distributed among parcels and objects that make up the appraisal site.
Site Data
Create and maintain appraisal site information and characteristics, flags, adjustments and area sizes.
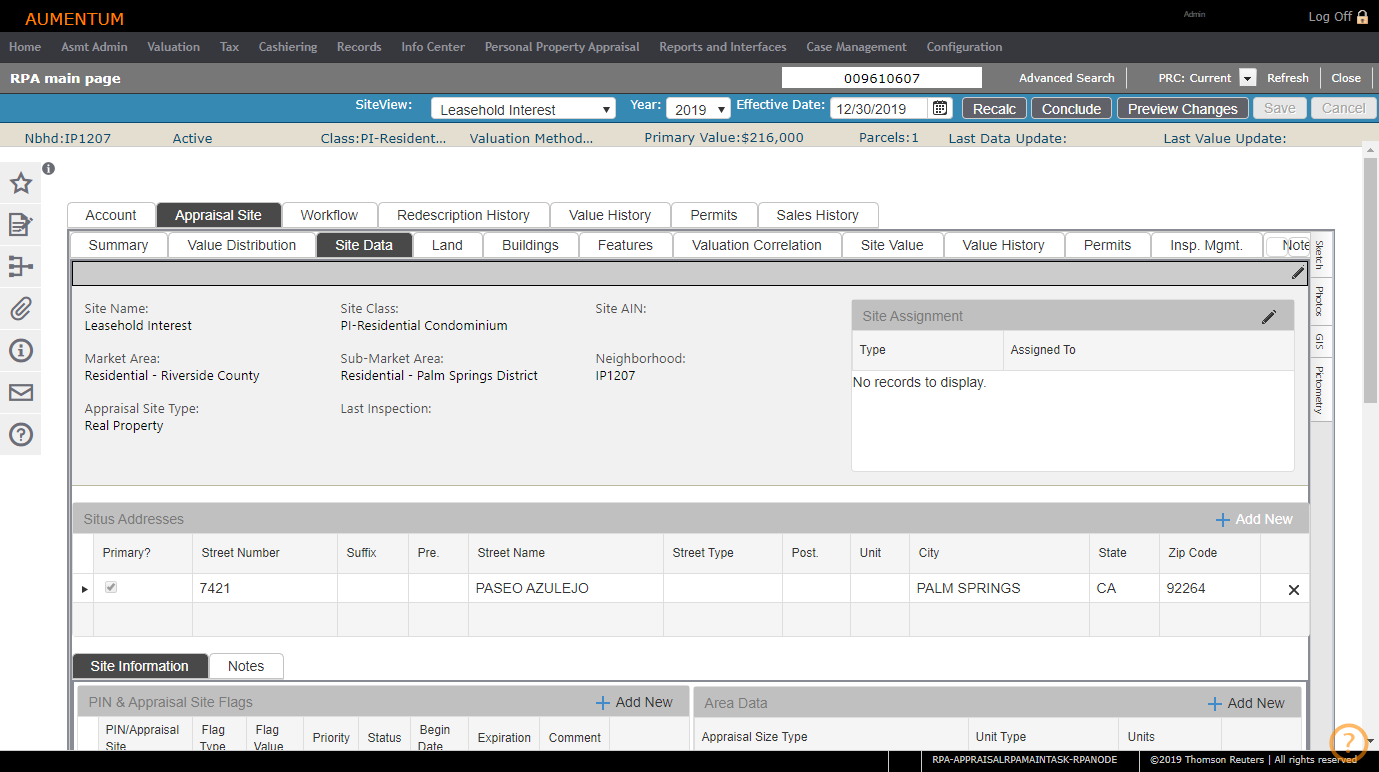
NOTE: For child PINs created as the result of a split, the situs address in this tab is the same as the situs address in Records.
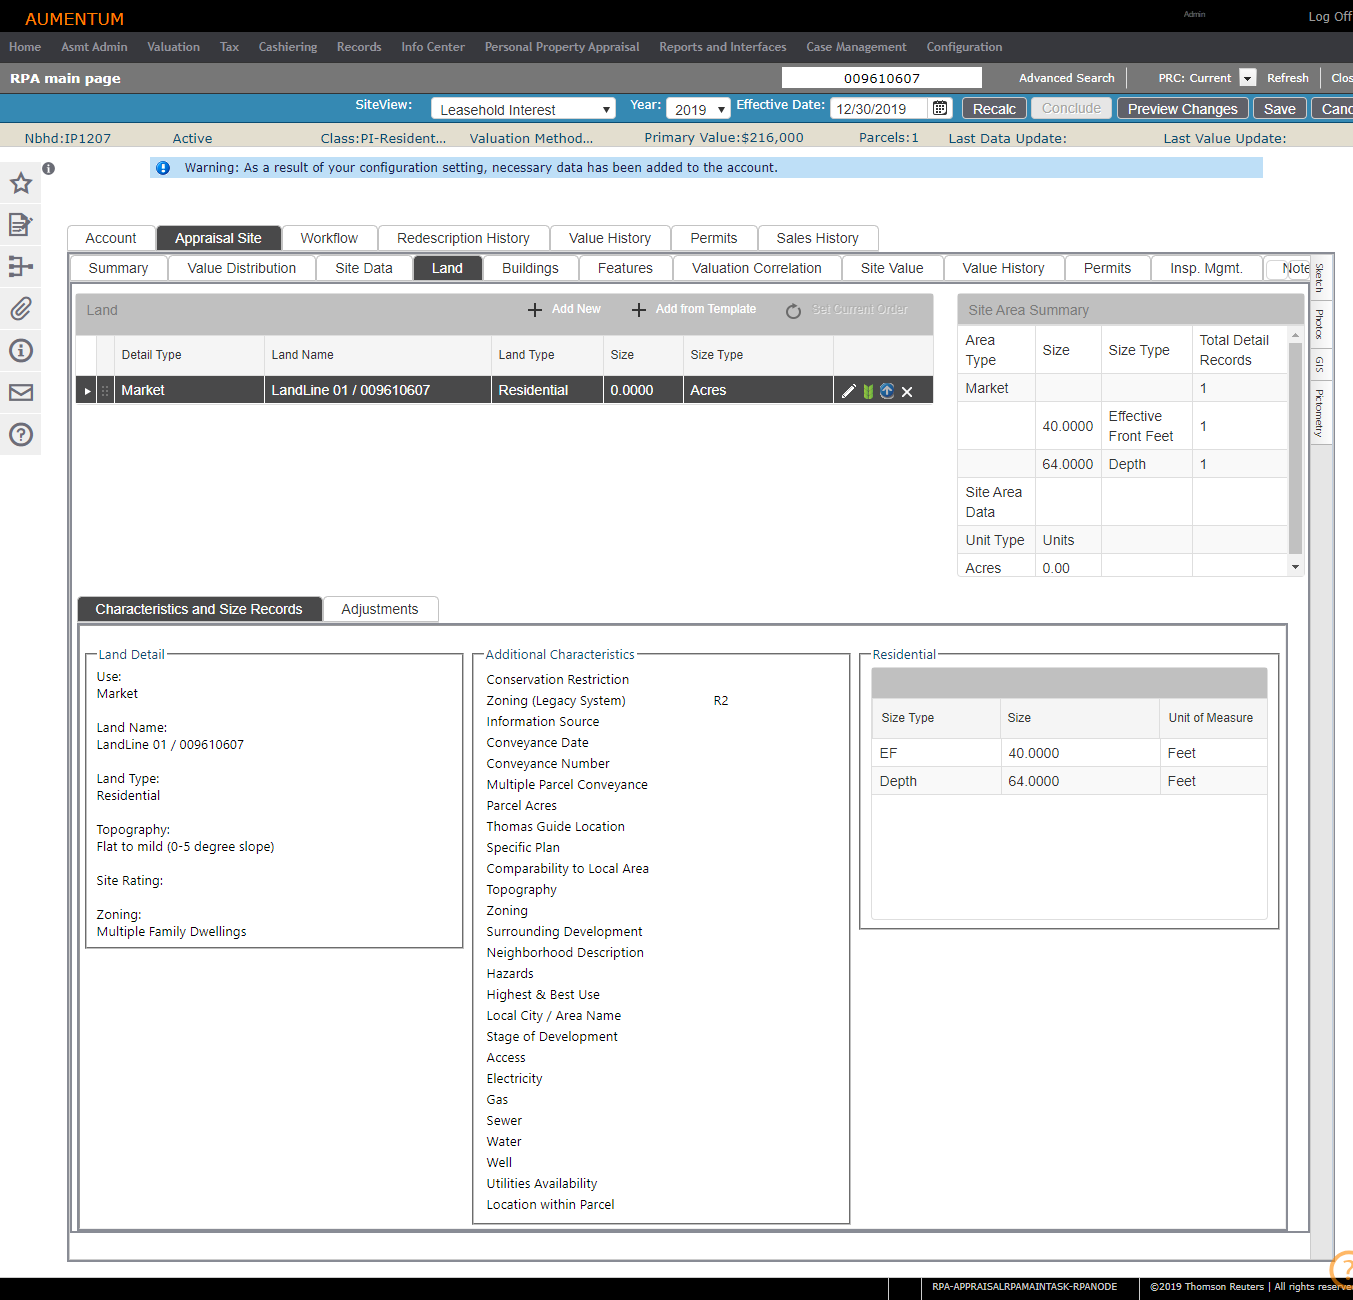
Land
Displays a list of land associated with the appraisal site and allows you to maintain characteristics, adjustment information, and notes.
Buildings
Displays a list of buildings and building sections associated with the appraisal site and allows you to maintain building size records, characteristics, adjustments and depreciation, notes, flags, floor detail and structural elements and unit counts.
NOTE: Information in the sub-tabs (Floor Detail, Structural Elements & Unit Counts, etc.) is read-only, summarizing data input to the Building and Building Section pop-ups (see below).
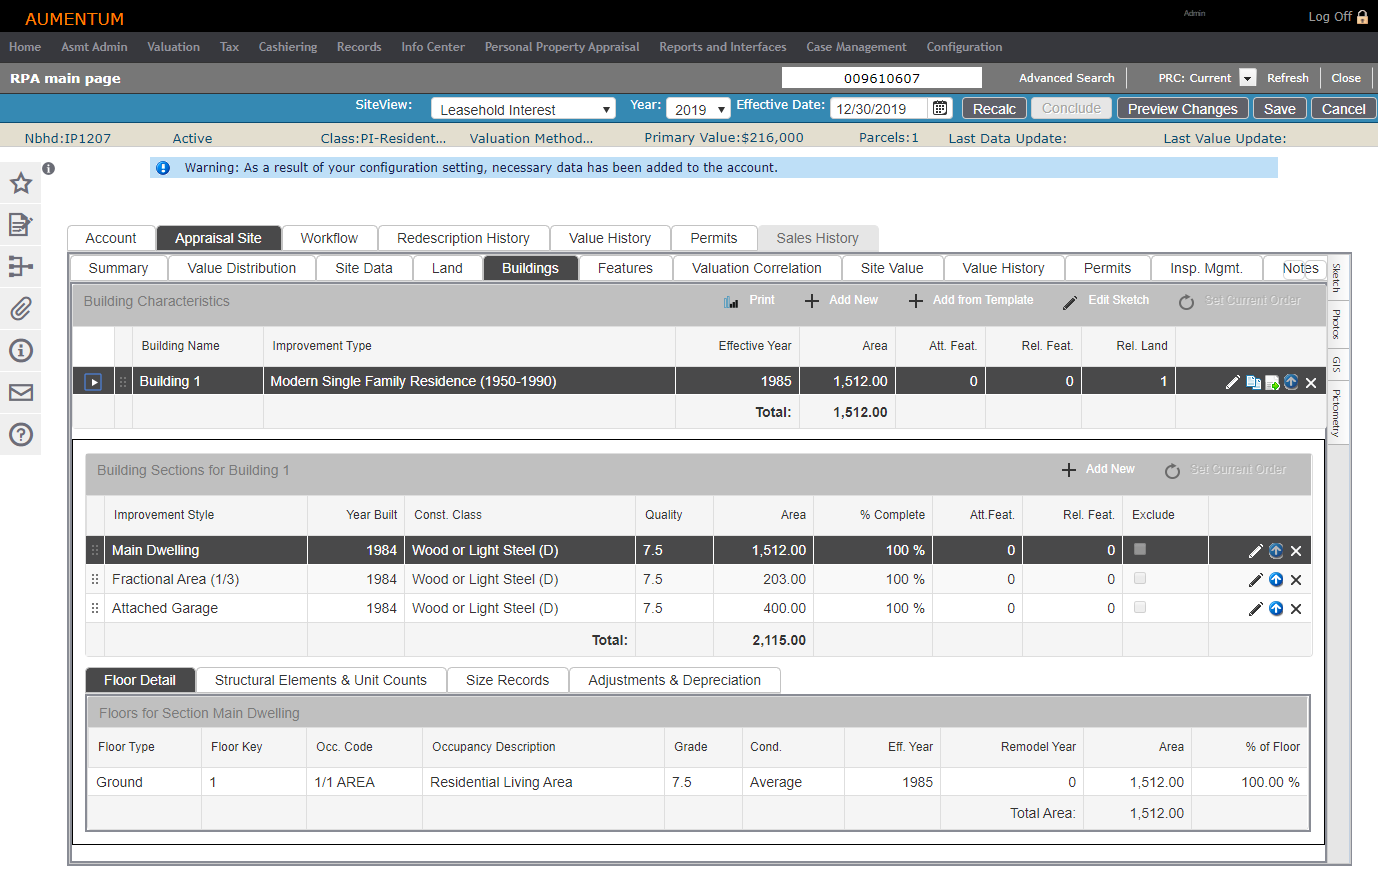
Adding a Building Record
Click here for information on the New Building pop-up.
Editing a Building Record
Click on a record in the Building Characteristics panel to see its related information in the Building Sections panel.
TIP: When multiple buildings exist, a blue Up arrow becomes available so you can move an item up in the list.
Copying a Building Record
Moving a Building
Deleting a Building
Features
Displays a list of features associated with the appraisal site and allows you to maintain related size records and unit counts, elements and adjustments and notes.
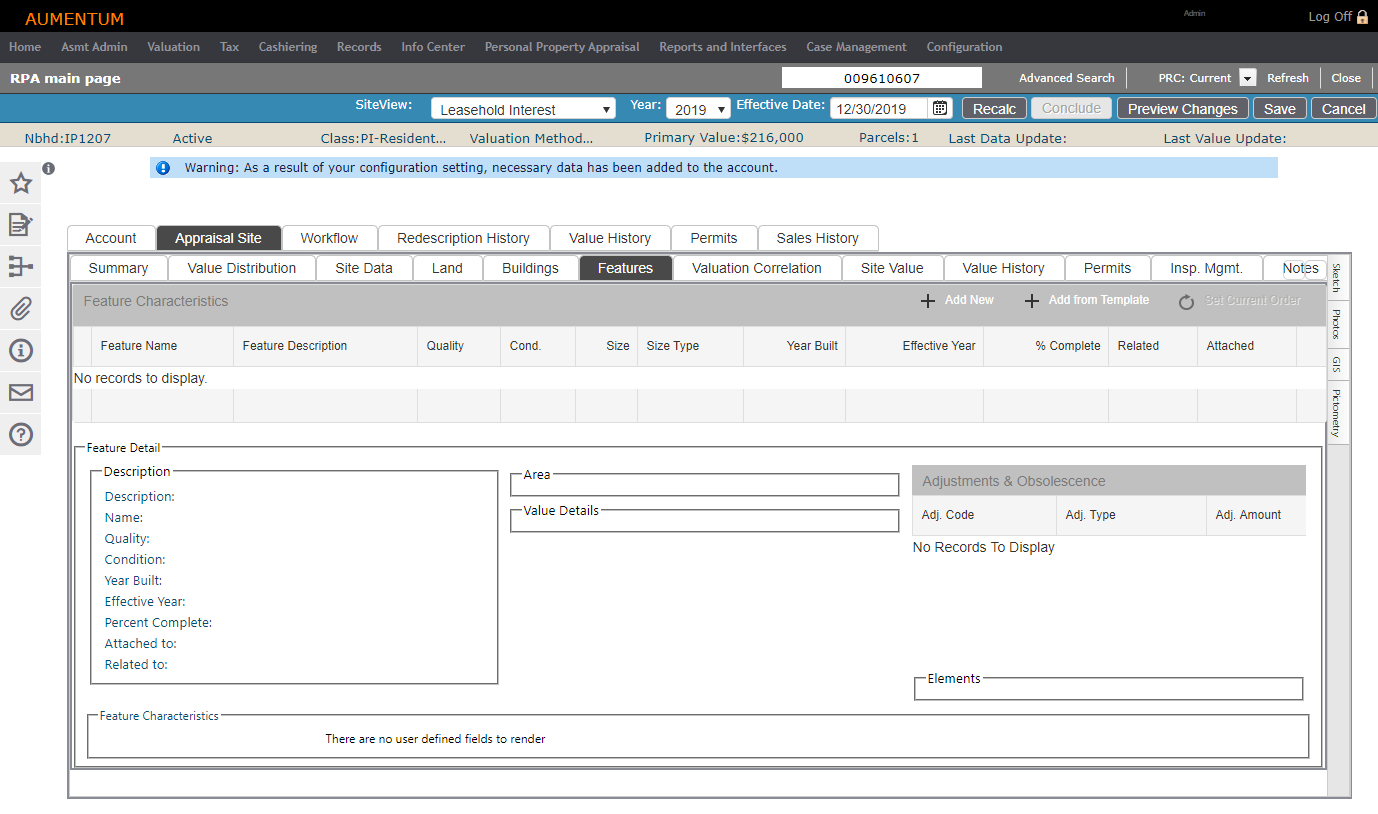
Adding a Feature
Click the Pencil icon for an item in the grid. When features are added or edited, the Feature Detail information is automatically updated.
NOTE: When multiple features exist, a blue up arrow becomes available. Use the arrow to move a specific item to the top of the list.
Click here for information on the New Feature pop-up.
Copying a Feature
Moving a Feature
Valuation Correlation
View all of the model values at a high level to determine which valuation method produces the best value for the parcel. Model Control, Neighborhood Maintenance, and Time Period Configuration are prerequisites to this task.
NOTE: A Recalc must be performed using a valuation method before that method will display in the list.
NOTE: A warning message displays on this screen if all methods included in a Reconciled Value Model have not been calculated, which prevents 100% accounting of reconcile value.
Site Value
Value History
View historical valuation data and concluded values for the appraisal site. These values are also visible in the Assessment Administration module.

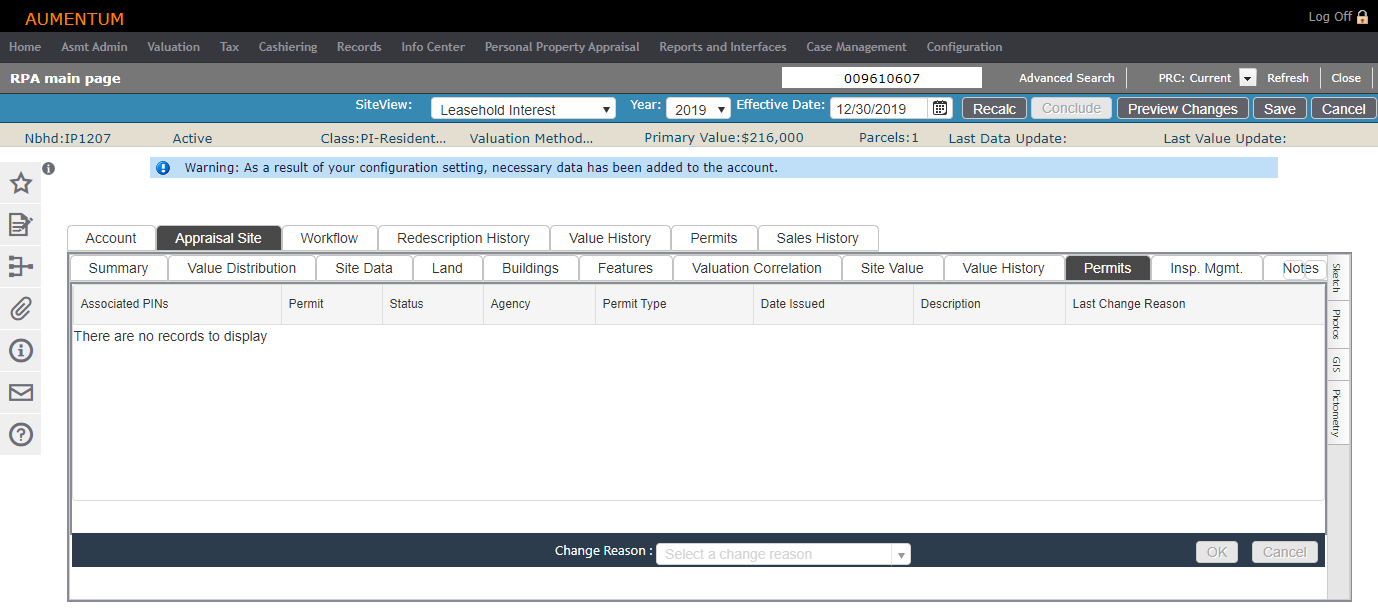
Permits
View permits associated with the appraisal site.
NOTE: This sub-tab is read-only. To add or edit a permit, use the account level Permits tab.
Insp. Mgmt.
Click the Inspection Mangement tab to view site inspection history.
NOTE: This is where appraiser field checks are tracked. Permit Inspections (by permit issuing agencies) are tracked with the associated permits.
Notes
View all notes associated with the appraisal site.
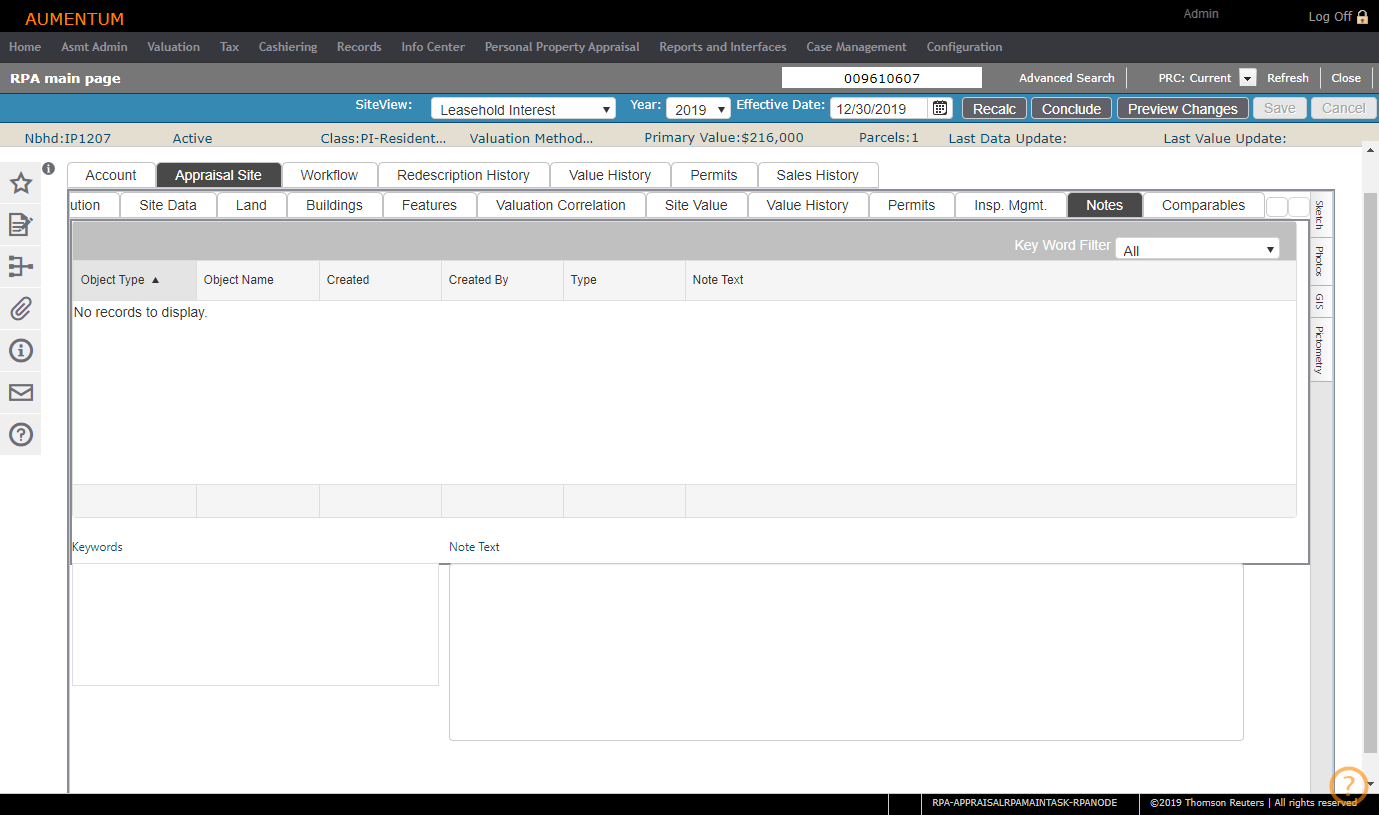
Notes are read-only; the notes are added on the other sub-tabs with corresponding entries. Select the Key Word Filter to view notes specific to the selected filter.
Comparables
Display a list of comparable properties used to derive comparable sales values and/or generate a new comparable report.
OPTIONAL: Select the Change Selection Criteria sub-tab.
NOTE: You can calculate the Indicated value per units of comparison using either the Comparable size, Subject size or both. Each will display at the bottom of the Comparable Report grid.
Comps Map side tab
GIS integration with Comparable Sales lets you see on a map where the subject property is and where comparable sales parcels are located. Labels are displayed above the property on the map and associated information is displayed in the Subject and Comparable columns to the right.
You can also select sales parcels on the map. After initialization, you can select and clear comparable sales parcels to display and toggle between the map and the grid. The color of the map changes when you select items in the Use column. Red is the default color.
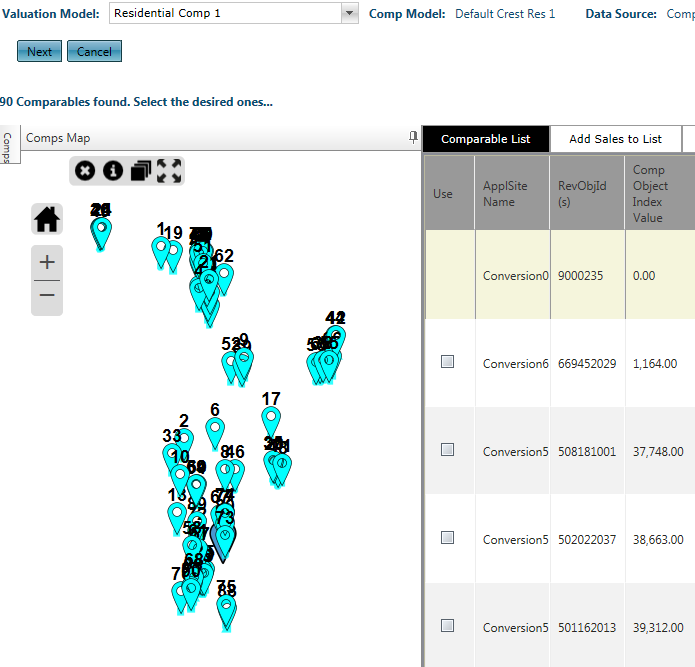
From the Comparables sub-tab, click the Comps Map side tab on the left side of the screen to open a GIS viewer of the property. Descriptions for the GIS viewer, buttons and features can be found in the GeoAnalyst module.
Notes
Print Report
The report displays in a separate browser window.
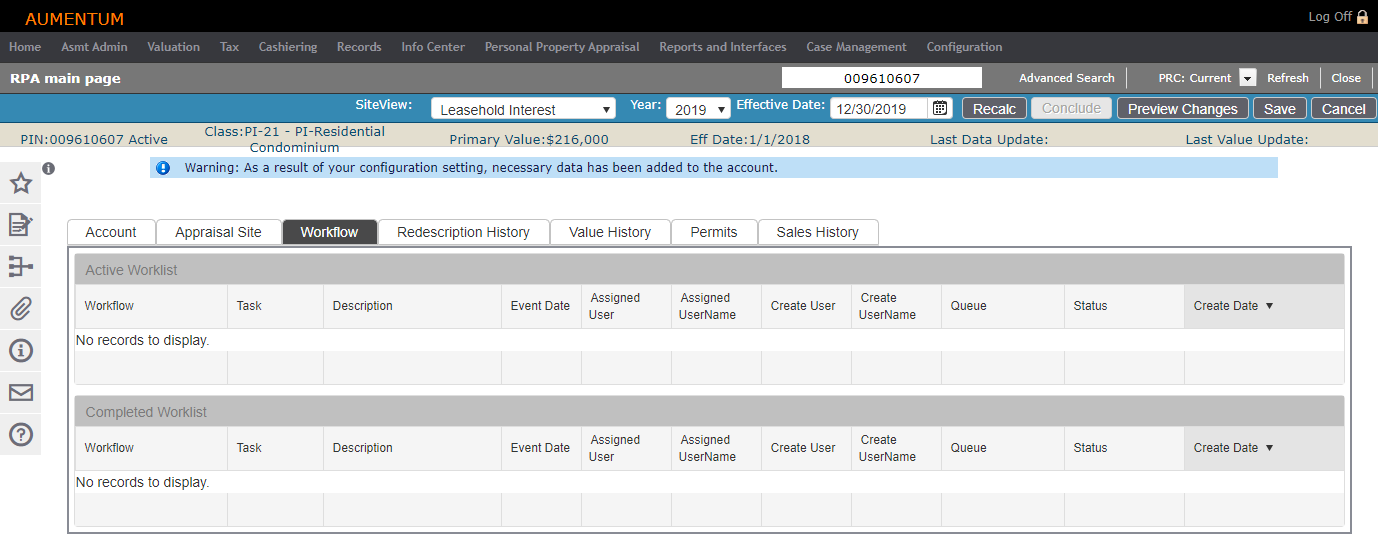
Workflow tab
View the high-level information for any workflow items associated with the appraisal site. This screen is read-only.
Redescription History tab
View redescription history details for the appraisal site.
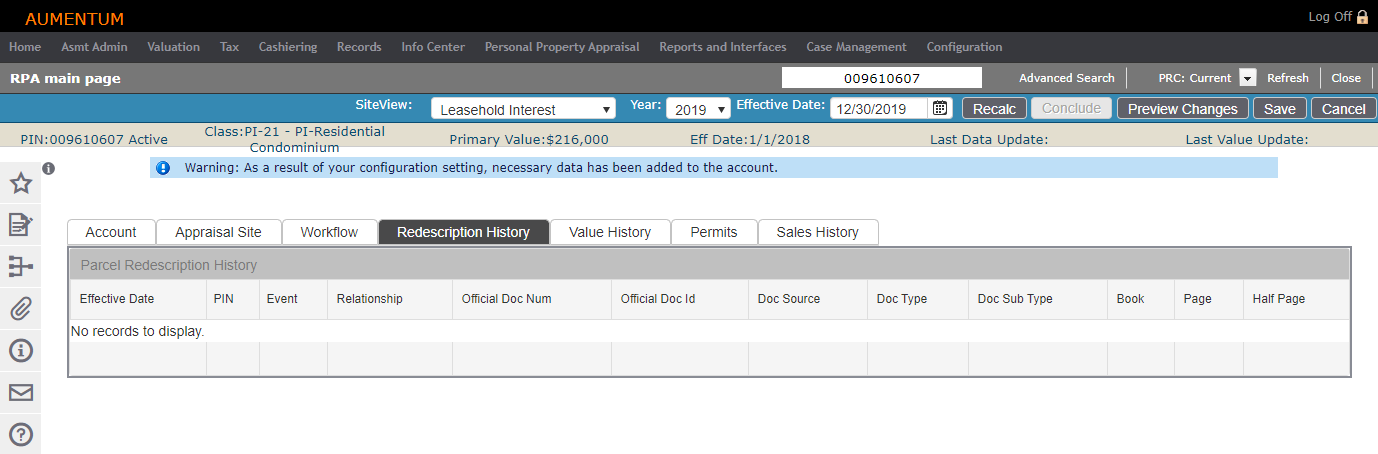
Parcel Redescription History
Split/Merge: Link situs address to Widget for Adding & Editing Situs Addresses
Value History tab
View valuation details for the appraisal site. This information is read-only, but can be exported to a Microsoft Excel worksheet.
Permits tab
View and maintain any permits associated with the appraisal site.
To view a permit, click on the row of the permit you want to view. The information associated with the selected permit populates the grid below in read-only format.
To edit, click the Pencil icon next to the permit you want to edit. The information associated with the selected permit populates and becomes available for editing in the grid below.
In addition, the Permits tab contains three subtabs for permit maintenance. The fourth tab, Situs Addresses, is populated with entered data from other tabs, and is therefore read-only.
Permit Workflow
The RPA Permits Page (Valuation > Permits > Advanced Search > RPA Permits Page) supports workflow processing if configured for your jurisdiction. You can access the workflow, if you are configured for the applicable workflow queue, from the View My Worklist screen via the Workflow icon in the sidebar of any screen.
EXAMPLE: Permits enter the system, for example, as scanned documents from Documentum. This generates a system event which in turn kicks off a Permits workflow. The workflow is then available from the workflow queue. When selected, you advance to the RPA Permits Page screen and additional buttons, such as Submit to Approve, Reject, Approve, etc., are available, depending on your user role, for selection from the task bar for workflow processing.
NOTE: When receiving the New Construction Statement (NCS) from Documentum/eForms, Aumentum autopopulates the date the document is received (in a UDF) as well as the Owner's Reported Cost (also a UDF). This is also displayed on the Permit tab of the RPA Main Page. The document returned date is scanned or submitted from the imported document. Once the document is imported into the system, the Owner's Statement Received field is set to Yes.
Sales History tab
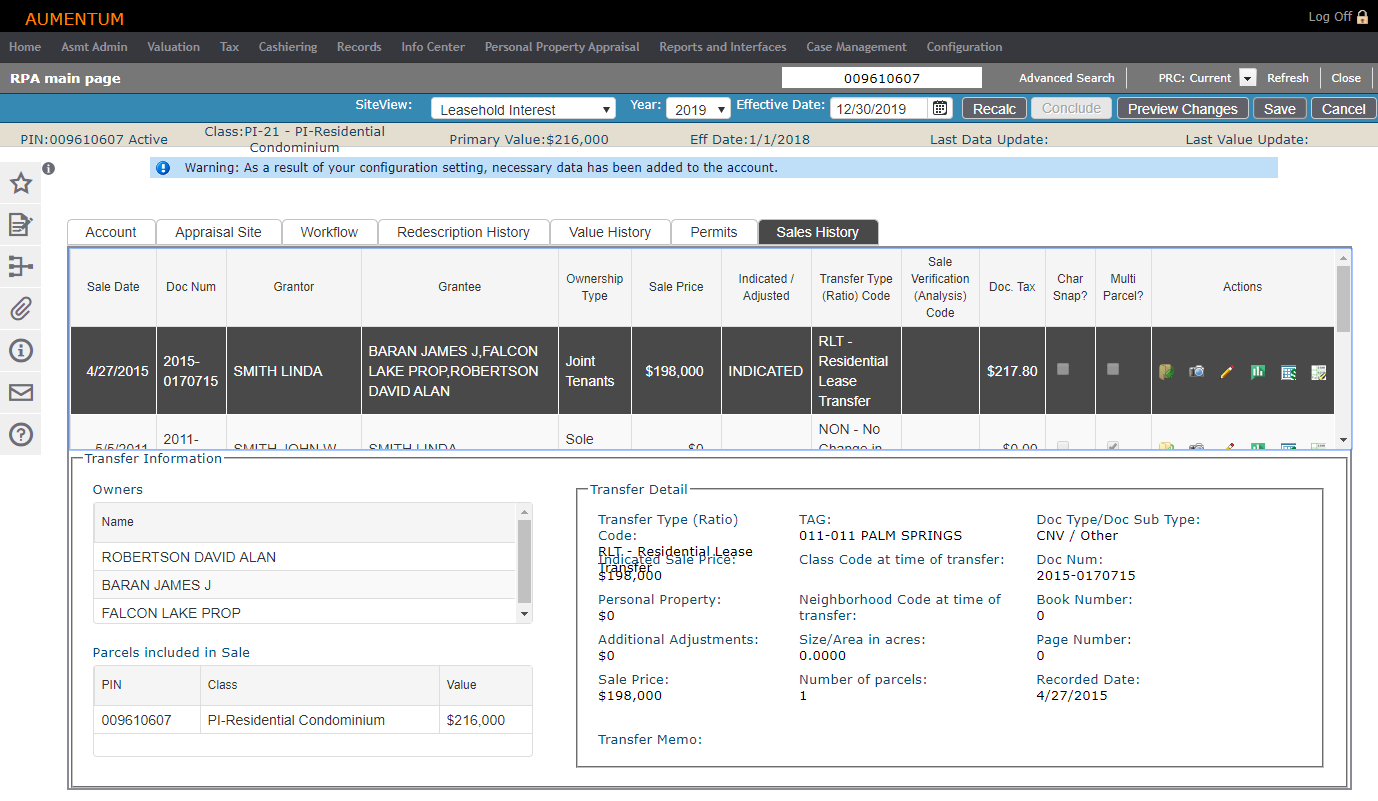
Click the Open icon to see the last snap shot for a new or edited sale.
Click here to learn how to enable snap shots.
Click the Pencil icon to open the Maintain Transfer Detail screen.
Recalculate
Recalculate produces an estimate of value based on the chosen model.
-
Search for and select the appraisal site that needs to be recalculated.
-
On the RPA main page screen, click Recalc under the Command Item bar.
-
In the pop-up, make a selection from the Selected Valuation drop-down list and click OK.
NOTE: The list of models are configured for the neighborhood on the given appraisal site.
To set the primary valuation method for the selected valuation model:
-
Click the Appraisal Site tab, then click the Valuation Correlation sub-tab.
-
Make a selection from the Primary Valuation drop-down list.
-
Click Save under the Command Item bar. The Valuation Correlation tab displays the values after applying the model to the appraisal site and its objects.
Conclude
Conclude pushes the value produced from the model to Assessment Administration.
-
Click Conclude under the Command Item bar.
-
In the pop-up, make a selection from the Value Change Reason drop-down list.
-
Optionally, enter a reference number and select one or more statutory references.
-
Click OK.
Dependencies, Prerequisites, and Setup
To edit an inactive bypass PIN, the Allow edit of Bypass Parcel must be set to True.
- Click Configuration > Application Settings.
- On the Maintain Application Settings screen, select Effective Date from the Setting type drop-down list, and select Real Property Valuation from the Filter by module drop-down list.
- Locate Allow edit of Bypass Parcel and click Edit.
- Select the checkbox in the Setting Value column and click Apply.
- Click Save in the Command Item bar.
To grant security rights for the Records Situs Address panel in the Accounts tab:
- Click Configuration > Security and User Maintenance > Roles.
- On the Maintain a Role screen, click Edit for the role to which you want to grant rights.
- On the Edit Role Details screen, click Valuation > Property Characteristics > Details in the Granted Menu Items panel.
- On the Edit Additional Role Details screen, expand RPA main page and click to select btnAddFeature, select the checkbox for each right you want to grant, and click Set Rights.
- Repeat these steps for the btnEditFeature.
- Click Save in the Command Item bar.
NOTE: If you don't see Valuation or Property Characteristics in the Granted Menu Items panel, click to select it in the Available Menu Items panel and click Add Selected.