Mass Update
Navigate:  Valuation > Mass Update
Description
The Mass Update task provides a mechanism by which the characteristics of one or more appraisal sites can be modified in a single action. Mass Update is executed as a batch process which means the task can run unattended on a large number of records. Mass Update offers the ability to:
-
Save a mass update definition file for future use against other data sources. When saved, a definition may be marked as publicly available for all users who can invoke mass update.
-
Associate a distinct set of appraisal sites processed by the mass update engine with a mass update definition file.
-
Define additional criteria for the mass update exercise to target specific components of the appraisal site (e.g., a specific building, land line, etc.).
-
Define and update User-Defined Fields (UDFs) for various data types.
-
Perform revaluation of an appraisal site if a characteristic that is used in the valuation determination is modified.
-
Modify any adjustments and flags set for PINs during the mass update process.
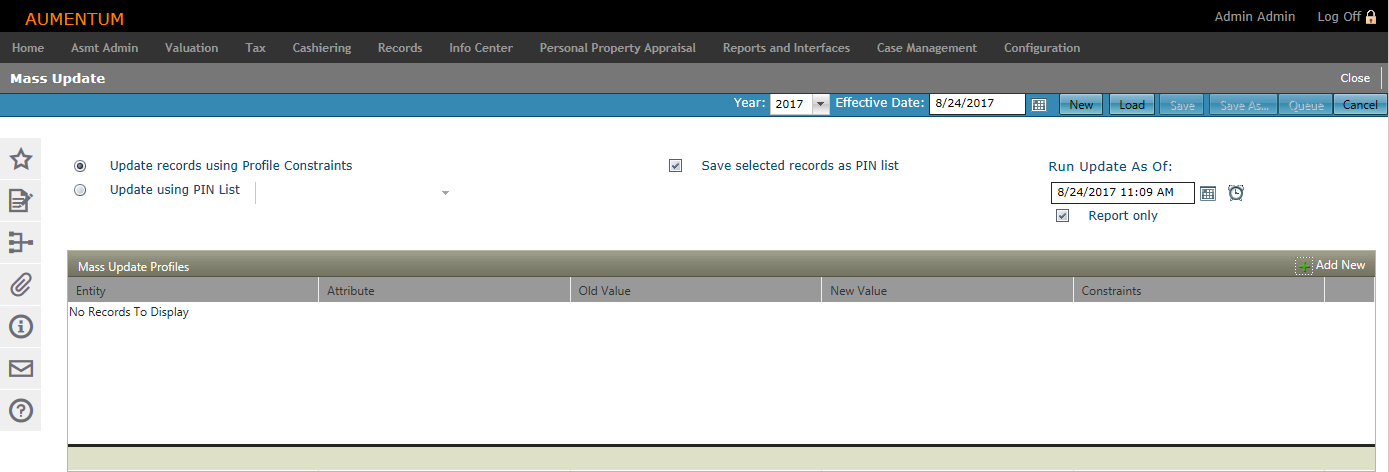
The Mass Update screen is comprised of a wizard that allows you to specify the input and output options for a mass update exercise.
Steps
-
Click New to create a new mass update profile. The screen refreshes with blank information for building the new update.
- Click Add New in the Mass Update Profiles panel header. In the pop-up, make your selections from the drop-down lists:
- Entity Type – Your selection determines the Attributes and Adjustments that are available.
- Attribute – Specify which attribute to update.
- Old Value – The existing attribute value you want to change.
- New Value – The value you want the attribute to display.
- Site Assignment Type
-
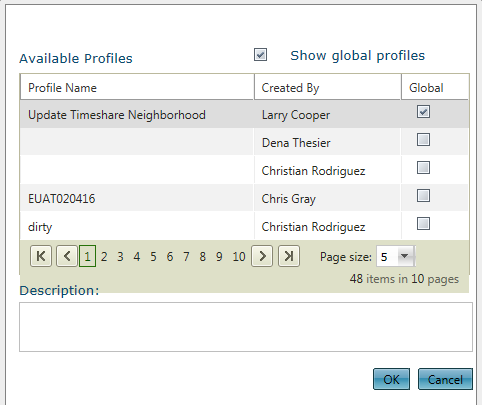
Click Load to use a previously saved Mass Update Profile. The Available Profiles pop-up displays, allowing you to select an existing profile from a list:
-
In the Available Profiles screen, select the Show global profiles checkbox to display profiles that are visible to all Aumentum users (these are marked with a check under the Global column). Non-global profiles are only visible to the user and members of the user group that created the profile.
-
Click on a profile (you will see a description appear if the profile has one) and click OK. The selected profile is displayed in the Mass Update Profiles screen.
-
Select how to perform the update:
-
Update Records using Profile Constraints – When selected, records are updated using constraints, criteria that defines the processing set (e.g., single family dwelling, commercial building).
-
Update using PIN List – When selected, records are processed according to an existing PIN List, as selected.
NOTE: You cannot see the individual PINs within a PIN List.
-
Optionally, select the Save selected records to a PIN list checkbox. When selected, a record of all PINs updated in the Mass Update process is created for reuse.
-
Enter or select the Run Update As Of date, which also sets the mass update's effective date.
The effective date impacts the date in which the Mass Update Profile begins its existence, and the date on which a mass update is applied to the Appraisal Site.
- Optionally, select the Report Only checkbox. When selected, the mass update runs in verify mode. No PINs are updated but any reported generated display the expected results of the mass update, when it is run. This gives you the ability to review the expected results and fine tune your parameters before running the mass update.
-
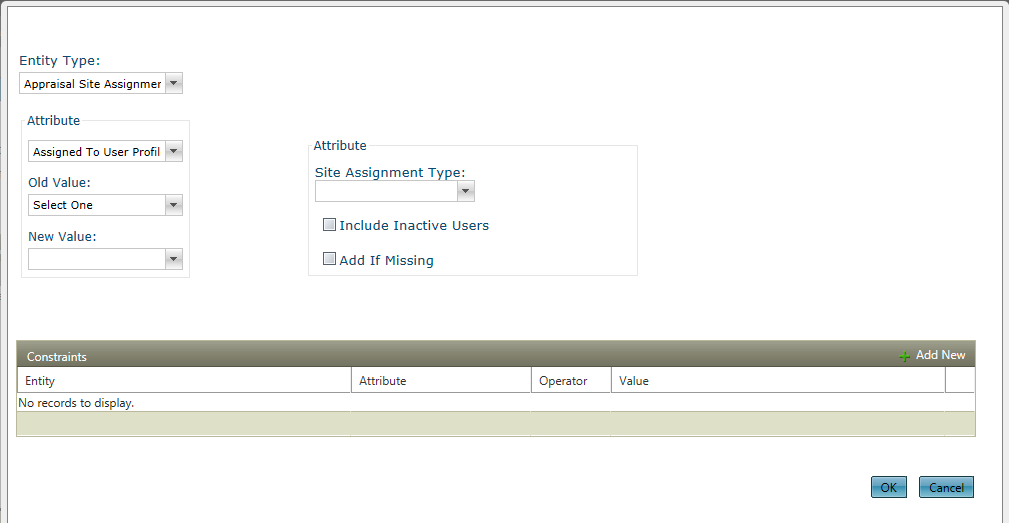
In the Mass Update Profiles panel, click Add New to add a new entity/attribute pair to a new or existing profile. The Mass Update pop-up window displays.
-
Make a selection from the Entity Type drop-down list.
NOTE: The remaining fields may vary, based on the type selected.
-
Make a selection from the Attribute drop-down list or user-defined field if applicable to the type selected to before selecting a value from the Attribute from the drop down list and setting its old and new values as required.
-
Select the Adjustments(Update Action, Adjustment, Adjustment type) if applicable to the type selected to using the drop-down lists.
-
Select the Flags (Update Action, Flag Type, Begin Date, Status, Tickler Date, Duration and Comments) if applicable to the type selected to using the drop-down lists, date selector and free fields.
-
Select the User Defined Fields button if applicable to the type selected to and define any UDFs.
-
Click Add New in the Constraints panel to add constraints which provide further granularity to the update process by identifying additional characteristics of records will be included in the mass update process.
-
Entity – An appraisal site or component of an appraisal site (e.g., building, feature, etc.).
-
Attribute – An attribute/property related to the selected Entity.
-
Operator – Available operators populate based on your Attribute selection. If the In operator is selected use the ellipsis button (…) to open the Systypes Selection dialog box to select a list of values using an appropriate check box.
-
Value – Available Values populate based on your Attribute selection. You can partially type a word/value to see a list of matching values; wildcards cannot be used.
-
Click OK.
-
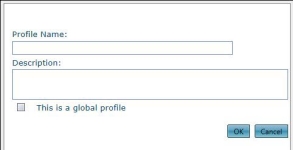
Click Save. A Profile Name pop-up displays:
-
Enter a profile name and description.
-
Select the This is a global profile checkbox to apply the profile globally.
-
Click OK.
-
Click Cancel to close the pop-up without saving changes.
-
Click Save As in the Command Item bar to save the update for future use.
-
Click Queue to open the Monitor Batch Processes screen.
-
Enter a profile name and description.
-
Optionally, set as a Global Profile.
-
Click OK.
NOTE: Until you create a new profile, some buttons are disabled.
Select the checkbox for Include Inactive Users and Add If Missing, if necessary.
OR
Click the Pencil icon to edit an existing profile in the list. The Mass Update pop-up displays.

-
Click Cancel to cancel the mass update process.
-
Click Close to end the task.
Common Actions
Batch History – shows all batch processes for the current user (by default).
Tips
The report generated from the batch process should be reviewed in order to interpret the results of the mass update exercise.