Income Configuration
Navigate:  Valuation >
Configuration >
Income Configuration
Valuation >
Configuration >
Income Configuration
Description
NOTE: Income Configuration settings are initially setup by your Aumentum Implementation team. The data maintained from Income Configuration defines and modifies the data/fields/drop-down lists that are available for Income Approach Valuation in Aumentum.
Income Configuration allows you to create rules specific to your jurisdiction's business processes that govern what information is collected for different income types and subtypes.
Income Configuration includes four tabs for:
-
Code List – Create and manage Types, Subtypes and Classes of income-related information.
-
User Defined Fields (UDF) – Create and manage UDFs for configured Entities.
-
Code Mapping – Map Code category Types/Subtypes/Classes together to define relationships between them.
-
User Defined Fields Mapping – Map UDF codes together to define relationships between them.
Code List
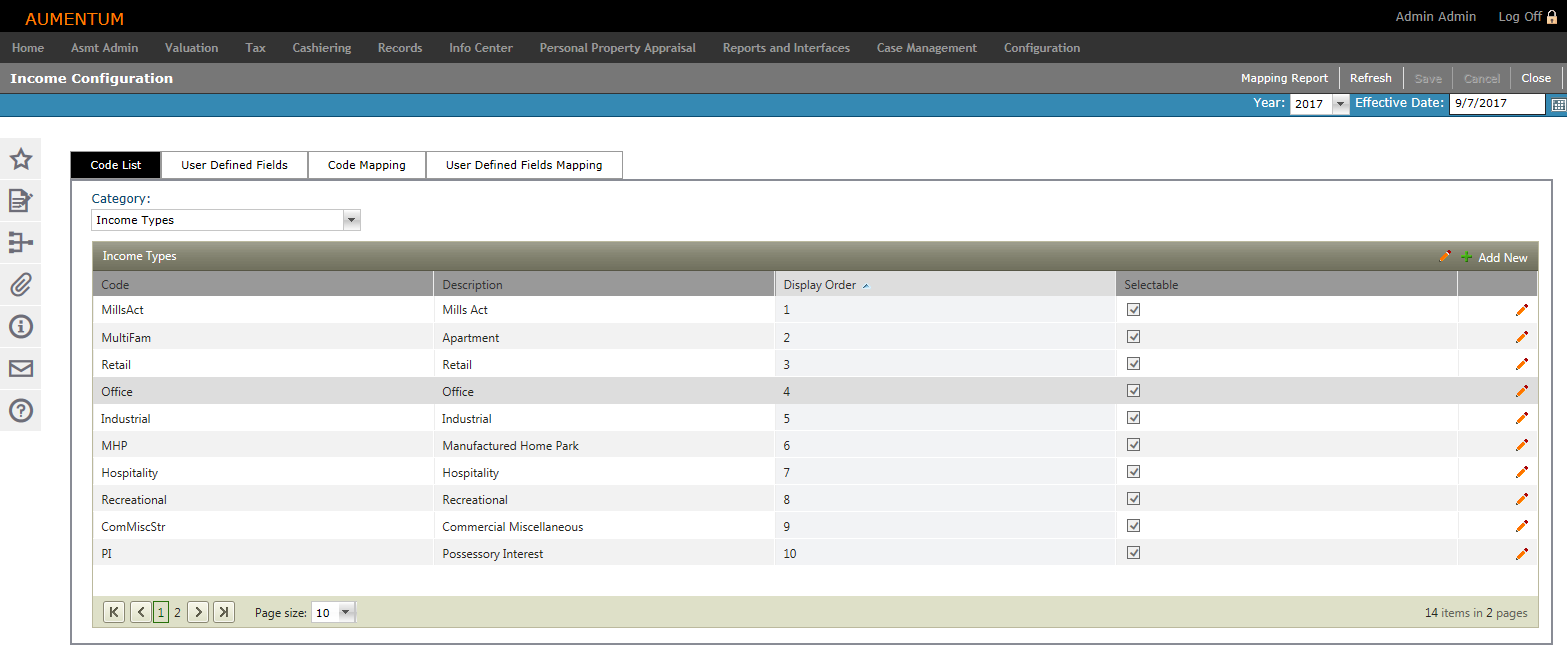
Steps
-
Select a Category. The grid column options and available fields populate based on your Category selection.
-
Click the Add New icon to add a new code to the selected Category. A new line item is highlighted and active for editing.
-
Define the code's attributes and save.
-
Code - Enter a brief code.
-
Description - Enter a description of the code.
-
Display Order - Enter a numeric value identifying where the code appears in the select list.
-
Selectable - When selected, the code is available for selection in the Aumentum application.
-
Click the green check mark to save all changes.
-
Click the red X to cancel all changes and exit the editor.
OR
Click the Pencil icon to edit an existing code next to the code in the list. The line item is active for editing.
OR
Click the Pencil icon in the header panel to edit all codes in the list. The entire list is active for editing upon clicking the edit icon.
-
Click Save.
User Defined Fields
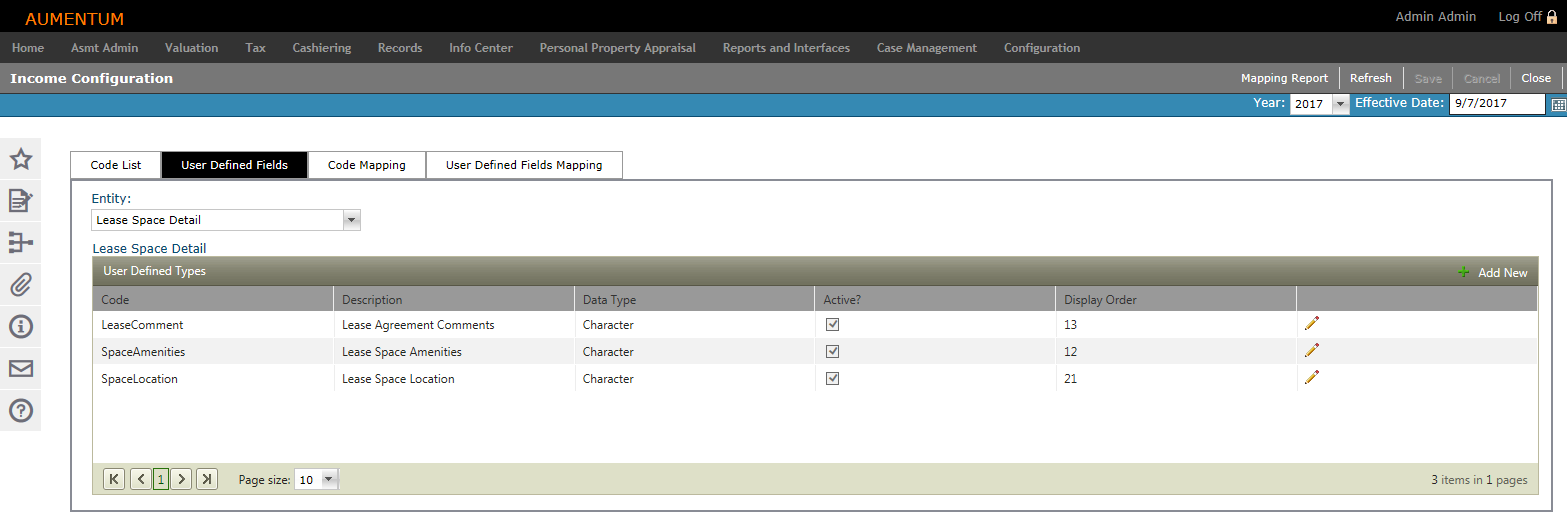
Steps
-
Select the Entity for which you are defining a User Defined Field (UDF). The grid column options and available fields populate based on your Entity selection.
-
Click the Add New icon to add a new code to the selected Entity. The grid expands to expose fields for adding the new UDF.
-
Define the new UDF attributes.
-
Code to represent the UDF.
-
Description of the UDF.
-
The Data Type as it should appear on the data entry form
-
SysType Category is available for selection only if SysType is the selected Data Type.
-
Select whether the UDF is Active.
-
Select whether the UDF is a required field.
-
Enter the Display Oder as it should appear in the list.
-
Click Insert to add the UDF.
-
Click Cancel to cancel out of task.
-
OR
Click the Pencil icon to edit an existing UDF next to the code in the list. The line item is active for editing.
-
Click Save.
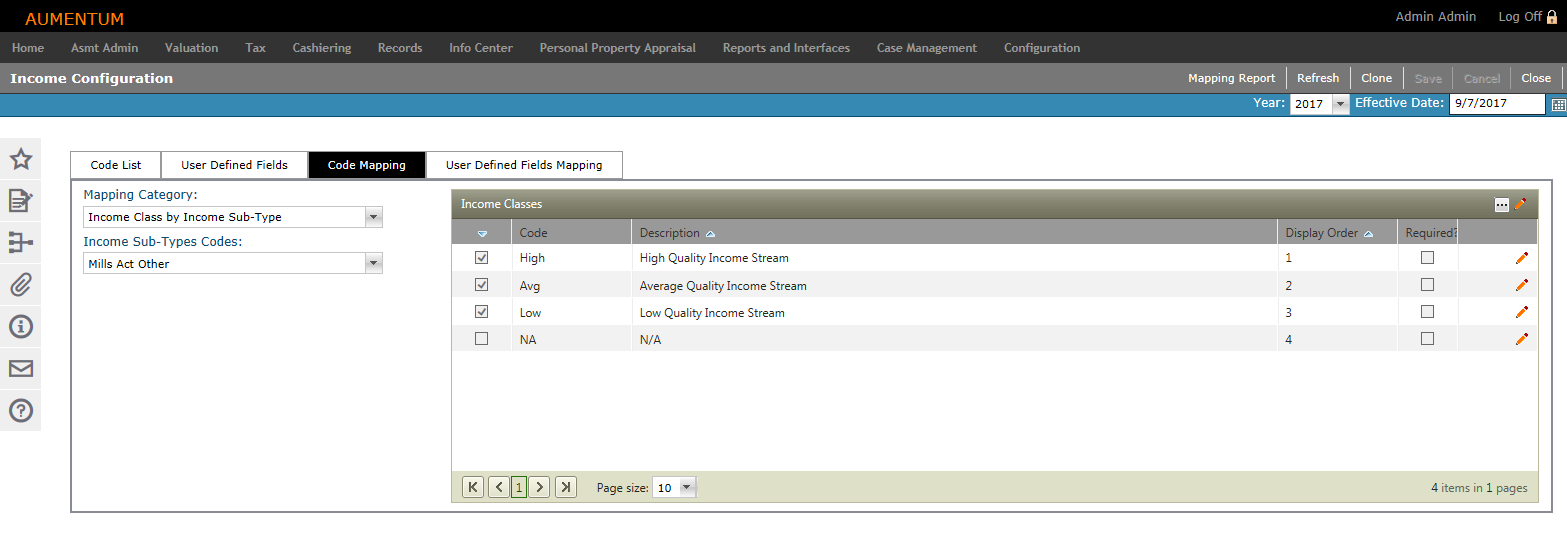
Code Mapping
NOTE: The Clone feature is available from the Code Mapping and User Defined Fields tabs. The Clone feature allows you to quickly clone data relationships from one code to any other code in the same list-level code list.
-
Select a Mapping Category (and other additional sub-categories/types, if applicable) from the list.
-
Map applicable codes, as desired and click Clone. The Clone To pop-up displays.
-
Select one or more Class Codes from the list to clone adjustments definitions to.
-
Click OK to complete the clone.
-
Click Cancel to cancel the clone task.
Steps
-
Select the Mapping Category and associated Codes. Codes for the selected categories populate in the grid to the right.
-
Click the Pencil icon to edit an individual code next to the code in the list. The line item is active for editing.
-
Display Order - Enter a numeric value identifying where the code appears in the select list.
-
Selectable - When selected, the code is available for selection in the Aumentum application.
-
Click the green check mark to save all changes.
-
Click the red X to cancel all changes and exit the editor.
OR
Click the Pencil icon in the header panel to edit all codes in the list. The entire list is active for editing upon clicking the edit icon.
OR
Click the View Filter Options icon to expose the filtering tool in the panel header.
Continue editing Code Mappings, as desired.
-
Click Save.
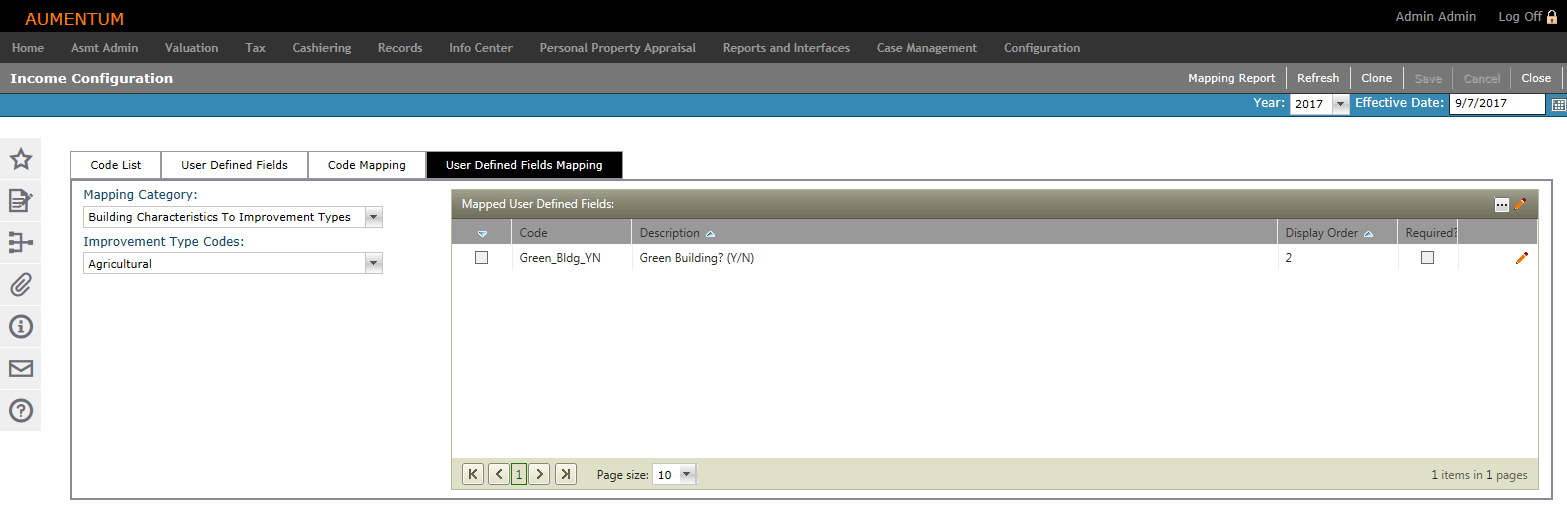
User Defined Fields Mapping
Steps
-
Select the Mapping Category and associated Codes. Codes for the selected categories populate in the grid to the right.
-
Click the Pencil icon to edit an individual code next to the code in the list. The line item is active for editing.
-
Display Order - Enter a numeric value identifying where the code appears in the select list.
-
Selectable - When selected, the code is available for selection in the Aumentum application.
-
Click the green check mark to save all changes.
-
Click the red X to cancel all changes and exit the editor.
OR
Click the Pencil icon in the header panel to edit all codes in the list. The entire list is active for editing upon clicking the edit icon.
OR
Click the View Filter Options icon to expose the filtering tool in the Mapped User Defined Fields panel header.
Continue editing UDF Mappings, as desired.
-
Click Save.
-
Click Refresh to clear all selections and refresh the page.
-
Click Clone to clone the mapped data.
-
Click Cancel to discard changes since the last Save and retain the current view.
-
Click Close to end the task.
Tips
-
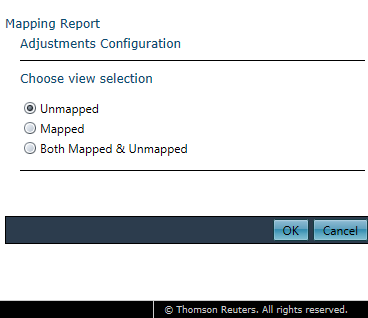
Click Mapping Report to select Mapping Report Options from the pop-up which displays and generate a report of the mappings which have been mapped, unmapped or both mapped and unmapped.
-
Select View Selections and click OK. The report is exported to a Microsoft Excel worksheet.