Condominium Projects
Navigate:  Valuation > Configuration > Condominium Projects
Description
Create and configure new condominium projects and define the various Unit Types that may be present within a project from the Configure Condominium Projects screen.
Configure Condominium Projects includes three tabs:
-
Project Description – Displays an overview of the project and condo-specific characteristics that are within the project. You have the ability to edit characteristics from this view.
-
Unit Type Summary – Identify the number of Units and types of Units/floor plans present in the project.
-
Unit Type Detail – Select Building Types/styles/characteristics specific to the selected Unit Type(s).
Initially navigating to the Configure Condominium Projects task displays a blank screen.
- Click New Search to navigate to the Advanced Search screen to search by Condominium Projects.
OR
Click New to add a new condominium project on the Add Condominium Project screen.
Project Description
The top portion of the Project Description tab displays a read-only description of the project.
-
Stated Units - Total number of Units that exist in the project.
-
Defined Units - Total number of Units accounted for as defined Unit Types.
-
Assigned Units - Total number of Units that have been assigned to account PINs in Aumentum.
-
Project Class Code - The default Class Code assigned to the Unit Types within the project.
-
Neighborhood Code and Description - Each project must be assigned to a Neighborhood.
-
Subdivision Code / Description / Lot Count (optional) - If the project has been assigned to a Subdivision, the Code Description and Lot are displayed.
The bottom portion of Project Description includes three subtabs.
- Characteristic
Categories
Select the Characteristic Categories that are selectable within the project. The list contains all defined Building Characteristics.
- Edit an existing Characteristic by clicking the Pencil icon next to the code in the list. The Display Order and Required fields are active for editing.
-
Click the green check mark to save all changes.
-
Click the red X to cancel all changes and exit the editor.
-
Click Save to save all changes.
OR
Click the Pencil icon in the header panel to edit all codes in the list. The entire list is active for editing upon clicking the edit icon.
OR
Click Cancel to cancel all changes and exit the editor.
- Characteristic
Codes
Define what Characteristic Codes are selectable within the project.
- Click the Pencil icon to edit an existing Characteristic by selecting a Characteristic Category next to one or more codes in the Characteristic Codes grid The Display Order and Required fields are active for editing.
-
Click the green check mark to save all changes.
-
Click the red X to cancel all changes and exit the editor.
-
Click Save to save all changes.
OR
Click the Pencil icon in the Characteristic Codes header panel to edit all codes in the list. The entire list is active for editing upon clicking the edit icon.
OR
Click Cancel to cancel all changes and exit the editor.
- Notes
Contains notes that are specific to the project.
The Notes tab uses standard Aumentum Notes functionality.
-
Optionally use the Key Word Filter to filter the notes that display. Notes relevant to the selected Key Word, if any, display in the far left panel.
-
Select the Visibility. This selection determines if the Note is Private (seen internally) or Public (displayed on a public portal such as Aumentum eGovernment).
-
Select Key Words to affiliate with the Note. Use the left and right arrows to move Key Words to/from the selected panel.
-
Enter a Note.
-
Optionally run a Spell Check.
-
Click Save.
OR
Optionally Delete the Note.
-
Unit Type Summary
Each Unit within a Condominium Project must be described by a single Unit Type, but one Unit Type can describe more than one Unit in the project.
Each Unit Type represents an Appraisal Site and is capable of tracking land segments, a single building, features, and common area assignments (e.g., General or Limited Common Areas).
Steps
-
Click the right arrow to expand any Unit Types in the Project Unit Types grid. Detailed information about the Unit is displayed (see screen capture above).
-
Click Add New to add a new Unit Type to the project. The New Unit Template wizard is displayed.
-
Define the new Property Unit and click Next.
-
Unit Type Code & Description - Required fields to identify the Unit Type within the project.
-
Quantity in Project - Define how many separate units within the project share the same floor plan.
-
Common Area - Define the prescribed percentage of area of ownership for the Unit Type. NOTE: Fractional percentages are not recognized.
-
Class Code - Select the code to be assigned to the Unit Type.
-
Assign Appraisal Site Level Information - Select if the Unit Type includes an Appraisal Site.
-
Assign Land Records - Select if the Unit Type includes land records. When selected, the Land Edit user interface is added to the New Unit Template Wizard process.
-
Assign Building Records - Select if the Unit Type includes building records (this is true for most condominium Unit Types). When selected, the Building and Section Edit user interface is added to the New Unit Template Wizard process.
-
Assign Features - Select if the Unit Type includes feature records. When selected, the Feature Edit user interface is added to the New Unit Template Wizard process.
-
Click Finish to save the Property Unit.
-
Click Cancel to cancel and exit the editor.
-
View and/or edited notes specific to the Unit Type from the Unit Type Notes panel. Unit Type Notes uses standard Aumentum Notes functionality.
-
Optionally use the Key Word Filter to filter the notes that display. Notes relevant to the selected Key Word, if any, display in the far left panel.
-
Select the Visibility. This selection determines if the Note is Private (seen internally) or Public (displayed on a public portal such as Aumentum eGovernment).
-
Select Key Words to affiliate with the Note. Use the left and right arrows to move Key Words to/from the selected panel.
-
Enter a Note.
-
Optionally run a Spell Check or delete the note.
- Click Save.
OR
Click next to any Project Unit Type in the list to copy its definition (e.g., Description, Quantity in Project, Common Area, Class Code, Features, etc.) to a new Unit Type.
NOTE: The Wizard's data collection process and required data fields adjust with your data selections. For example, if the Assign Features checkbox is selected, the Wizard navigates you to assign features, otherwise it does not.
Unit Type Detail
Navigate between Unit Types by selecting another Unit from the Unit Type worklist drop-down list, located in the top panel of the screen.
The Unit Detail Type tab contains five subtabs.
-
Site Data - Displays an overview of the Unit Type and exposes two additional subtabs used to add appraisal site flags, area, and adjustments information, and notes relevant to the appraisal site.
-
Land - Displays land records related to the site.
-
Buildings - Displays building-related characteristics and each section of structural elements, unit counts, floor detail and adjustments.
-
Features - Displays features related to the site.
-
Notes - Notes specific to the Unit Type are displayed.
Side Panel
Use the flyout side panel to access more site information:
-
Sketch - View sketch information relevant to the appraisal site.
-
Site Plan - View floor plans for the appraisal site.
-
Photos - View photos of the site.
-
GIS - A GIS map of the project is displayed. Search for projects by highlighting an area on the GIS map and identifying all projects within the defined area. You can also create a worklist from the list of projects or navigate from parcel to parcel on the map.
-
Pictometry - View detailed aerial photographic images of the appraisal site.
Site Data
The top portion of the screen displays an overview of the Project Unit Type (selected from the Unit Type worklist).
The bottom portion of the screen displays two tabs.
-
Site Information - View, add, and/or edit Appraisal Site Flags, Area Data and Adjustments.
-
Notes - View, add, and/or edit Notes specific to the appraisal site
Steps for Unit description information
-
Click the Pencil icon in the top header panel to edit the Unit Type description information. The fields are active for editing.
-
Click the green check mark to save all edits.
-
Click the red X to cancel and exit the editor.
- Click Save.
Steps for Site Information
-
Click Add New in the Appraisal Site Flags, Area Data or Adjustments and Obsolescence grid headers. The edit fields are active.
-
Add the new Appraisal Site Flag Area Data and/or Adjustment.
-
Click the green check mark to save all edits.
-
Click the red X to delete the data.
-
Click Save.
Steps For Notes
View and/or edit appraisal site-specific notes from the Notes tab. The Notes tab uses standard Aumentum Notes functionality.
Land
The Land tab contains a summary grid that displays all land records. You have the ability to define land as a Common Area and modify the use of the land. A stated portion of ownership in the Common Area is expressed for each Unit's ownership percentage.
Steps
- Click the Add New icon to add a new land record. The Edit Land Use wizard displays.
-
Characteristics - Select the Land Use Info, Additional Characteristics (if applicable), and Size Records and select a Change Reason.
-
Adjustments - View, add, edit or delete any adjustments, as desired.
-
Notes - View, add, edit or delete any notes specific to the land.
-
Click OK.
-
Click on a line item from the Land grid to populate its related Land Characteristics and Adjustments in the panel below. The information displayed on the Characteristics and Adjustments tabs is read-only.
-
View a summary of the project Site Area. This information is read-only but can be edited from the Land grid (see previous steps).
-
View a summary of the Homesite's size. This information is read-only but can be edited from the Land grid (see previous steps).
- Use the flyout side panel to access more land information:
-
Sketch - View sketch information relevant to the land.
-
Site Plan - View floor plans.
-
Photos - View photos of the land.
-
GIS - A GIS map of the project is displayed. Search for projects by highlighting an area on the GIS map and identifying all projects within the defined area. You can also create a worklist from the list of projects or navigate from parcel to parcel on the map.
-
Pictometry - View detailed aerial photographic images of the land.
-
Click Save.
OR
Click the Pencil icon next to any item in the Land grid to edit its details. The Edit Land Use wizard displays.
OR
Click to add a new use of land. The Edit Land Use wizard displays.
OR
Click the Copy icon to add land from an established Unit Type data template.
The Edit Land Use wizard contains three subtabs.
Buildings
The entry of buildings is restricted to one building per Unit Type.
Steps
-
Click the Copy icon to add a building from an established Building Type data template.
-
Click the right arrow to expand a building in the Building Characteristics grid. Four subtabs display with read-only information related to the building.
-
Click the Add New icon to add a new building section. The New Section wizard displays.
-
Click the red X to delete a record.
-
Define the New Section.
-
Select the Improvement Style.
-
Enter the Year Built.
-
Select the Construction Class.
-
Select the Quality.
-
Select the Condition.
-
Enter the % Complete.
-
Add or edit any related Structural Elements.
-
Add or edit the elements' Unit Counts.
-
Enter the Change Reason.
-
Optionally access Sketch, Photo, and/or Pictometry information.
-
Click OK to save the new section and exit the wizard.
-
Click Cancel to exit the wizard without saving.
-
Click Save.
OR
Click the Edit Sketch icon to open the sketch editor for the selected building.
OR
Click the Pencil icon next to any item in the Building Characteristics grid to edit its details. The Edit Building wizard displays.
OR
Click the Pencil icon next to any section listed in the Building Sections grid. The Edit Section wizard displays.
Features
Steps
-
Click the Add New icon to add a new feature. The New Feature wizard displays.
-
Define the new feature.
-
Select a Feature.
-
Enter the Year Built.
-
Enter the Relationship Type.
-
Enter the % Complete.
-
Select the Grade of the feature.
-
Select the Effective Year.
-
Select the Object Type by which the feature is Attached/Related.
-
Select the Condition of the feature.
-
Enter the Remodeled Year.
-
Select another feature of which the new feature is Related.
-
Access the Size & Unit Counts, Elements & Adjustments, Feature Characteristics, and Notes tabs to continue defining the feature.
-
Select a Change Reason.
-
Click OK to save the new section and exit the wizard.
-
Click Cancel to exit the wizard without saving.
-
Click Save.
OR
Click the Pencil icon next to any existing feature listed in the Features Characteristics grid. The Edit Feature wizard displays.
OR
Click on any feature in the Feature Characteristics
grid to display its details below.
Notes
The Notes tab uses standard Aumentum Notes functionality.
-
Click New Search to navigate to the Advanced Search screen to search for another Condominium Project.
-
Click Refresh to clear all selections and refresh the page.
-
Click New to navigate to the Add Condominium Project screen to add a new project.
-
Click Close to end the task.
Common Actions
Edit Project Description - Edit the basic project's description.
Delete Project - Select to delete the condominium project.
Prerequisites
Appraisal Site Configuration, Building Configuration, Feature Configuration and Land Configuration are required before a project can be created in Aumentum.
Tips
-
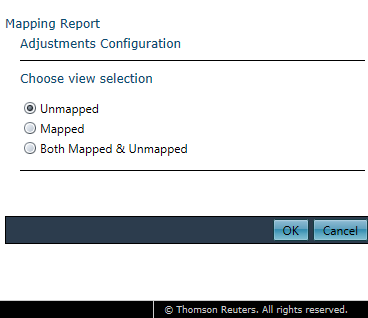
Click Mapping Report to select Mapping Report Options from the pop-up which displays and generate a report of the mappings which have been mapped, unmapped or both mapped and unmapped.
-
Select View Selections and click OK. The report is exported to a Microsoft Excel worksheet.