Appraisal Site Configuration
Navigate:  Valuation > Configuration > Appraisal Site Configuration
Description
NOTE: Appraisal Site Configuration settings are initially setup by your Aumentum Implementation team.
Use the Appraisal Site Configuration screen to define and modify the data, fields, and drop-down lists that are available when you edit an appraisal site's information in the Aumentum Platform.
Only users with proper permissions can modify the Appraisal Site Configuration screen.
Steps
Appraisal Site Configuration contains four tabs:
-
Code List – Create and maintain Market Areas and other appraisal site-related data.
-
User-Defined Fields (UDF) – Create and maintain user-defined appraisal site characteristics.
-
Code Mapping – Map sub-market areas to related market areas.
-
User-Defined Fields Mapping – Map related UDF codes together.
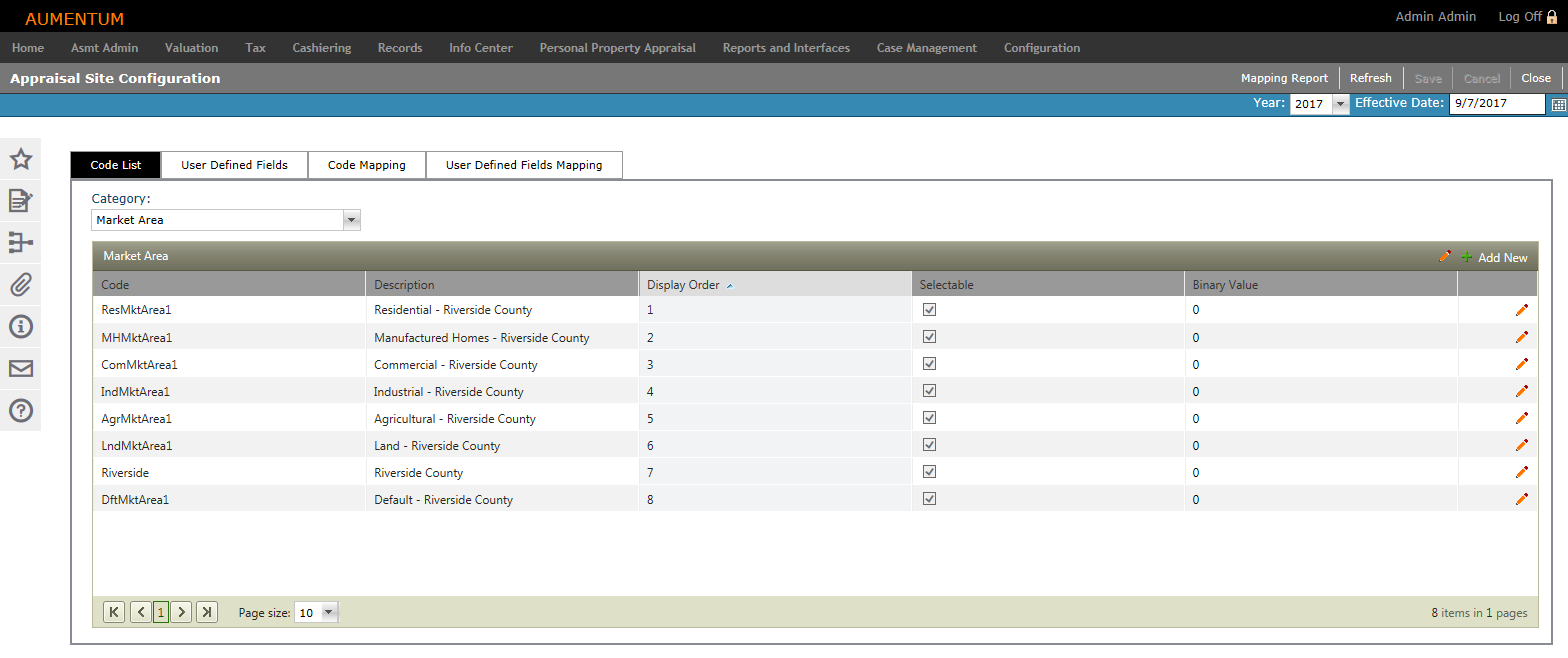
Code List
-
Make a selection from the Category drop-down list. The grid column options and available fields populate based on your Category selection.
-
Market Area – Optionally define Market Areas within your jurisdiction that have similar economic and sale factors (e.g., Eastside).
-
Sub-Market Area – Optionally define secondary Sub-Market Area groupings within a Market Area (e.g., Upper Eastside).
-
Appraisal Size Type – Define how an appraisal site is measured (e.g., total acre).
-
Appraisal Class Code – Define class codes specific to appraisal-related information (e.g., Single Family Residential). NOTE: The Class codes that are defined in this area are often very similar, if not the same, as the Class Codes that are defined in the Records module.
-
Valuation Model Status – Define the statuses that are available for each configured valuation model.
-
Site Assignments – Define the roles that are available for assignment on the RPA Main Page in the Appraisal Site tab > Site Data sub-tab (e.g. Appraiser, or Supervising Appraiser).
-
-
Click Add New to create a line item that is active for editing.
-
Define the code's attributes and save.
-
Code – Enter a brief code.
-
Description – Enter a description of the code.
-
Display Order – Enter a numeric value identifying where the code appears in the select list.
-
Selectable – When selected, the code is available for selection in the Aumentum application.
-
Category-dependent Attributes:
-
Sub-Market Area
-
Binary Value - Assign a numeric value for grouping, independent of other grouping
-
-
Appraisal Class Code (Columns may display in a different order, depending on your jurisdiction)
-
No Buildings - Undocumented functionality
-
Base Class Code - Undocumented functionality
-
Impr Size Type Breakdown - Future functionality
-
Land Size Type Breakdown -Future functionality
-
Impr Unit Category Breakdown - Future functionality
-
Features Only - Undocumented functionality
-
Class Group - Place an Appraisal Class in a Class Group for use in Time Period Configuration
-
Income Template - Define if there is a default Income Template associated with this Appraisal Class and what that template is
-
Objects To Be Queried - Future Functionality to be used in conjunction with Breakdown columns; the list aof available options for Impr Size Breakdown", "Land Size Type Breakdown", and "Impr Unit Category Breakdown" will be filtered based on selections made in this column
-
Single Building - Undocumented functionality
-
-
Site Assignments
-
Role Value - Role Assigned to user (Configuration>Security and User Maintenance>Roles)
-
-
-
Click the green check mark to save all changes.
-
Click the red X to cancel all changes and exit the editor.
-
-
Click Save.
OR
Click the Pencil icon to edit an existing code next to the code in the list. The line item is active for editing.
OR
Click the Pencil icon in the header panel to edit all codes in the list. The entire list is active for editing.
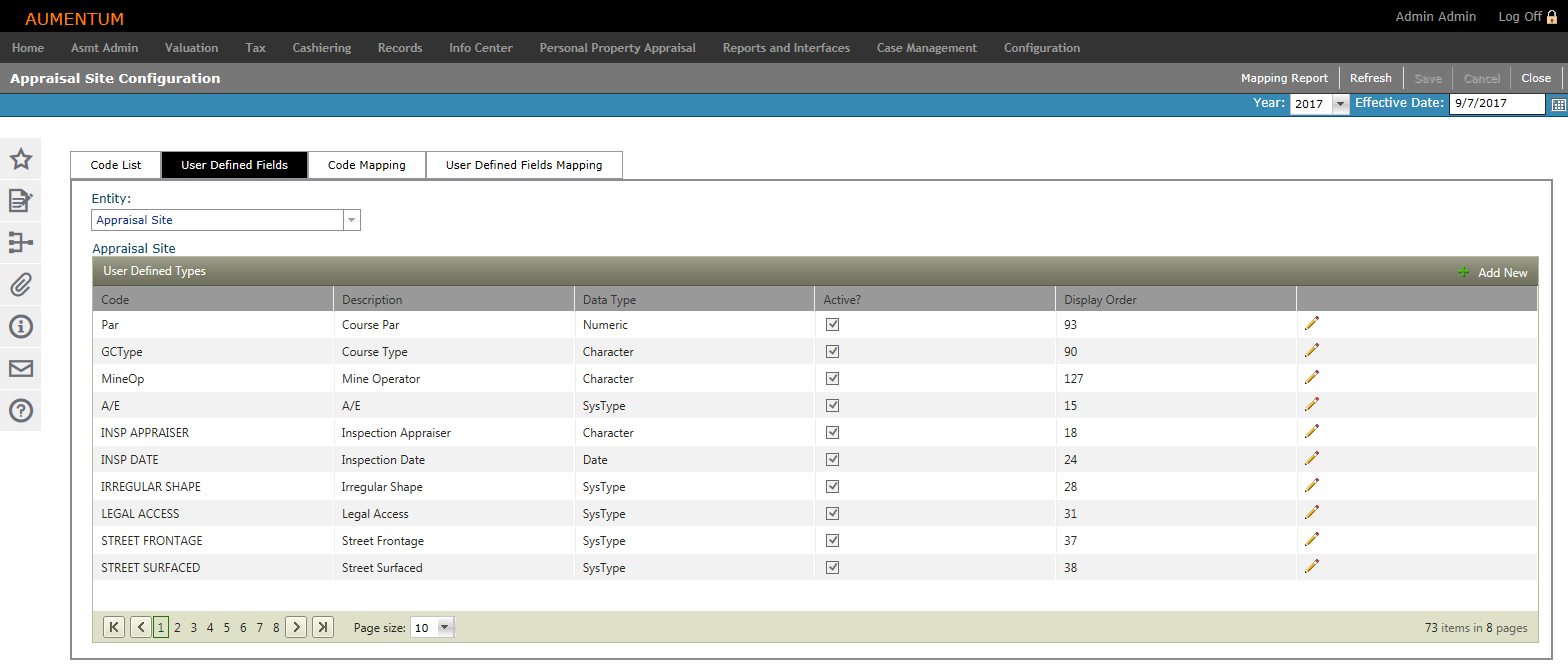
User-Defined Fields
-
Select the Entity for which you are defining a User Defined Field (UDF). The grid column options and available fields populate based on your Entity selection.
-
Click the Add New icon to add a new code to the selected Entity. The grid expands to expose fields for adding the new UDF.
-
Define the new UDF attributes.
-
Code to represent the UDF.
-
Description of the UDF.
-
The Data Type as it should appear on the data entry form.
-
SysType Category is available for selection only if SysType is the selected Data Type.
-
Select whether the UDF is Active.
-
Enter the Display Oder as it should appear in the list.
-
Click Insert to add the UDF.
-
Click Cancel to cancel out of task.
-
-
-
Click Save.
OR
Click the Pencil icon to edit an existing UDF next to the code in the list. The line item is active for editing.
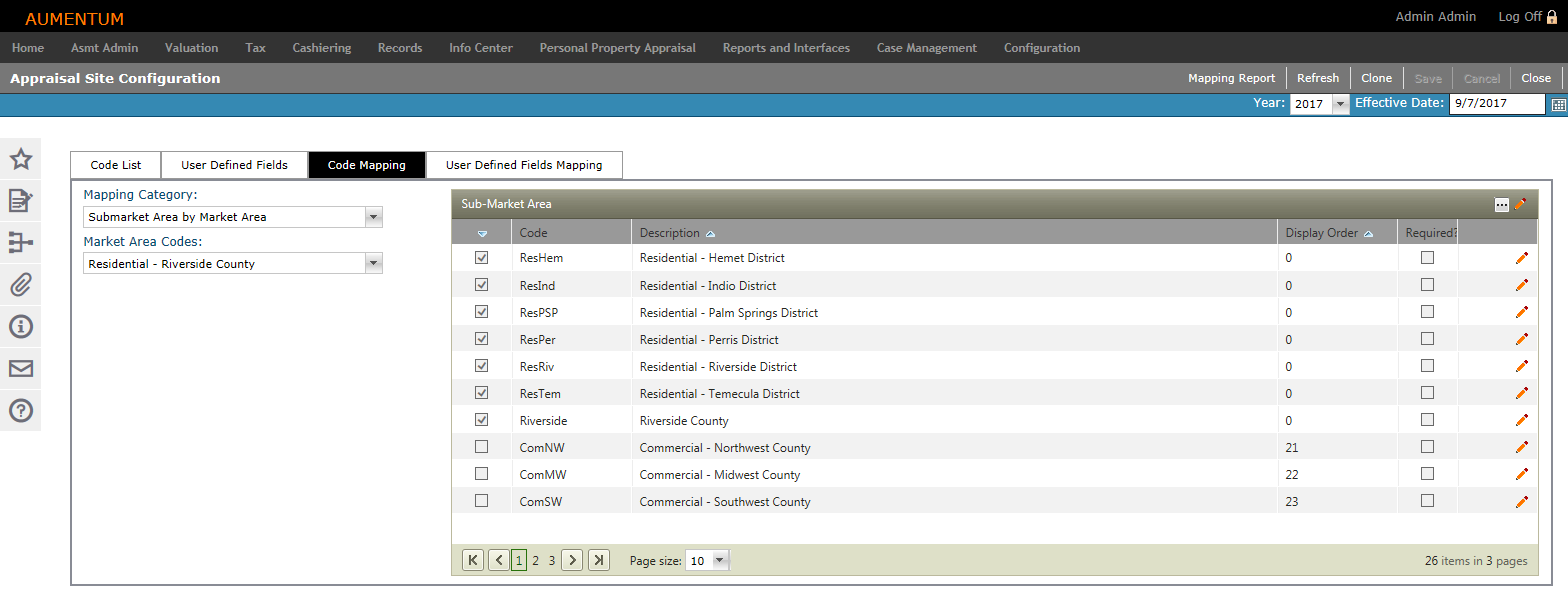
Code Mapping/User Defined Fields Mapping
-
Select the Mapping Category and associated Codes. Codes for the selected categories populate in the grid to the right.
-
Edit an individual code by clicking the Edit icon next to the code in the list. The line item is active for editing.
- Continue editing Code Mappings, as desired.
-
Select or clear the checkbox at the left end of a row to add or remove the code to the selected Category.
-
Display Order – Enter a numeric value identifying where the code appears in the select list.
-
Required – When selected, the code is a required field in the Aumentum application.
-
Click the green check mark to save all changes.
-
Click the red X to cancel all changes and exit the editor.
-
Click Save.
OR
Click the Pencil icon in the header panel to edit all codes in the list. The entire list is active for editing upon clicking the edit icon.
OR
Click the View Filter options icon to expose the filtering tool in the panel header.
Cloning
The Clone feature is available in the Code Mapping and User -Defined Fields Mapping tabs. You can quickly clone data relationships from one code to any other code in the same list-level code list.
-
Select the checkbox for one or more items in the Mapped User-Defined Fields panel.
-
Click Clone.
-
In the Appraisal Class Code pop-up, select the checkbox for one or more items and click OK.
-
Click Cancel to cancel the clone task.
-
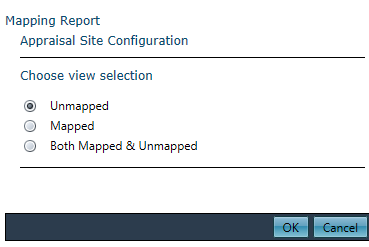
Mapping Report
Click Mapping Report in the Command Item bar to open the Mapping Report pop-up.
-
Choose a view selection and click OK. The report is automatically exported to a Microsoft Excel worksheet.
Common Actions
Create New Systype – Navigate to the Select a Systype Category screen to create or edit a systype category.
Copy Class Codes from Records Module – Selecting this Common Action displays the Records Module Class Codes list.
-
Select one or more class codes.
-
Click OK to copy the selected class codes.
-
Click Cancel to cancel this task.