Bonds
Navigate:  Tax > Special Assessments > Setup > Bonds > [search for and select bonds] > Maintain Bond Information
Description
After setting up a bond, you can associate it with an amortized special assessment via Tax > Special Assessments > Special Assessment Maintenance.
Steps
-
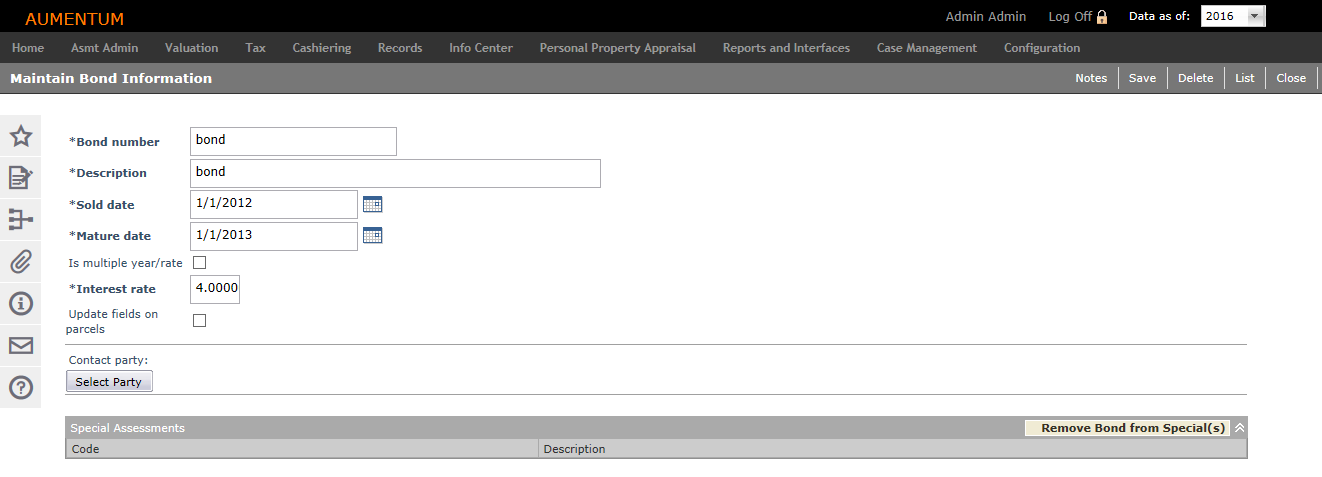
On the Maintain Bond Information screen, enter a bond Number and description.
-
Enter the Sold Date and Mature Date.
-
Enter an Interest Rate.
OR
Select the Is Multiple Year/Rate checkbox. Click the Multiple Year/Rate button to open the Set Interest Rates screen.
-
If you've made changes to an existing bond that has already been added to a special assessment with revenue objects, select the Update Fields on Parcels checkbox. When you save the bond, the update process goes to the batch processor and the associated revenue objects are updated.
-
Click Select Party to open the Records Search for Legal Party screen.
- Search for and select a legal party. You automatically return to the Maintain Bond Information screen.
-
In the Command Item bar, click Notes to open the Notes View screen. This option is not available when creating new bonds.
-
Click Remove Bond from Special(s) to delete the bond from all associated special assessments.
- Click Save to update the bond information.
-
Click Delete to remove the bond.
-
Click List to return to the Search for Bonds screen.
-
Click Close to end the task.