Calculations and Postings
Navigate:  Tax > Special Assessments > Calculations and Postings
Description
Through this task, you are able to calculate special assessments, set them ready to post, and post them to Levy Management.
NOTE: You can allow a user role to have calculation access and/or posting access for Special Assessments. See Setup at the end of this topic.
Steps
-
Calculate and post special assessments en masse.
You can choose one or more special assessments to run the calculations and postings for. The processes run one special assessment at a time until all selected specials are completed.
-
Choose one special assessment to calculate and post.
You can choose to run one step, multiple steps, or all steps, but the steps must be completed in order.
The calculation process steps are the same for all types of special assessments, but work in slightly different ways.
-
Amortized Charges – This calculation creates the amortization information for all years of the special assessment. Then puts all the tax years' the information into the calculation tables and sets the status to 'Ready to post'.
-
Fixed Charges – This calculation takes the revenue object amount for the selected tax year and puts the information into the calculation tables, then sets the status to Ready to post.
- Rate Table – This calculation process figures the amount for each revenue object on the special assessment according to the rate structure, then sets the status to Ready to post.
The posting step is the same for all types of special assessments. This step posts amounts to Levy Management to use when creating Tax Bills
-
After the calculation has been completed, the posting step makes the special assessment information available for Levy Management.
A correction is triggered when adding, removing, or changing a posted PIN from a special assessment and then calculating and posting the special assessment. The correction is processed based on the rules for the Value Change Reason you select when posting the special assessment.
NOTE: Any special assessments marked Is paid in full on the Maintain Special Assessment Revenue Objects screen have an SA value of zero and a SA Fee value of zero when posting.
Calculate and post special assessments en masse
-
On the Search for Special Assessments to Calculate and Post screen, make a selection from the Value Change Reason drop-down list
If you are not posting, you can leave this field blank. Value change reasons are used to determine how the posting is processed; they are set up via Asmt Admin > Setup > Valuation Change Reason Mapping.
-
Select the Force recalculate all checkbox, if applicable.
- Make a selection from the Accumulate counts for commission charge drop-down list.
-
In the Search Critieria panel, enter or select your search criteria.
-
Code/Description – This field searches on both code and description. A special assessment is listed in the search results if the entered text matches either the special assessment code or the special assessment description.
-
Calculation type – You can choose Amortized Charges, Fixed Charges, or Rate Table.
-
Category – Special Assessment Categories are system- and user-defined Systypes.
-
Calc/Post status – You can choose No calc/post errors, With calc/post errors, Not calculated/posted, or Running calc/post.
-
Tax Authority – Search by the Tax Authority attached to the special assessment.
If you selected Amortized Charges from the Calculation type drop-down list, three additional search criteria choices display:
-
Bond – Search by the Bond attached to the special assessment.
-
Status – Choose to search for Active, Inactive, Frozen, No Billing special assessments.
- SA type – Search by the type you selected on the Amortization Detail tab when setting up the special assessment.
-
Click Search.
-
In the Search Results panel, select the checkbox next to each special assessment and click Post to calculate and post the selected special assessments. The Monitor Batch Processes screen opens automatically.
NOTE: Change the Results/Page number in the Search Results panel title bar to view more or fewer special assessments per results page. The minimum amount is 10 special assessments per page.
Choose one special assessment to calculate and post
-
Follow steps 1 through 5, above.
-
In the Search Results panel, click on the name of a special assessment to open the Calculate and Post Special Assessments screen.
-
In the Calculation panel, select the checkbox for Force recalculate all. For example, if you change a rate and attempt a recalculate, no recalculation occurs because all the PINs are flagged as Ready to Post or Posted. Selecting this checkbox requires all PINs to be calculated regardless of their status.
NOTE: This checkbox is automatically cleared after you click Calculate, to avoid any accidental forced recalculations.
-
In the Steps tab, click Calculate to run the selected steps.
NOTE: A special assessment is locked when a user begins a calculation. The lock is lifted when the calculation is complete. If you select a locked special assessment, a message is displayed. Click Unlock to remove the lock from the other user and give the lock to you. Be careful using the unlocking feature. Switching the lock can cause calculation failure.
NOTE: Amortized special assessments are only amortized in the first year of the special assessment. The amortization start year is based on the revenue object's start year, not the special assessment start year. In years after the first year, the calculation steps for amortized special assessments takes the amortized amount for the selected tax year and marks it Ready to Post.
-
Click Refresh to update the status.
-
In the History tab, make a selection from the Iteration drop-down list in the panel title bar to view the history of each calculation attempt.
NOTE: The History tab summarizes the Log tab information for each of the process steps.
-
In the Log tab, make a selection from the Iteration drop-down list in the panel title bar to view the log for each calculation attempt
-
In the Files tab, you can view the Not Posted Special Assessment Value Report.
-
In the Posting panel, make a selection from the Value Change Reason drop-down list, which indicates how Levy should react to the Special Assessment Posting process. For example, the Value change reason indicates if a roll correction should be triggered. Value change reasons are set up in Asmt Admin > Setup > Valuation Change Reason Mappings.
-
In the Steps tab, click Post to run the step.
-
Click Refresh to update the status.
-
In the History tab, make a selection from the Iteration drop-down list in the panel title bar to view the history of each posting attempt.
-
In the Log tab, make a selection from the Iteration drop-down list in the panel title bar to view the log for each posting attempt.
-
In the Files tab, you can view the Posted Special Assessment Value Report.
Tips
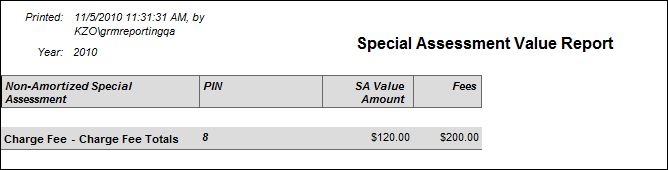
An Application Setting determines the detail level in the Special Assessment Value Report that is printed at the end of the calculation process and at the end of the posting process. The 'Totals Only' report prints by default. To instead print the 'PIN List' report, go to Configuration > Application Settings > Maintain Application Settings. Select the Setting type of Tax year and the Module Special Assessments. Change the setting 'Default Totals Only for mass process Calculation/Posting' to false.
When posting a special assessment, the Assessment Administration Functional Calendar must have a Special Assessment Posting event for the Type of revenue objects on the special assessment (real, personal, etc.). If the event does not exist, special assessment posting fails with the following message: Could not find the SPA Posting event defined in any period of the functional calendar for assessment administration with a calendar type of (real, personal, etc.).
Report Samples
Posting Summary

Batch Summary
SA Value Report -Totals Only
SA Value Report - PIN List

Common Actions
View Batch Processes – Opens the Monitor Batch Processes screen.
Setup
To set user security for the Calculate and Post processes:
- Click Configuration > Security and User Maintenance > Roles.
- On the Maintain a Role screen, click Edit for the role to which you want to grant access.
- On the Edit Role Details screen, click Non-Menu Items in the Command Item bar.
- Select SA from the Modify security for drop-down list.
- In the Details panel, click to select AllowCalc and/or AllowPost.
- In the Rights panel, select each checkbox for both items to allow access. Clear each checkbox to deny access.
- Click Set Rights.
- Click Save in the Command Item bar.
- Click Close to end the task.