Jurisdictional Change Tracking
Navigate:  Tax > Levy Management > Jurisdictional Changes > Jurisdictional Change Tracking
Description
Use this task to import a BOE code chart of jurisdictional changes. For example, you might need to transfer the annual TAG rates to a new TAG due to jurisdictional changes. NOTE: Annual Tax Increment (ATI) factors at the TAG level are synonymous with Aumentum TAG Ratios.
Aumentum supports information the ACO (Auditor-Controller’s Office) captures in the Tax Transfer Guide and uses it to produce preliminary TAG ratios.
A workflow is also generated from the Jurisdictional Change Tracking task. See the Workflow section below.
For BOE Code chart imports, potential revenue district updates are identified based on a review of the annual BOE District Chart, the BOE TRA Change Actions from each logged TRA Change Notice, and from the County TRA District configuration special instructions.
Steps
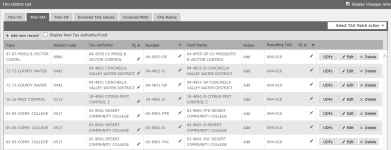
- On the Search Jurisdictional Change Log screen, enter your search criteria and click Search.
- In the Jurisdictional Change Log panel, select the checkbox for one or more items in the grid and click Next in the Command Item bar.
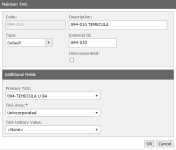
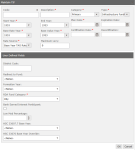
- On the Maintain Jurisdictional Change Item screen, enter or edit information in the Identification panel.
- In the TAG panel, click Add new record.
-
Enter all or part of the TAG number to display a pop-up scrolling field of existing TAGs from which you can select; or enter the number.
-
If retiring the TAG, select the Retire checkbox.
-
Make a selection from the Action Type drop-down list
-
Define a Resulting TAG number if applicable. Optionally, click the + Plus sign in the column header to display a list of TAG numbers from which to select.
-
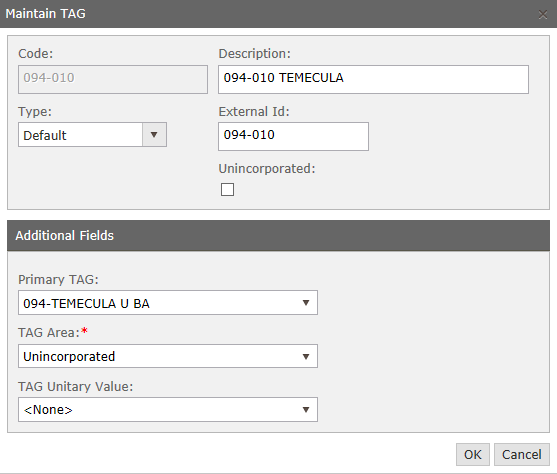
Enter the Code. If you do not know the code, click the magnifier icon to open a pop-up containing existing TAGs.
-
Enter a Description.
-
Select the Type.
-
Enter an External Id.
-
Select the TAG Area.
-
Select the TAG Unitary Value.
-
Click OK and close the pop-up.
-
Select the Add checkbox if you are adding the TAG.
-
Click Update.
-
Click Cancel to discard your changes.
-
Click Edit on any line to edit the details.
-
Click Delete on any line to delete the record.
-
In the TAG District List panel, there are several tabs.
- Click Add New Record or click Edit for an existing item in the grid.
-
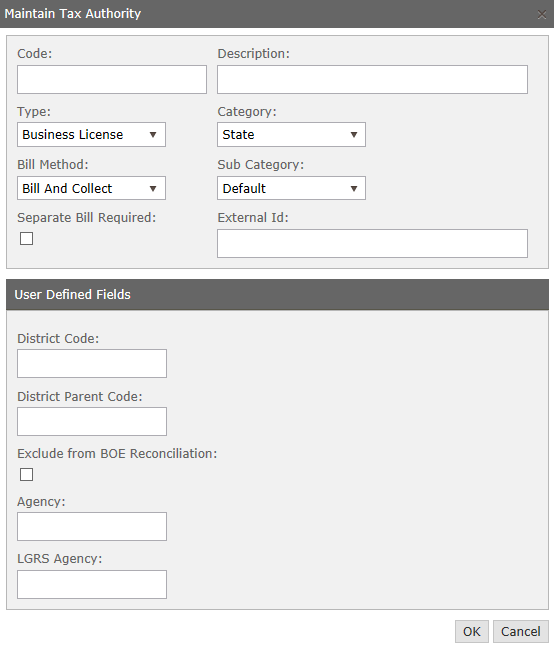
Define the Tax Authority. Optionally, click the magnifier icon in the column header to open a pop-up. Search for and select the Tax Authority, then click Add.
-
Make a selection from the Action drop-down list.
-
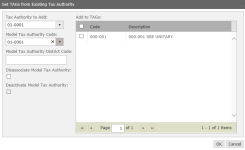
Define a Resulting TAG number, if applicable. Click the magnifier icon to open the Get TAGs from Existing Tax Authority pop-up.
-
Make a selection from the Tax Authority to Add drop-down list.
-
Optionally, make a selection from the Model Tax Authority Code drop-down list after which to model the changes.
-
Optionally, enter a Model Tax Authority District Code.
-
If a Model Tax Authority is associated with the tax authority, select the Disassociate Model Tax Authority checkbox (blank by default) to disassociate the model.
- The Deactivate Model Tax Authoritycheckbox is activated when you select the Disassociate Model Tax Authority checkbox.
-
Select the TAGs from the Add to TAGs panel and click OK to close the pop-up and populate the TAG District List panel with the selected TAs.
OR
-
Click the Plus sign to display a list of TAG numbers from which to select. (See above as for the TAG panel.)
-
Click the Filter icon to open the Filter by pop-up and narrow the selection of items in the grid, if necessary.
- Click Update.
-
Click Cancel to cancel the update.
-
Click Edit on any line to edit the details.
-
Click Delete on any line to delete the record.
- If available in your jurisdiction, click Matching Composition and select the Matching TAG Composition report, the Matching TAG Composition - Exact Match report, or both, and click Print to generate the report.
-
Select the Display New Tax Authority/Fund checkbox to include that information in display and reporting.
-
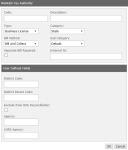
Click Add New Record or click Edit for an existing item in the grid.
-
Define the Tax Authority.
-
Click the magnifying glass icon in the column header to open a pop-up from which you can select and maintain Tax Authority information.
-
Click the Plus icon to open a pop-up to define search criteria and UDFs for the jurisdictional change.
-
-
Enter the Number. Click the Plus icon to open a pop-up to define search criteria and UDFs for the jurisdictional change.
-
Make a selection from the Action drop-down list.
-
Define a Resulting TAG number if applicable.
-
Click the magnifying glass icon to open a pop-up from which you can get TAGs from an existing TAF.
- Click the Plus icon to open a pop-up to define search criteria and UDFs for the jurisdictional change.
-
-
Click Update.
-
Click UDFs to open a pop-up from which you can select UDFs to include in the change item and define the Expired From Year and define the fund to which to redirect the values.
- Select TAG Match Action – Default view for the TAG-TAF tab
- Exact TAG Ratios Match – Opens the TAG Ratio Matches pop-up
- Reports – Opens the Matching TAG Composition Reports pop-up
-
Click Add new record or click Edit for an existing item in the grid.
-
Make a selection from the drop-down list in the TIF District Name drop-down list.
- Make a selection from the Action drop-down list. Click the Plus icon to open a pop-up to define search criteria and UDFs for the jurisdictional change.
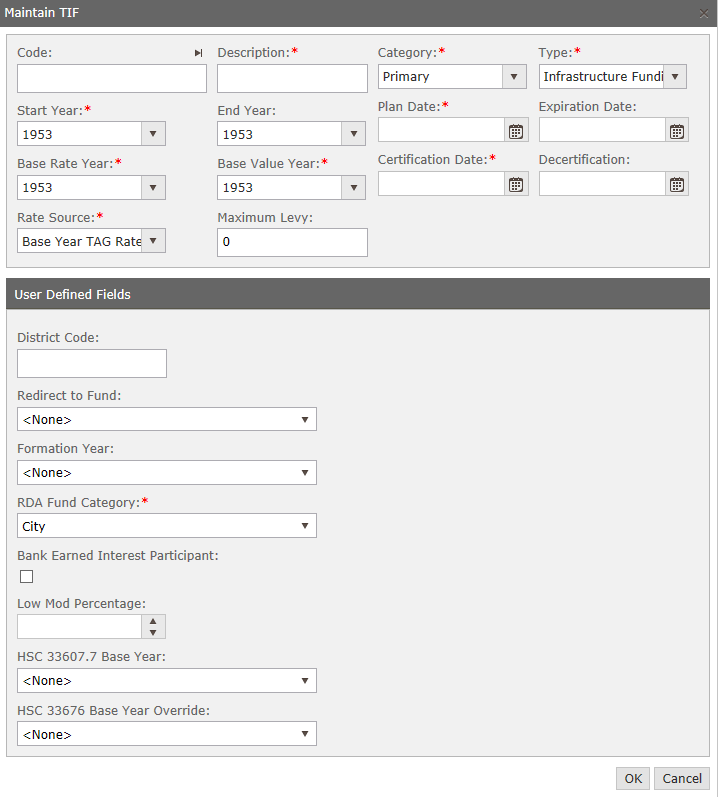
- Make a selection from the Resulting TAG drop-down list. Optionally click the + Plus sign to open a Maintain TIF pop-up.
-
Click the arrow above the Code field to automatically enter the next available number for the TIF.
- Define the data as applicable and click OK. Close the pop-up.
-
Optionally, enter a Resulting TAG or click the Plus icon to search for and select the TAG on the Maintain TAG pop-up.
-
Click Update.
-
Click Cancel to discard your changes.
-
Optionally, select the Display Changes Only checkbox in the panel's title bar.
-
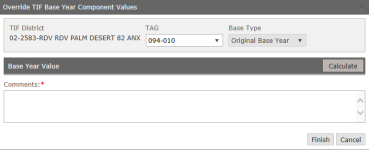
Click Edit to open the Override TIF Base Year Component Values pop-up to calculate the values.
-
Select the TAG.
-
Select the Base Type.
-
Click Calculate.
-
Enter comments.
-
Click Finish.
-
Click Cancel to discard your changes.
-
Click Save in the Command Item bar. The resulting amount is displayed in the Adjustment column.
-
View a list of resulting PINs.
-
Click Edit to modify values as applicable.
- In the TAG District List title bar, select the checkbox next to Display Changes Only, which applies to the Resulting TAG column.
- Modify TAG Ratios as desired.
TAG-TA
 TAG-TAF
NOTE: When you set the Maintain Base Revenue at the TAG Level application setting to True, this process consolidates TAGs based on Funds match in this tab.
Make a selection from the drop-down list in the panel's title bar.
TAG-TIF

 Involved TAG Values
 Involved PINs
 TAG Ratios
Use temporary TAG Ratios to calculate and produce a Revenue Impact report for districts during the study phase.


Viewing Mismatches
-
Click View Mismatches to open the View and Manage TAG Profile Mismatches screen on which you can view mismatches as well as manage the details.
Creating a New Log
-
Click New to create a new change log, defining all the data as described in the previous steps.
Adding Notes
-
Click Notes to add notes about the jurisdictional change item.
Deleting a Jurisdictional Change Item
-
Click Delete in the command bar at the top of the screen to delete the entire jurisdictional change item.
IMPORTANT: This button is not available for any jurisdictional change item that has been approved.
Saving and Completing
-
Click Save to save all changes.
-
Click Cancel to cancel.
-
When you are finished maintaining all data, adding new records, etc., click Complete to finish the log.
-
Click List to return to the Search Jurisdictional Change Log screen.
-
Click Close to end the task.
Workflows
Jurisdictional Changes Import
A workflow is triggered as a result of the jurisdictional changes import. If multiple recipient fund matches exist in the new TAG, no processing is performed. When no match is found, no processing is performed. These two instances generate a Jurisdictional Change workflow for processing with the task of TAG Ratio out of Balance. All other jurisdictional changes are shown in the Jurisdictional Change workflow with a task of Process Documents.
After working through the jurisdictional change in the workflow, and it has passed the fund and TAG configuration validation, Aumentum begins the TAG ratio tax transfer process by performing the following processing by BOE Change log steps:
-
Identifies new TAGs. Because the TAG ratio process only applies to new TAGs, Aumentum identifies the new TAGs by utilizing the jurisdictional change TAG action type (ST: TAG Action Type [TAGActionType]) “S/N – Split to New” “C/N – Cancel to New”. Iit is only these TAGs that require the TAG Ratio transfer.
-
Identifies the existing TAG from which the new TAG is based. The existing TAG provides the starting TAG ratios to which the Tax Transfer Guide rules apply.
-
Copies the existing TAG Ratio to a new TAG where funds persist. From the worked jurisdictional change record, the system knows all the complete TAG-TA-TAF associations for the new TAG.
You can:
-
Use the Levy Management > Setup > Tax Ratio transfers > Manage TAG Ratios task to manage the ratios.
-
Use the Maintain TAG Ratio Transfer Guide to maintain TAG ratio transfer rules and to apply the transferring percentage from the current fund percentage to the recipient fund TAG ratio. When an exact fund match is found during the jurisdictional change import and processing, the transfer percentage is indicated by the transfer rule, which looks first to see if the fund being transferred from exists in the new TAG. If the fund exists, the rule adjusts the TAG ratios within the TAG by negatively adjusting the fund in equal proportion to the increase the fund to which it is moving.
New Fund Workflow
When a new special assessment is created on the Maintain Jurisdictional Change Transaction Item screen, a New Fund workflow is created that is available for selection via the View My Worklist screen. Depending on your user rights and roles, you can then process the new special assessment. When selected from the worklist, you navigate to the Maintain Special Assessments screen for the purpose of reviewing and either accepting or rejecting the new special assessment. If you select:
- Accept, enter a note, and click Finish.
- Reject, the new special assessment is kicked back to a new workflow, also called New Fund, for the purpose of further maintenance and submission for review.
When a new TAF fund is created via the Maintain Jurisdictional Change Transaction Item screen, a New Fund workflow is also created that is available for selection via the View My Worklist screen. Depending on your user rights and roles, you can then process the new TAF. When selected from the worklist, you navigate to the Maintain Jurisdictional Change Transaction Item screen for the purpose of reviewing and either accepting or rejecting the new TAF. If you select:
- Accept, enter a note, and click Finish.
- Reject, the new TAF is kicked back to a new workflow, also called New Fund, for the purpose of further maintenance and submission for review.
New TIF Fund Workflow
When a new TIF is created via the Maintain Jurisdictional Change Transaction Item screen, a New TIF Fund workflow is created that is available for selection via the View My Worklist screen. Depending on your user rights and roles, you can then process the new TIF. When selected from the worklist, you navigate to the Maintain Jurisdictional Change Transaction Item screen for the purpose of reviewing and either accepting or rejecting the new TIF. If you select:
- Accept, enter a note, and click Finish.
- Reject, the new TIF is kicked back to a new workflow, also called New Fund, for the purpose of further maintenance and submission for review.
TAG Ratio and Base Revenue Exchange Workflow
This workflow is automatically kicked off when you select Submit for Approval on the Exchange TAG Ratios and Base Revenue screen. Select it from the workflow to advance to the same screen at which points, if you are the individual approving the exchange, additional Accept/Reject buttons become available to accept or reject the workflow. If rejected, the item is returned to the workflow for further processing and review. If approved, the workflow is finished.
Prerequisites and Setup
CAMA Application Settings
See CAMA Import for details about dependencies, prerequisites and setup for imports.
Other Application Settings
The following two application settings determine the format of TAGs and Funds selected and displayed on the various jurisdictional changes screen:
-
Fund Format. The default is ##-#### but you can change the format as applicable to your jurisdiction.
-
TAG Format. The default is ###-### but you can change the format.
Set these via Configuration > Application Settings > Maintain Application Settings. Select the Setting Type of Effective Date and the Filter By Module of Levy Management. Click Edit on the settings and set as applicable. Click Save and Close.