Distribution History Reports
Navigate:  Tax > Distribution > Reports > Distribution History Reports
Description
Select reports, distributions to include, and criteria to include in the distribution reports before generating them.
Steps
-
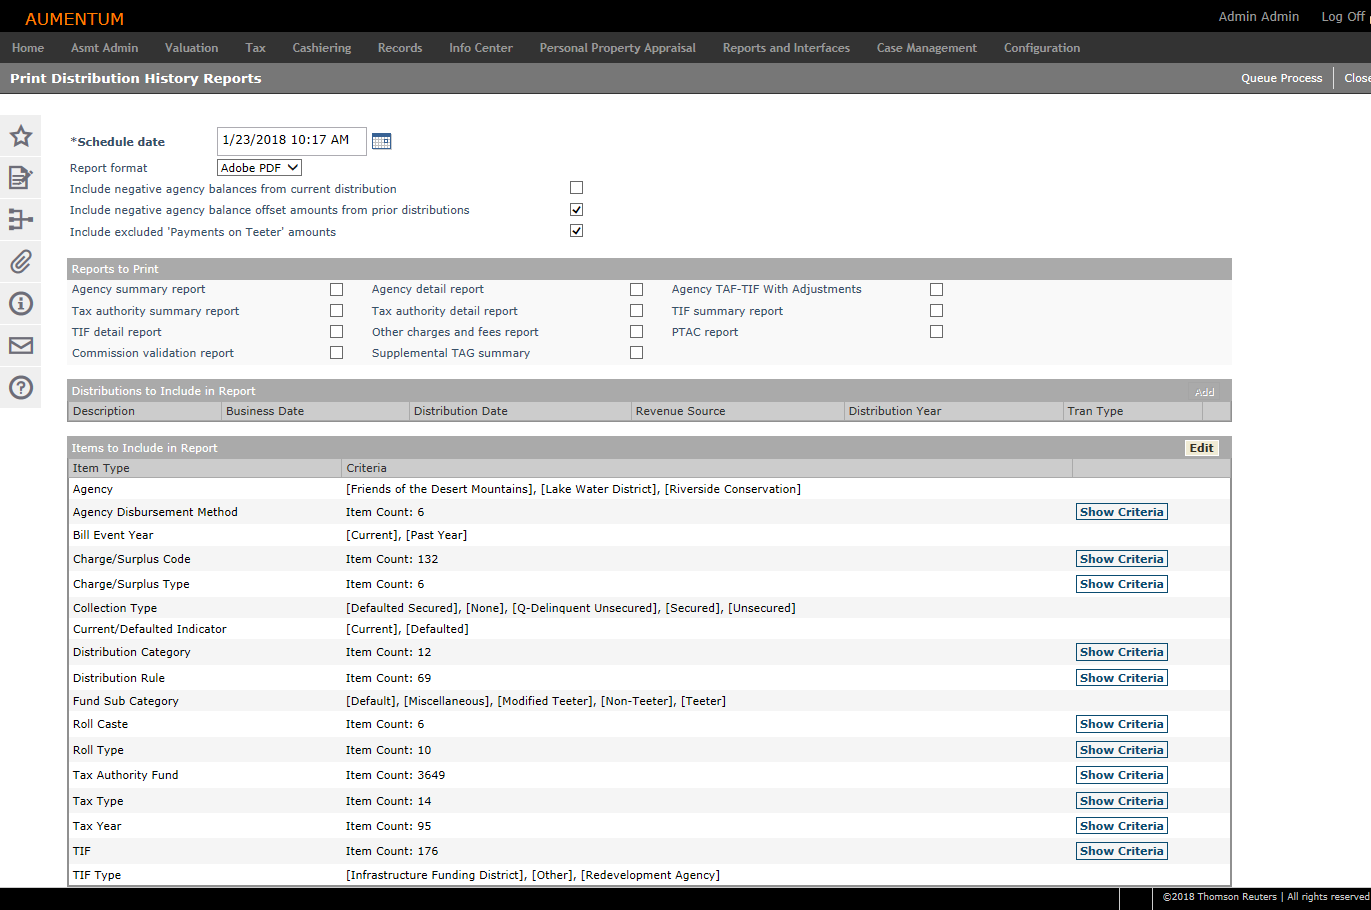
On the Print Distribution History Reports screen, enter or select the Schedule Date.
-
Make a selection from the Report Format drop-down list.
- Select each checkbox in the header area, if desired.
-
In the Reports to Print panel, select the checkbox for each report you want to generate.
-
In the Distributions to Include in Report panel, click Add.
-
Select the checkbox for each item you want to include in the report.
- Click Remove on any distribution to remove it from the report.
-
In the Items to Include in Report panel, click Edit to edit.
- On the Edit Report Criteria screen:
-
Click Show Criteria to see more details in the Criteria column.
-
Click Hide Criteria to return to normal view.
- Click Finish to return to the Print Distribution History Reports screen.
-
Click Queue Process to submit the reports to the batch queue, which opens the View Batch Process Details screen.
To view reports, click Information Center > Batch Processes. Click on a process in the grid to open the View Batch Process Details screen. Click on the report to view report details.