User Data Entry
Navigate:  Tax > Delinquent > User-Defined Fields > User Data Entry
Description
Attach the user-defined fields and some Aumentum fields to a specific bill. The user-defined fields and value information is then available in Correspondence, Advertising List, and the Info Center.
Steps
-
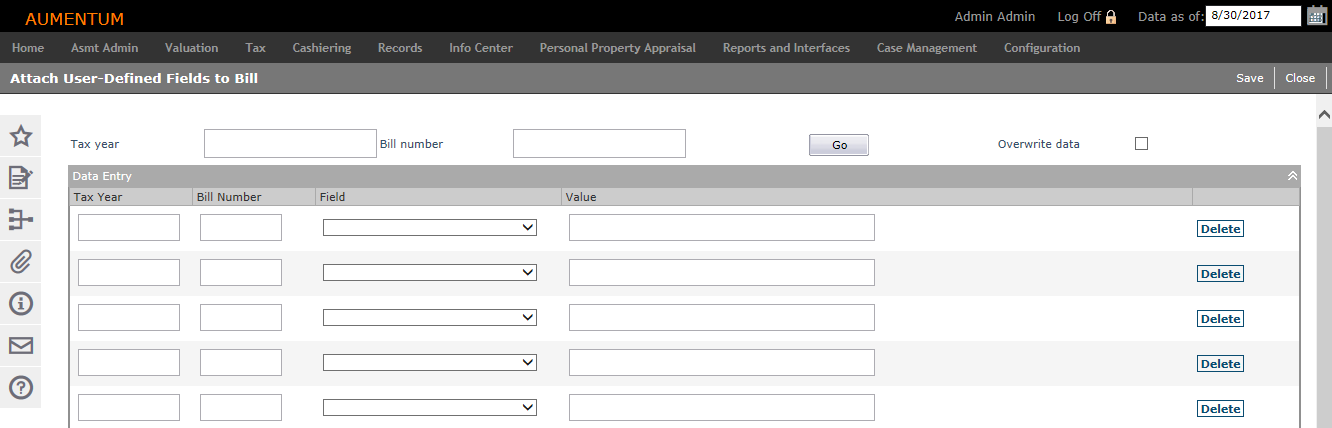
On the Attach User-Defined Fields to Bill screen, enter the Tax year and/or Bill number and click Go. The matching bills display in the Data Entry grid.
-
Manually enter additional bills by entering the Tax Year and Bill Number in the Data Entry gird.
-
Select the Overwrite data checkbox to replace existing data. If not selected, you cannot duplicate a tax year/tax bill combination for a UDF.
IMPORTANT: Previously saved data cannot be restored after you edit and overwrite it.
-
Select the Field from the available user-defined fields.
-
Type in the Value for the field.
NOTE: The data that you enter must conform to data type and character length of the field's setup. However, data is not validated until you click Save.
Validation includes these checks:
-
If data type is Yes/No then valid values are Yes or No only.
-
If the data type is character, memo, or numeric, then the length of the field must fall within the setup length.
-
Tax year and bill number entered must already exist.
-
Correct data must be entered for the field selected; that is, a numeric must have only numbers, a character field can have any keyboard characters; Yes/No field has only those two choices for value.
-
Data cannot already exist for a tax bill and field, unless overwrite is selected.
-
The same data cannot be entered more than once.
-
All fields in the grid must be filled.
-
-
Click Save to store the new information and validate the data or click Close to end the task.
Tips
Click Delete in the grid row of a user-defined field you want to remove from the bill.
Common Actions
Click New Field in the Common Actions panel. The Maintain Delinquent User-Defined Fields screen displays.