Print Proof of Claim
Description
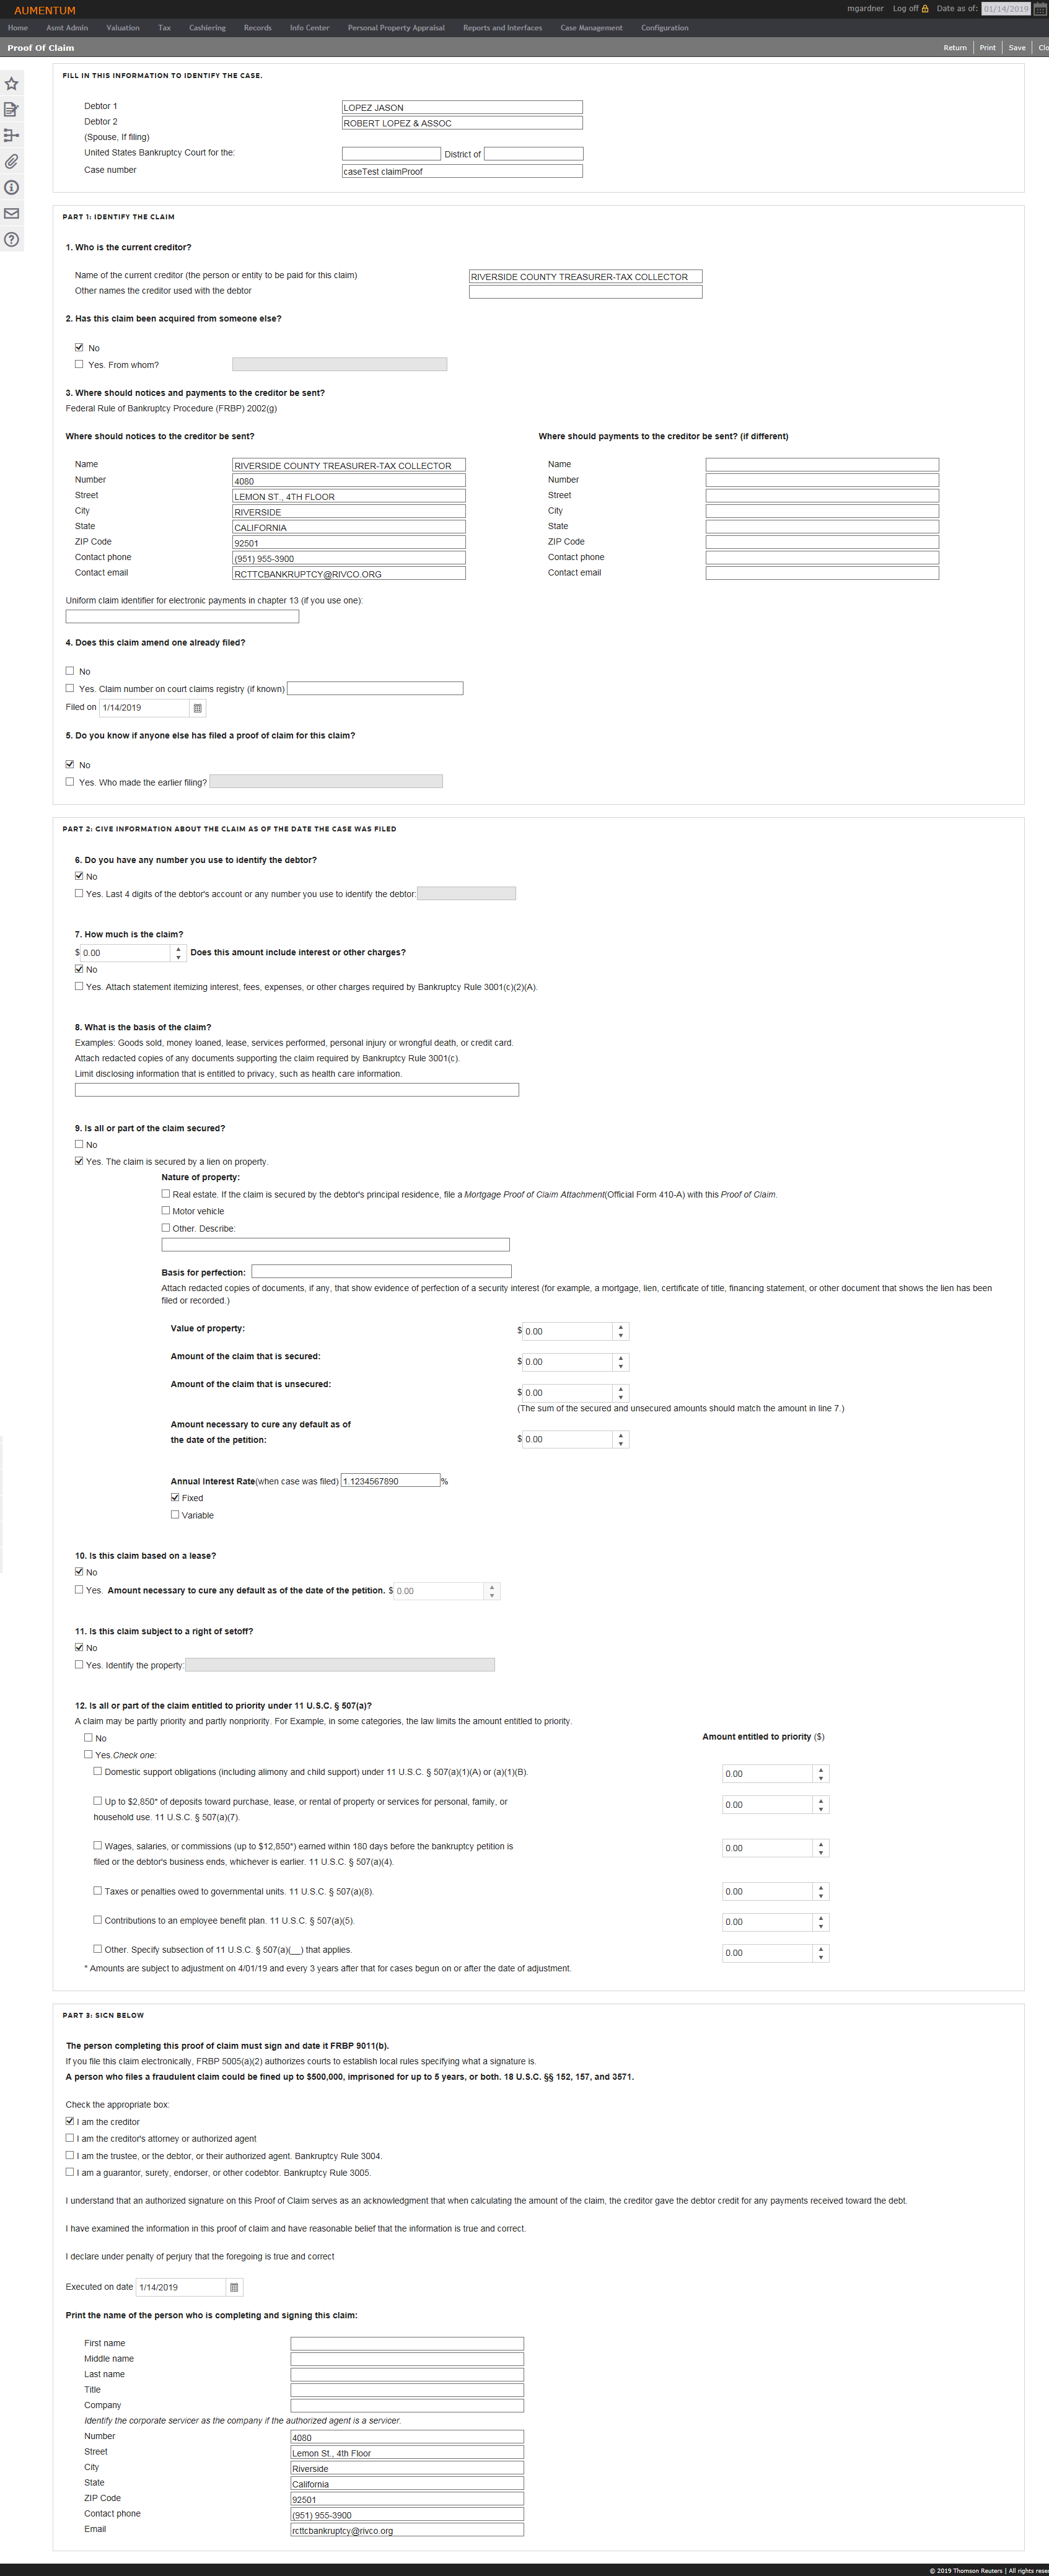
Print the Proof of Claim form to file with the bankruptcy court for a Proof of Claim or a blank form. Some of the information for the form has already been defined in the case and claim creation steps and is filled in automatically for you.
Steps
-
On the Proof of Claim screen, review the case information and modify as necessary. These fields display information from case maintenance and other settings in the application.
- Debtor 1 and Debtor 2 – automatically populated from the Create or Maintain Cases screen.
- District and State fields – automatically populated from the Create or Maintain Cases screen.
- Case Number – automatically populated from the Create or Maintain Cases screen.
-
In the Identify the Claim section, the name of the current creditor is static and the Other Names field is blank (Item 1).
- Item 2, No is selected by default.
- Item 3, address information is static.
- Item 4, select Yes or No, as applicable. If Yes, enter the claim number and filing date.
- Item 5, No is selected by default. If you select Yes, provide the name of the person who made the earlier filing.
-
In the Information About the Claim section, No is selected by default (Item 6). If Yes, provide the requested account information.
-
Continue with Items 7 through 12 on the screen.
-
In the Sign Below section, select the appropriate checkbox.
- Enter or select the executed date.
- Enter the name of the person completing the form.
-
Click Print to generate the form. The form is opened in a new browser window.
Tips
- Typically, creditors must file a Proof of Claim form with the bankruptcy court.
- The report prints using the format you have set via Configuration > Security and User Maintenance > Preferences. On the Maintain Default Preferences screen, locate Security - Report Display Format and make a selection from the drop-down list.