MH Tax Clearance Request (California Only)
Navigate:  Tax >
Billing > MH Tax
Clearance Request
AND
Tax > Delinquent > Correspondence > Notices > MH Tax Clearance
Request
AND
Sidebar > Workflow icon > search for MH Tax Clearance Request workflow
Description
Use this screen to maintain the details of a Mobile Home Tax Clearance Request that a taxpayer legal party has submitted to the jurisdiction. For example:
-
Request number, name, address, etc.
-
Decal number, model, make, year, etc.
-
Transfer information, such as PIN/AIN, name, and address.
-
Revenue objects to include/exclude
-
Tax Clearance Certificate information
Steps
NOTE: Buttons and links in the panels vary, depending on your navigation path. Fields also vary depending on the information defined on the form when it entered the workflow and your navigation path. Edit the data as applicable.
-
On the MH Tax Clearance Request screen, define all the data as applicable in the Request Information panel.
NOTE: Fields are populated according to where the request is in the process. If blank, the request is new and its status is Pending.
The Request Number is auto assigned. A new request does not have a number assigned until it is further along in the process. When first entering the workflow, the status is Pending, but you can edit that field.
-
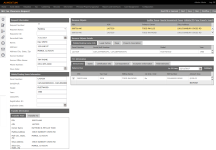
In the Mobile/Floating Home Information panel, define all the data as applicable to the property.
-
In the Transfer Information panel, you can see the legal party to whom the revenue object is being transferred.
This panel displays the PIN/AIN, owner name, mailing/situs address of the legal party from whom the mobile home is being transferred and the legal party information to whom it is being transferred.
-
The Revenue Objects panel displays the PIN/AIN, primary owner, and situs address information of the revenue object.
IMPORTANT: The Auditor Queue and Special Assessment Queue links in the title bar are not selected until all information is reviewed and, optionally, a certificate cost estimate is performed.
-
The Revenue Objects Details panel displays the decal number, serial/hull number, model and year. Click each tab for more information
- Mobile/Floating Home Info
- Legal Parties
- Flags
- Property Description
- Click Configuration > Application Settings.
- In the Maintain Application Settings screen, select Effective Date from the Setting type drop-down list, and select Tax Billing from the Filter by module drop-down list.
- Locate MHTCC data is located and click Edit.
- Make a selection from the drop-down list in the Setting Value column:
-
RPA (Real Property Appraisal)
-
PPA (Personal Property Appraisal)
-
Records Property Description.
-
Click Apply, then click Save in the Command Item bar.
- Click Configuration > Application Settings.
- In the Maintain Application Settings screen, select Effective Date from the Setting type drop-down list, and select Tax Billing from the Filter by module drop-down list.
- Locate MHTCC property description to use for data and click Edit.
- Make a selection from the drop-down list in the Setting Value column.
- Click Apply, then click Save in the Command Item bar.
- The TCC (Tax Clearance Certificate) information panel displays all information associated with the certificate, including tax years and bill numbers to which it applies.
- The Amount Due tab includes the ability to calculate an estimate for the request. Select an As Of Date or accept the current date default, and click Estimate to open the Levy Management Create New Estimate screen and then open the Maintain Estimate Details screen, which shows how the tax estimate is being calculated.
- When finished, you return to this screen to continue with the request process and the value is shown in the Amount Due column.
-
Click the Dates tab to define an As Of Date, view and Edit balance due descriptions and dates.
-
Click Edit and enter the date.
-
Click Update.
-
Click the Certification Info tab and define the data for any fields displayed as applicable.
-
Click the Correspondence tab to view details about any correspondence that has been generated, such as the date and type of correspondence sent to the legal party.
NOTE: Any correspondence generated is sent to the Outbound Document Queue, from which you can generate the report (clearance requests).
- Exception Information is a free-form field.
- Paid Estimates
- In the Command Item bar, click Need PIN or Approval to submit the clearance form back to the workflow for additional processing.
-
Click Need PIN Approval to open the Earliest Taxable Year pop-up.
-
Enter the Earliest Taxable Year and click OK. The Change Reason and Statutory References pop-up opens automatically.
- Make a selection from the Change Reason drop-down list.
- Select the Statutory Reference(s) that apply to the reason for the MH Tax Clearance Request.
- Optionally, enter a note.
- Click OK to save your changes and close the pop-up
-
Click Clear in the Command Item bar to refresh the data, for example, after selecting another PIN if there are multiple in the Revenue Object panel list.
-
Click Save.
-
A clerk's next step might be to submit the request to the auditor queue for review, or if the revenue object has a special assessment attached to it, the next step might be to submit the request to the special assessment queue.
-
An auditor's next step might be to review the information, perhaps edit some of it, and click Next to proceed to the next screen in the process.
-
Select the PIN from the list in the Revenue Objects panel and click the applicable link in the title bar:
-
Auditor Queue – To save the queue, submit the request back to the workflow to the auditor queue for review.
-
Special Assessment Queue – To submit the request back to the workflow to the special assessment queue for review.
-
Validate PIN – To validate the pin to submit the request back to the workflow to the particular queue of the individual, typically the assessor, who must validate the PIN prior to the request proceeding in the workflow.
-
New Property Search – To perform a Records Search for Revenue Object to select property to attach to the request.
-
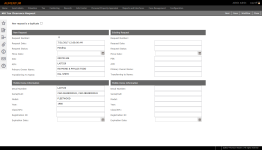
Click Next in the Command Item bar. The new clearance request information is displayed in the New Request panel on the left and the current request information in the Existing Request panel on the right.
-
Select the New Request is a duplicate checkbox, if applicable. Additional fields display.
-
Enter or select the start date, and enter the duration in weeks.
-
If no duplicate is found, a message is displayed to that effect.
-
Click Close to return to the previous view.
-
Click Next in the Command Item bar to go to the next screen in the process, depending on the workflow queue and navigation path from which this screen was accessed.
-
Click Close to end the task.
IMPORTANT: Two application settings determine the property description data to display.
 Click here to learn more about MHTCC data is located
This application setting defines the MHTCC data property description to use for MHTCC workflows.
 Click here to learn more about MHTCC property description to use for data
This application setting specifies the property description you want to use for data.
NOTE: If you set a date for the First Payment Due Date, that date is used to retrieve the first amount due. If you do not set a date, the first due date in the system is used for the first amount due.
NOTE: The next step varies, depending on the queue. For example:
Workflow
The MH Tax Clearance Request is also available as a workflow item, if configured for your jurisdiction.
With the applicable user rights, you can access the MH Tax Clearance Request from the View My Worklist screen via the workflow icon from the side panel on any screen. The MH Tax Clearance Request progresses through various stages in the workflow.
How a New Request Enters the Aumentum Platform
A new request enters the Aumentum Platform in two ways:
-
From a document storage system such as Documentum, to the workflow for review. Mobile Home information is imported via Records > Batch Process > Mobile Home Import.
-
Via Tax > Billing > MH Tax Clearance Request > Create New.
The workflow is configured specifically for the jurisdiction and may include unique processing steps and user queues. Typically, only users with specific privileges based on role can access, process, and view workflow items. Privileges are set via Configuration > Security and User Maintenance > Roles.
Reviewing a New Request via the Workflow
When accessed via the workflow, the MH Tax Clearance Request screen may contain additional fields, panels, and buttons. Command Item bar buttons may include Submit to Approve, Accept, Reject, and Approved, depending on your jurisdictional configuration, workflow queue, and the location of the workflow in the process.
The screen's view, buttons, and functionality change depending on where the MH Tax Clearance Request is in the workflow. For example, when reviewing and editing from the clerk's queue, the screen has a Finish button.
Upon final review, such as from the Auditor Queue, the screen includes Accept and Reject buttons. If rejected, the request returns to the appropriate workflow queue, such as the clerk's queue, for additional processing. If accepted, the workflow ends and the tax clearance request is approved.
When the request is marked Complete, it is closed, and can then be accessed via Tax > Billing > MH Tax Clearance Request > Search for Closed.
Generating Correspondence
Click the Correspondence icon in the sidebar to generate a report of the MHTCC Tax Clearance Certificate. When executed, the report is sent to the Outbound Document Queue. Click the Files tab when finished processing to view the certificates.


