Surplus Report
Navigate:  Tax > Accounts Receivable > Reports > Surplus Report > Print Surplus Report
Description
NOTE: This report was previously called the Refund/Overpayment Listing Report.
Generate and view a listing of all surpluses (positive or negative) that match the search criteria such as amount, surplus type, and date. The report also includes net amount totals by surplus type; subtotals for original amount for each surplus type; and balancing totals and subtotals for each type. The listing is generated in PDF format and displayed in a separate window.
NOTE: The Surplus report can also be generated and viewed from the Payment Search Results screen. This alternate access point to the Surplus Report allows you to first search for a specific refund and then include those specific refunds to in a report.
Steps
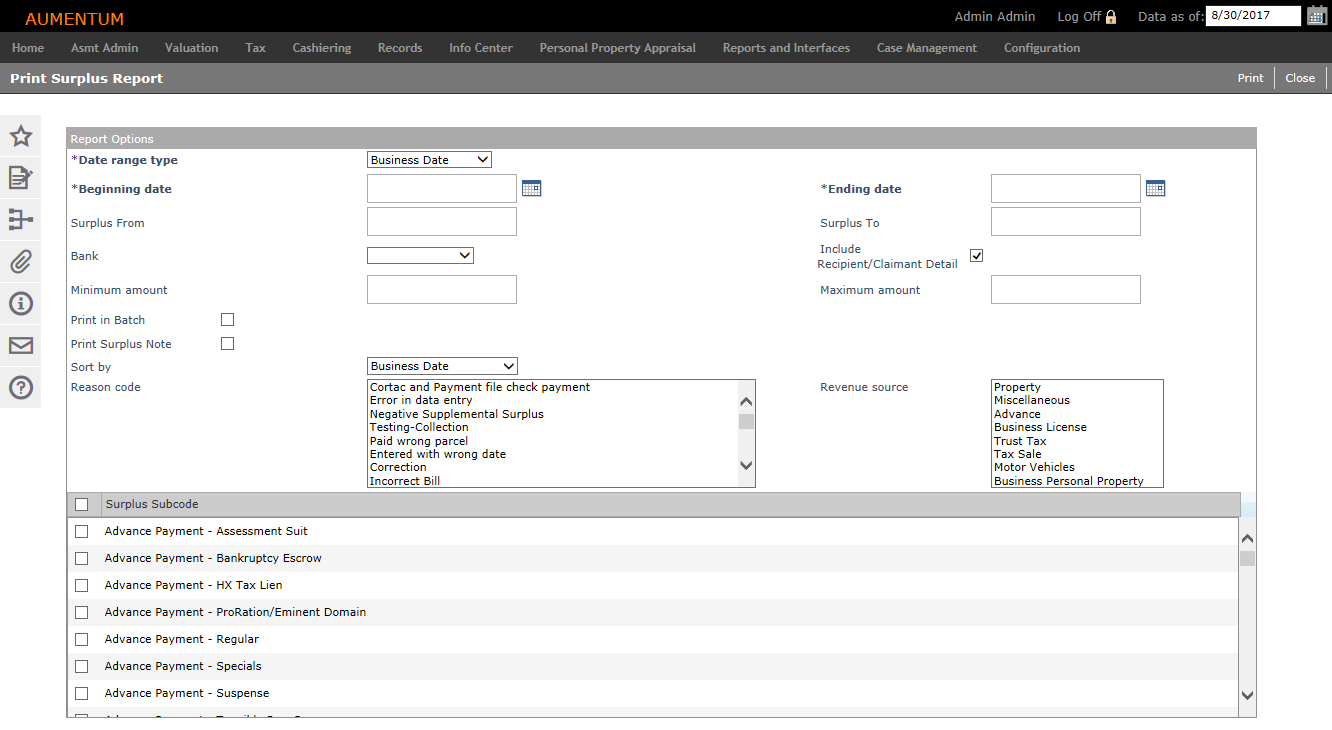
You must minimally select the Date range type, Beginning date, and Ending date.
-
Select a Date range type, either business date or payment effective date.
-
Select the Beginning date and Ending date for the date range.
-
Enter the Surplus From and Surplus to numbers.
-
Select the Bank, if applicable.
-
Check the Include Recipient/Claimant detail checkbox to include details about the recipient/claimant if a claim was submitted against the surplus.
-
Enter the Minimum amount and Maximum amount.
NOTE: The minimum and maximum amounts are inclusive. That is, if you enter 10.00 as the minimum amount, all amounts of $10 or higher are included in the report. If you enter 25.00 as the maximum amount, all amounts of $25 or less are included in the report.
-
Check the Print in Batch checkbox to print items in batch.
-
Check the Print Surplus Note to generate correspondence as part of the process.
-
Check the Sort by reason code checkbox to enable sorting by reason code.
-
Select the Reason Code.
NOTE: Click Ctrl + point/click your mouse on items to select multiple. If you do not select one or more reason codes, all are included.
-
Select the Revenue Source.
NOTE: Click Ctrl + point/click your mouse on items to select multiple. If you do not select one or more revenue sources, all are included
-
Check the applicable checkbox for each Surplus Subcode to include.
-
Click Print to generate the report.
-
Click Close to end the task.
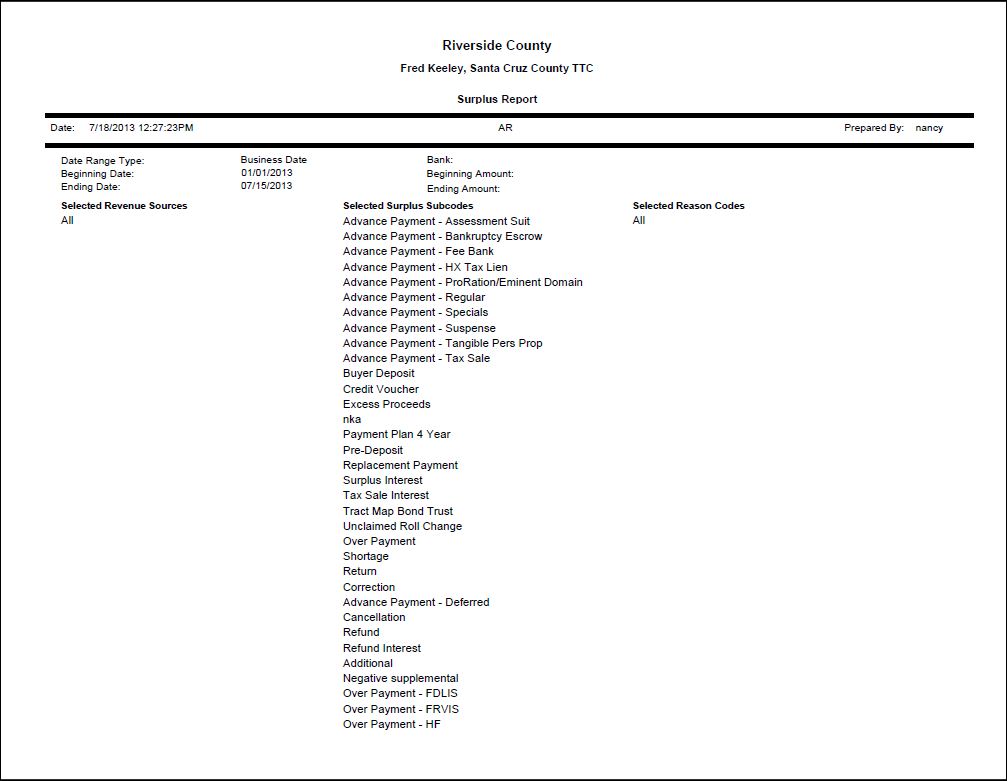
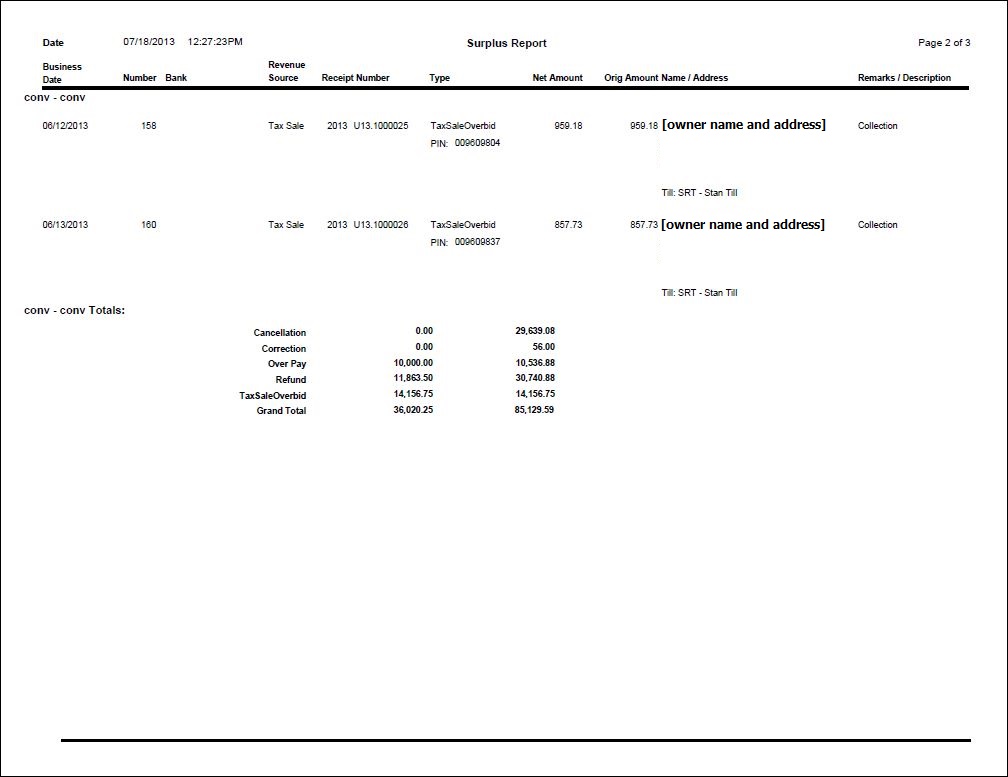
Report Samples
Surplus Report, Page 1
Surplus Report, Page 2
Tips
-
The flag Refund Created With Outstanding Taxes generates a remark on the Refund/Overpayment report for any PIN that has received a refund despite outstanding delinquent, current, or future taxes. To set up the Refund Created With Outstanding Taxes flag type, you must associate it with the revenue object entity type (Configuration > Set Up Flags).
-
The mapping between which type of surplus gets generated from a given process is based on systype settings. For example, overpayments are created when cashiering (a functional management process) is mapped to a certain surplus subcode. For more information on System Types, see Edit a Systype and Edit a Systype Category.
-
Use the Ctrl key to select multiple, individual items in a list; use the Shift key to select a block of items in a list.
-
EXAMPLE: Consider, as an example, a list that contains the items credit, payment, refund, and surplus. If you hold down the Ctrl key and click on credit and refund you will select only those two individual items. However, if you hold down the Shift key and click on credit and refund you will select those two items as well as all items listed between them. In this case, payment will be selected as well.