Reapply
Navigate:  Tax
> Accounts
Receivable > Manage
Payments > Reapply
Tax
> Accounts
Receivable > Manage
Payments > Reapply
Description
Use Reapply to move a payment from one revenue object to another. Payments are usually reapplied because the payment amount was applied against the wrong revenue object. During the reapply process the payment is first removed from the original revenue object and then applied to a different revenue object.
NOTES:
-
If you want to only remove a payment from a revenue object, but not apply the amount to another revenue object, use Refund or Cancellation (with or without creating surplus) instead.
-
Reapplying a payment on a bill that was partially paid as secured, and partially paid as defaulted secured keeps payments associated to the appropriate collection type.
-
If a payment was originally made as a secured payment, that amount must stay secured unless there are no longer secured charges to which to apply it.
-
If a payment was originally made as a defaulted secured payment, that amount must stay defaulted secured unless there are no longer secured charges to which to apply it.
-
If the bill is adjusted so that there is now an excess payment, that amount becomes surplus and the secured or defaulted secured buckets are adjusted accordingly.
-
See Collection Type Transfer, Transfer Collection Type, Set Up Cashier, and Collect Payments for more information and for example scenarios.
Jurisdiction
Specific Information
Riverside, California
-
To reallocate/reapply Defaulted Secure charges during roll/process corrections, the following modifications have been made:
-
An AR Correction API was created that checks to see if Collection Types are used, and if so:
-
Paid charges are kept as the original Collection Type up to the payment amount, prioritized in Secured, Unsecured, then Defaulted Secured order
-
Remaining unpaid charges are kept at their original Collection Type amounts and allocated in the sequence of Defaulted Secured, then Unsecured, then Secured
-
If the correction raises taxes, the remaining allocation goes to Defaulted Secured if any charge on the bill is Defaulted Secured. Otherwise, if any charge on the bill is Unsecured, it goes to Unsecured. Otherwise, it is Secured.
-
The Reallocate/Reapply process has been modified to keep payments Defaulted Secured. The allocation occurs multiple times based on the number of distinct Collection Types that exist within the charges on the bill. First secured charges are reallocated to up to the amount of the original secured charge payment amount, then Unsecured, then Defaulted Secured
-
The Fee assignment processes – Collection Type assignment process was modified so that new fees are checked to see if the bill has any Defaulted Secured charges. If so, the fee is Defaulted Secured. Otherwise Unsecured is checked and if they exist, then the fee is Unsecured. Otherwise, it Secured.
Steps
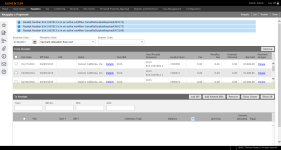
- On the Search for Payments/Surplus screen, select Payment from the drop-down list, enter your search criteria, and click Search.
-
On the Payment Search Results screen, select the checkbox for one or more items and click Next. For each payment that is in an active workflow, a separate message is displayed in the header area.
-
On the Reapply a Payment screen:
-
Confirm the business date, or click the Date Picker icon to specify the new payment date.
-
Select the allocation rule to use when reapplying the payment.
-
Select a reason code to indicate why the payment was reapplied.
-
In the From Receipts panel, click the PIN link to open the Tax Information screen.
-
In the Name column, click Details to open the Paid by Name/Address pop-up.
-
In the Payment Images column, click Image to open payment images in a separate window.
NOTE: Click the paperclip icon in the sidebar to add attachments. -
Select the checkbox for one or more items and click Remove to exclude the bill from the list from which the payment will be reallocated.
NOTE: If the payment that you want to reapply is not listed, you must return to the search results screen and select it, or perform a new search if the payment is not listed among the results. This only removes the bill from the list -the bill is not removed or deleted from the system as a whole. To add a bill, click List to return to the payment search result screen.
-
In the To Receipts panel, enter search criteria in the Year, Bill No., PIN or AIN fields, and click Add Bill to populate the grid with the receipt(s) to which the payment will be allocated. Other options are:
-
Add Related Bills – Adds all related bills to the list.
-
Remove – Removes the selected bill from the list.
-
Show Owner/Hide Owner (toggle button)
-
Show All/Hide All (toggle button) – Displays or hides child items associated with the parent item in the panel.
-
Arrow in Balance column header – Toggles between the Amount Due and Amount Allocated columns with additional columns.
-
Once the bill information is loaded, click the + (Plus) button in the To Receipts panel to display a sub-panel that shows any additional bills and information for any associated legal parties.
-
In the Flag column, click the link to open the Manage Flags screen.
- Click Reapply in the Command Item bar. The Transaction Confirmed screen shows both the from and to information.
-
Click List to return to the Payment Search Results screen.
- Click Restart to return to the Search for Payments/Surplus screen.
-
Click Close to end the task

NOTE: click on the column headers to sort the grid in ascending or descending order.
Dependencies, Prerequisites and Setup
Accounts Receivable
-
Define details for Automatic Reapply of Payments Setup