Reallocate
Navigate:  Tax
> Accounts
Receivable > Manage
Payments > Reallocate
Tax
> Accounts
Receivable > Manage
Payments > Reallocate
Description
Use Reallocate to move a payment from one bill to another for the same revenue object. Payments are usually reallocated because the payment amount was applied against the wrong bill. During the reallocation process the payment is first removed from the original bill and then applied to a different bill.
Jurisdiction
Specific Information
Riverside, California
To reallocate/reapply Defaulted Secure charges during roll/process corrections, the following modifications have been made:
-
An AR Correction API was created that checks to see if Collection Types are used, and if so:
-
Paid charges are kept as the original Collection Type up to the payment amount, prioritized in Secured, Unsecured, then Defaulted Secured order
-
Remaining unpaid charges are kept at their original Collection Type amounts and allocated in the sequence of Defaulted Secured, then Unsecured, then Secured
-
If the correction raises taxes, the remaining allocation goes to Defaulted Secured if any charge on the bill is Defaulted Secured. Otherwise, if any charge on the bill is Unsecured, it goes to Unsecured. Otherwise, it is Secured.
-
The Reallocate/Reapply process has been modified to keep payments Defaulted Secured. The allocation occurs multiple times based on the number of distinct Collection Types that exist within the charges on the bill. First secured charges are reallocated to up to the amount of the original secured charge payment amount, then Unsecured, then Defaulted Secured
-
The Fee assignment processes – Collection Type assignment process was modified so that new fees are checked to see if the bill has any Defaulted Secured charges. If so, the fee is Defaulted Secured. Otherwise Unsecured is checked and if they exist, then the fee is Unsecured. Otherwise, it Secured.
NOTES:
-
If you need to move a payment between different revenue objects, use the Reapply process instead.
-
If you want to only remove a payment from a bill, but not apply the amount to another bill, use the processes for Refund or Cancellation (with or without creating surplus) instead.
-
See the Manage Payments overview topic for information on the various transaction types.
- Reallocating a payment on a bill that was partially paid as secured, and partially paid as defaulted secured keeps payments associated to the appropriate collection type.
-
If a payment was originally made as a secured payment, that amount must stay secured unless there are no longer secured charges to which to apply the payment.
-
If a payment was originally made as a defaulted secured payment, that amount must stay defaulted secured unless there are no longer secured charges to which to apply the payment.
-
If the bill is adjusted so that an excess payment amount exists, that amount becomes surplus and the secured or defaulted secured amounts are adjusted accordingly.
See Collection Type Transfer, Transfer Collection Type, Set Up Cashier, and Collect Payments for more information and for example scenarios.
Steps
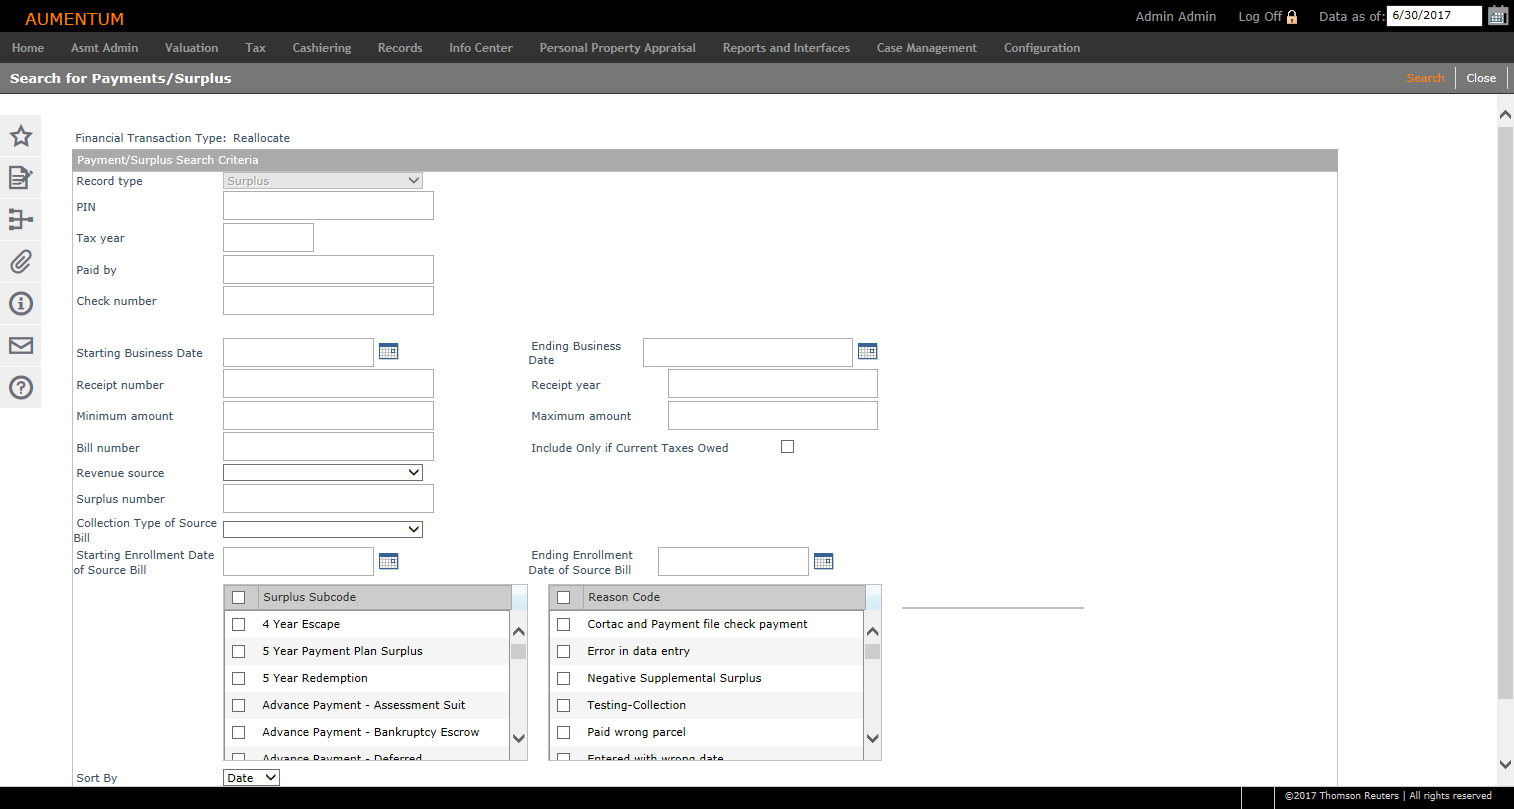
- On the Search for Payments/Surplus screen, select Surplus from the Record type drop-down list, enter your search criteria, and click Search.
- On the Payment Search Results screen, select the checkbox for one or more items and click Next. For each surplus that is in an active workflow, a separate message is displayed in the header area.
- On the Reallocate a Payment screen:
-
Confirm the business date, or click the Date Picker icon to specify the new payment date.
-
Select the allocation rule to use when reapplying the payment.
-
Select a reason code to indicate why the payment was reapplied.
-
After paying off a redemption group with a Defaulted Payment Plan Credit, when a single payment is reallocated to an unsecured outstanding bill, the DPPC is made whole, and all redemption group bills are partially paid.
-
If the payment you want to reallocate is not listed in the From Receipts panel, click List in the Command Item bar to return to the Payment Search Results screen and select it.
IMPORTANT: Payments should only be reallocated between a single revenue object's bills; all the "from" bills must belong to the same revenue object as all the "to" bills. If you need to move a payment between different revenue objects, use the Reapply process.
-
Click Add Bill and enter the Year and Bill Number.
-
Click Reallocate. When the process is complete, the Transaction Confirmed screen shows both the from and to information.
-
Click Restart to return to the Search for Payments/Surplus screen.
-
Click Close to end the task.
-

NOTE: This screen is used for various processes; therefore, the fields on the screen vary depending on your current process.
Tips
If the system encounters a scenario due to which a payment cannot be reallocated, for example, a payment with a future effective date, a message is displayed along the top of the screen. You must resolve any such scenarios before you can proceed with the reallocation.
If the initial payment had surplus and a refund was issued for the surplus, only the remaining amount can be reallocated. Even if the refund check has not been cut and the customer wants to reallocate the full amount, the refund must first be reversed (which puts the money back into surplus) before the full amount can be reallocated.
This process does not yet support manual allocations. If you need to have manual control over the allocations, you must use the manual process of performing a Cancel > Create Surplus > payment management transaction, and then using that surplus as tender in cashiering.
If the message Allocation rules not setup for this process. You must set up the allocation rules before continuing is displayed, click Tax > Accounts Receivable > Payment Allocation Setup > Payment Allocation Rule Setup to set up the necessary allocation rules.
Reallocating transactions is not allowed on any surplus which is attached only to a revenue account and not a revenue object. This restriction comes into play when using the Suspense feature.