Bad Check
Navigate:  Tax > Accounts Receivable > Manage Payments > Bad Check
Description
Use the Bad Check screens to edit payments made with a bad check, apply fees, and generate an NSF notice. You can also apply flags if needed. The Bad Check task recognizes the setting you define for Non workday moves to on the Maintain a Flag screen.
NOTE: If your state uses CollectMax, the Bad Check process recalculates Penalty and Interest for CollectMax.
How Accounts Receivable Processes Payments Removed Due to Non-Sufficient Funds
Accounts Receivable performs the following when a payment is removed due to non-sufficient funds:
-
An internal collection type transfer is performed to move the payment amount less any valid funds from the Collection Type(s) into the fund from which it was originally deposited to Collection Type 20 Rejected Checks.
-
An internal collection type transfer is performed to move any remaining valid funds from the Collection Type(s) into the fund from which it was originally deposited to Collection Type 53 Follow Up Predeposit Trust.
-
A pool of money method is supported for removing bad funds and reapplying good funds using business rules outlined in the Collections functional area for an NSF File record linked to a collection transaction involving multiple checks. Also, the ability to override the default pool of money method and direct the removal of funds and reapplication of funds if necessary to specified assessments impacted by the NSF File is available.
NOTE: An allocation rule choice for bad check functionality is used for reapplying the remaining amount if only a partial bad check is being processed.
Workflow Processing for Bad Check and Cancellation - No Surplus
An Aumentum Event is created for Accounts Receivable > Manage Payments > Bad Check and Cancellation - No Surplus processing when all or a portion of a payment is cancelled, and the bad check/cancellation meets predefined criteria in Configuration > Rules Maintenance to determine if the bill:
-
Is a specific roll type.
-
Is a specific collection type.
-
Meets other date/ownership transfer criteria.
This event kicks off an UnpaidChargesTransfer - Unpaid Charges Transfer workflow, if configured for your jurisdiction. Depending on your user role and privileges, this workflow is displayed in the View My Worklist screen via the Workflow icon in the sidebar.
Select this workflow to open the Levy Management Transfer Unpaid Charges screen with the option to manually change the collection type to unsecured for the purpose of transferring cancellation/bad check amounts from secured to unsecured.
CAUTION: Use care when changing the collection type as doing so can greatly impact accounts receivable processing. See the Transfer Collection Type topic for a list of scenarios and their impact on, for example, partial payments with a correction, reallocations, surpluses, and penalties, fees, and interest.
In that event, there may be, if configured for your jurisdiction, an additional Submit to Approve button on the Transfer Unpaid Charges screen that when selected, routes the workflow to the next queue for approval. See the View My Worklist topic for details about workflow processing, queues, and approvals.
IMPORTANT: Criteria that generates events and hence workflows, queues, approvals, and workflow processing, are unique to each jurisdiction. The Aumentum Engineering, Implementation, and Support teams work together to design and configure events, workflows, and queues specific to your jurisdiction. Contact your Aumentum Support representative if you need assistance with workflows and workflow configuration.
Jurisdiction
Specific Information
Riverside, California
- When cashiering a payment for a redemption group with multiple defaulted secured bills as well as secured bills, the oldest bill in the redemption group includes the bad check fee on the receipt while the remaining items do not have the fee applied.
-
When selecting part of a payment to a Redemption Group, all defaulted secured bills within the Redemption Group will be brought in for processing the transaction.
Steps
To manage a bad check:
-
Make a selection from the Record type drop-down list.
-
Enter your search criteria and click Search.
-
To further refine the search, you can make selections in the Surplus Subcode and Reason Code panels.
NOTE: These panels are available only if you select Surplus from the Record type drop-down list. -
Make a selection from the Sort by drop-down list.
-
To further refine the search, expand the Advanced Search Criteria panel.
- Select or add flags to include and flags to exclude.
-
Select Match All or Match Any (default) from the drop-down list.
-
Click Add and select the Object Type, Flag Type, Flag Value, Active Only? checkbox to include/exclude only flags that are active, and Days since Flag Start Date.
-
Click Apply.
-
Optionally, define any Surplus Date Comparison Criteria:
-
Select Include or Exclude from the drop-down list to include or exclude the surplus date comparison criteria. This takes the results of the search by other criteria, then filters it to determines whether to include or exclude the surplus record in the final results.
-
Enter an If date (current date default) and define whether the date is After, Before, On, On or After, On or Before the date that is either Equal To, The Earliest Of, or The Latest Of.
-
Click Add.
-
Optionally, enter the Value to represent the Units of Days, Weeks, or Year.
-
Select the Attribute or either After or Before the Units.
-
Select the Criteria of either:
-
Last Claim Form Sent Date on Surplus - This applies to the last (most recent) record Effective Pay Date on the Receipt Detail(s) for the bill associated with the creation of the surplus.
-
Last Payment Effective Date on Bill - For any claim records associated to the surplus, the last (most recent) Claim Form Sent Date.
-
-
Click Search to navigate to either the:
-
Payment Search Results screen if navigating from Accounts Receivable > Manage Payments > Claim Maintenance or Surplus Management
-
View Correspondence Search screen if navigating from Accounts Receivable > Correspondence > Refund and Surplus Notice and the correspondence contact has not been defined; otherwise to the Maintain Claim screen.
-
-
Click Close to end the task.
-
Depending on the navigation path and the item searched, the Business date field is displayed. Enter or select the business date.
-
Depending on the navigation path and the item searched, the Reason code field is displayed. For some searches, it is displayed on the next screen. Select the reason code.
-
Depending on which Bad Check reason code you choose on this screen, a certain default amount will be pre-filled in the amount field on the subsequent Manage Bad Checks screen.
-
-
Select the checkbox for one or more of the payments/surpluses/refunds to include in the transaction. To select all items, select the checkbox in the header.
-
If any images are attached to the process, click on the link in the Payment Images column to open a separate browser window showing the image.
NOTE: Select the image, then click the Attachment icon in the sidebar. Click Add Attachments and browse for the attachments you want to include.
- Click in the Flags column in any row to view any flags associated with the account or to maintain flags on the Add Flags screen. When finished, you return to this screen.
-
Click in the Note column in any row to view any existing notes associated with the account and to add any additional notes on the Add a Note screen. When finished, you return to this screen.
-
Select an item and click Start Workflow to start a workflow, if available on the particular search results, to review and process these items on the View My Worklist screen, available via the Workflow icon in the sidebar.
NOTE: If an item is in a workflow, you will receive a warning message to that effect when selecting the item from a task. For example, if you are processing a Surplus and select an item for workflow processing, you cannot process a refund for the surplus until the item is no longer in the workflow. -
Click Next. The screen that opens depends on the transaction type.
-
Select the checkbox for one or more refunds to include in the printing. To select all items, select the checkbox in the header.
-
Click Print Listings to generate a Surplus Report. This report is also available directly from the main menu under Tax > Accounts Receivable > Reports > Refund/Overpayment Listing Report.
-
Click Cancel. This is the safer method.
-
Exit out of the screen.
-
Place the later payments into Surplus (using the Cancel-Create Surplus function).
-
Return here for this transaction and process the Cancel-No Surplus transaction, this time without receiving the warning message.
-
Afterwards use the Reallocate function can be used to apply the surplus from the later payments back to the charges.
-
Click OK to continue. This could impact penalty and interest calculations.
-
Afterwards examine the balance due on the PINs carefully to make sure that they are accurate.
- When cashiering a payment for a redemption group with multiple defaulted secured bills as well as secured bills, the oldest bill in the redemption group includes the bad check fee on the receipt while the remaining items do not have the fee applied.
-
On the Manage Bad Checks screen, click Edit for an item in the Cancellation Accounts and Fees panel.
-
Enter the Fee Amount.
NOTE: This field has a number of dependencies: -
If the application setting for Bad check fee value is flat rate is set to True, and you chose one of the three Bad Check reason codes on the Payment Search Results screen, this field is populated with a dollar amount as specified for bad checks (this amount is also in application settings).
-
However, if the application setting for Bad check fee value is flat rate is set to False, and you chose one of the three Bad Check reason codes on the Payment Search Results screen, this field is blank. (The False setting indicates a percentage rate instead of a flat rate.) You must calculate and type the correct fee amount in this blank field.
-
Enter the Cancel Amount, if any.
-
Select the Installment.
-
Select the Allocation Rule.
-
Click Apply.
-
Click Edit Name/Address to open the Edit Tendered Information screen on which you can maintain paid by and tendered information.
-
In the Applying Flags panel, click Add to add flags.
-
Select the Flag Type.
-
Select the Flag Value and any other information associated with the particular flag(s) selected.
-
Check the checkbox for the Tax Bill flag(s) to apply the flag at the tax bill level if available for the particular flag.
-
Check the checkbox for the Legal Party flag(s) to apply the flag at the legal party record level if available for the particular flag.
-
Check the checkbox for the Revenue Object flag(s) to apply the flag at the revenue object record level if available for the particular flag.
-
Repeat the previous applicable steps to apply more flags.
-
-
Click Delete to remove the particular flag.
-
Click Process Bad Check in the Command Item bar to apply your selection. The Transaction Confirmation screen is shown when the process has completed. You can also print an NSF notice from the this screen.
-
Click Previous to return to Payment Search Results screen to manage another payment.
-
Click Restart to return to the Search for Payments screen.
-
Review the transaction information and payment amount.
NOTE: Different information is displayed depending on the transaction type. You cannot alter the displayed information on this screen.
-
Reallocate – transaction confirmation shows the "from" and the "to" receipt information, including business date, effective date, PIN, name, year/bill, year/receipt sequence, surplus number (if applicable), tax, penalty/fees, interest/discount, and net amount.
-
Reapply – transaction confirmation shows the "from" and the "to" receipt information, including business date, effective date, PIN, name, year/bill, year/receipt sequence, surplus number (if applicable), tax, penalty/fees, interest/discount, and net amount.
- Cancel (Create Surplus) – transaction confirmation provides the payee information, bill number, surplus amount, surplus number, and status. Click Print Notices in the top, right-hand corner of the results grid to print the Surplus/Refund Notices for the cancelled payments.
-
Cancel (No Surplus) – default transaction confirmation screen; Click Edit to edit the Surplus Subcode amount, Surplus Interest amount, and Allocation Rule.
NOTE: When searching for payments using this task, a Bad Check Reference Number is available for searching. -
Bad Check – default transaction confirmation screen. An NSF notice can be printed from this screen.
NOTE: The fees for NSF are set up via Accounts Receivable > Setup > NSF Fees. The data source for the NSF notice is set up and maintained via Reports and Interfaces > Data Services. The data source is then associated with the NSF report setup and template via Reports and Interfaces > Correspondence. When Print is selected from this screen, you navigate to the Schedule Custom Batch Job screen on which you can schedule the correspondence.
NOTE: The Bad Check Reference number defined on the Manage Bad Checks screen is included in the NSF notice. -
Refund – transaction confirmation provides the refund amount, interest, additional fees, refund total, refund number, and paid by name. If you selected to combine multiple refund amounts into a single refund transaction, the information on this screen will reflect the multiple refunds as a single line item, featuring the payee and address as specified on the Post Refund screen.
-
Reverse Refund – reverse a refund after posting that still exists in the system but that has not yet been paid to the customer.
-
Apply Advanced Payment – create, edit, and apply lists of advance payments
-
Surplus Management
-
Click Close to exit the task.
OR
Click Restart to return to the Search for Payments screen to manage another payment transaction of the same type.
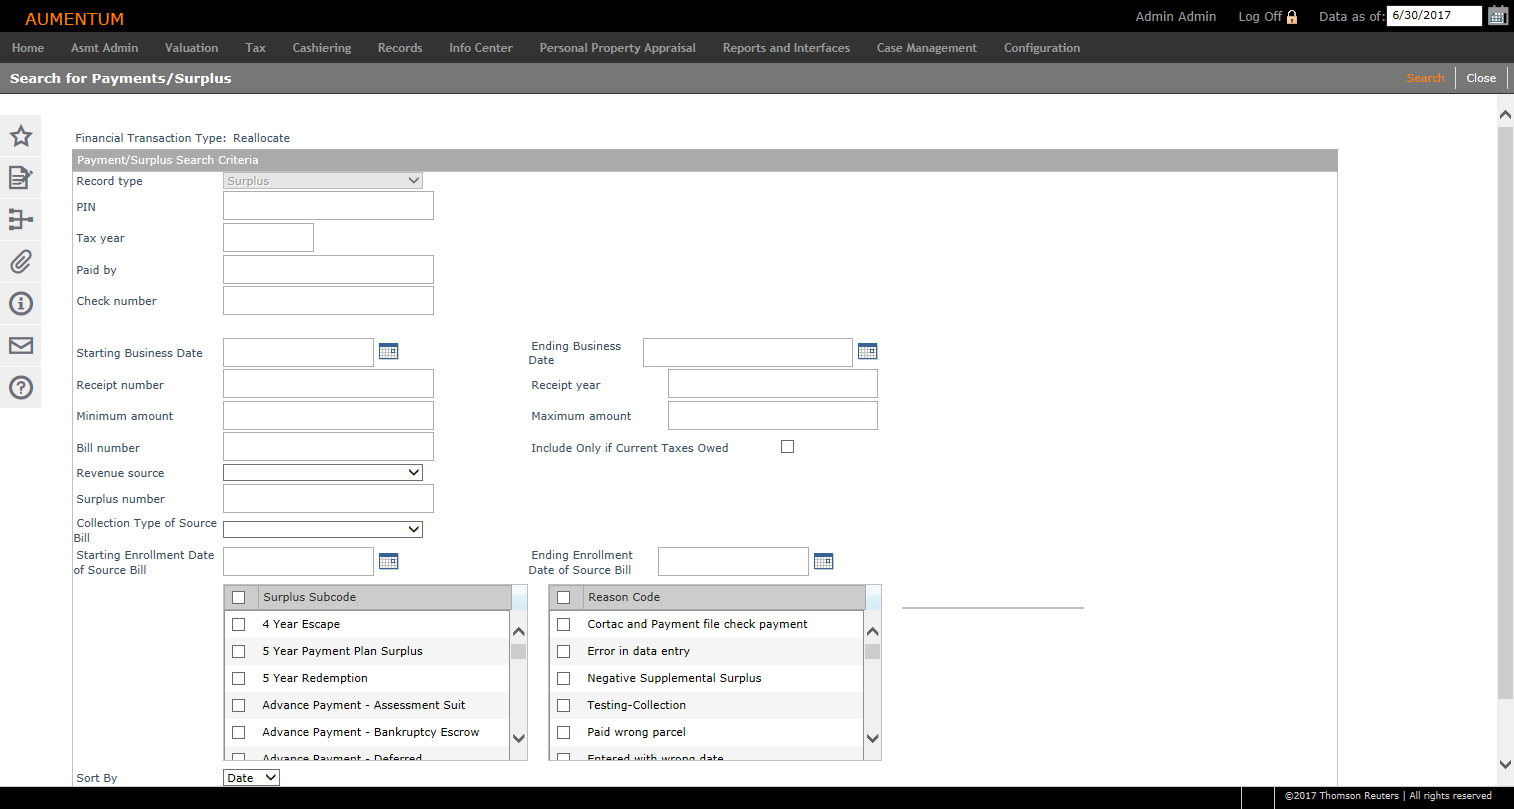
Search
for Payments or Surplus
Search for payments or surplus, including payment/surplus against which a claim has been created, and to generate surplus correspondence.
The fields available for the search vary, depending on the Payment Management task selected. For example, if you select Bad Check, a Bad Check Reference Number field is available for the search. This reference number is defined on the Manage Bad Checks screen.
Steps
NOTE: The Financial Transaction Type field in the heading of the screen shows the task selected.
NOTE: The Check Number field refers to the check number of the payment, not the refund check number.
Payment
Search Results

This screen displays the payment records matching the transaction type (cancel, apply advance, bad check, refund, manage surplus) and other search criteria specified on the Search for Payments screen.
Select one or more payments to manage among the results returned from the payment search.
IMPORTANT: Because this is the same screen used for these various processes, the fields on the screen vary depending on the process selected.
Select the checkbox for one or more payments, then click Next. If you are working with refunds, you can also choose to print a Surplus Report or refund notices directly from this screen.
IMPORTANT: The number of records listed in the search results list is limited to a maximum based on the system application setting Search Result Limit. If the maximum number of allowed matches has been returned, a message is displayed on the top of the screen. Instead of proceeding, click Restart to return to the search screen and re-run your search with more restrictive criteria.
For example, the maximum number of returned payment records could be set to 200. If the search criteria you specified on the Search for Payments screen are not specific enough, and there are 200 or more matching records in the database, the displayed search results list will only include the first 200 matching records. Hence, if your search reaches this maximum, the displayed results might or might not include all the records you need.
Workflow Processing
IMPORTANT: Depending on your jurisdiction and Aumentum Tax version, a Start Workflow button is available that generates an Unclaimed Roll Change workflow to the View My Worklist screen for selection and processing, depending on your user role and workflow queue. When an item is in a workflow, it cannot be processed via any other process and a message indicates that the item is in a workflow when attempting to select it, once placed in the workflow. When selected from the workflow, you advance to the Manage Surplus screen, which may have additional buttons available for processing, such as Submit to Approve.
Steps
NOTE: If this is a refund transaction, you can combine all selected items into a single refund. To combine the items, select the combine details into single refund checkbox at the bottom of the Search Results panel. This checkbox is displayed only for refund transactions.
|
Type of Transaction |
Screen Displayed |
|
Reallocate |
Reallocate a Payment |
|
Reapply |
Reapply a Payment |
|
Cancellations with/without Surplus |
Transaction Confirmation |
|
Bad Check |
Manage Bad Checks |
|
Refund |
Post Refund |
|
Reverse Refund |
Select Refunds To Reverse |
|
Advance Payments Apply |
View Advance Payments Search Details |
|
Surplus Payments |
Manage Surplus |
|
Refund Review Queue |
Review and Select Refunds |
|
Claim Maintenance |
Maintain Claim |
|
Correspondence Contacts |
Enter Surplus Number for Contact |
|
Credit Voucher |
Print Credit Voucher |
OR
Click Previous or Restart to return to the Search for Payments screen to manage another payment or redo your search. (Use the Previous button to retain the search criteria on the search screen; use Restart to clear the search screen as you return to it.)
Steps for Printing Surplus Report and Notices
If you are working with refund transactions, you can generate and view both a Refund/Overpayment Listing and refund notices directly from the Payment Search Results screen. Print buttons for both are in the title bar of the Search Results grid. Once generated, the listing/notices are displayed automatically in a separate window.
NOTE: While the report generated from the Payment Search Results screen allows you to search for and select specific refunds to include in the report, the report generated from the Refund/Overpayment Listing Report screen includes all refunds that match the search criteria.
OR
Click Print Notices to generate the refund notices for the selected refunds.
Workflow
Items in most Manage Payment processes can also be accessed, if applicable to your jurisdiction, from the View My Worklist screen from the Workflow icon in the sidebar. When accessed via the workflow, the various payment management processing screens may contain additional buttons, such as the Submit to Approve and/or Accept/Reject buttons, depending on your jurisdictional requirements and workflow queue setup.
NOTE: Workflows available for the payment management tasks vary. The Aumentum Engineering team and your Aumentum Implementation team set up each workflow specific to your jurisdiction setup and requirements.
IMPORTANT: When any payment management process item has an active workflow associated with it, you cannot select it for processing. When you attempt to process the item, a warning message displays indicating that the item is in an active workflow.
Tips
When processing a cancellation no surplus, you may receive a message, "Future payments exist on the selected PIN(s). You may want to make an adjustment. To continue, click OK." The message means that there are payments on the selected PINs that have been made after the ones you are attempting to cancel. Here are your options:
If you do not see a certain payment or surplus in the results list, your search might have been too narrow. To change your search, return to the previous screen and redo the search using different criteria.
If a payment was not reconciled and posted in Cashiering, it will not be found in this payment search.
The checkbox at the top, left-hand corner of the Search Results grid toggles. Use it to select or clear the selection of all payments listed in the grid. Note that this checkbox will include all listed transactions, including those on the subsequent pages.
Manage Bad Checks
Use this screen to edit a payment made with a bad check and apply a fee. You can also apply flags to the tax bill, party, or revenue object. This screen is displayed if you selected Bad Check as the transaction type on the Search for Payments screen.
A listing with the applicable bad checks, based on your search and your selection among the search results, is shown on the screen.
SETUP: See Manage Payments for any applicable prerequisites, dependencies and setup information for this task.
Jurisdiction
Specific Information
Riverside, California

Steps
Example 1: The application settings for bad checks specify flat rate and a fee of $25. When you select a Bad Check reason on the Payment Search Results screen, the fee amount is filled in by default on the Manage Bad Checks screen.
Example 2: The application settings for bad checks specify a percentage rate. (In this case, the preset dollar amount does not apply.) When you select a Bad Check reason on the Payment Search Results screen, the fee amount field is blank on the Manage Bad Checks screen. Calculate and type in the correct fee amount. For example, If you want to apply a 5% fee and the cancel amount is $700, you calculate and type in "35.00" in the fee amount field to denote a $35 fee. Keep in mind, however, that if your office applies a fee structure of, for example, "the lesser of ->5% or $30," you will instead type in "30.00" in the fee amount field since $35 would exceed the maximum stipulated fee.
Transaction
Confirmation
The Transaction Confirmation screen is a summary page for reviewing the information and amount of the payment management transaction. It is displayed after the specified transaction is complete.
The information on the screen varies, depending on the transaction.
Steps
Dependencies, Prerequisites and Setup
Payment Management Reason Codes
Your Aumentum Implementation team helps set up the necessary NSF reason codes (Payment Management Reason Codes) that are used within the Bad Check (NSF) process.
Accounts Receivable
-
Set up Payment Terms Rates via Accounts Receivable > Payment Terms Mapping and Setup.
-
Set up Payment Plans via Payment Plans.
-
Set up NSF fees via Accounts Receivable > Setup > NSF Fee Setup.
Reports and Interfaces
The County is responsible for the creation of the mail merge NSF notice(s). These are set up via Reports and Interfaces > Data Services. The data service is optionally downloaded and updated or created using Data Services. Once available, the data service is then associated to the particular report and report template, in this case NSF Notice, via Reports and Interfaces > Correspondence.
Configuration Menu
-
Application Settings:
Bad check fee for account closed
Bad check fee for non-sufficient funds
Bad check fee for stop payment
Bad check fee value is flat rate (false = percent)
Charge code for bad check
Charge subcode for bad check
Default bad check flag
NSF/Cancel-NS process to reapply remaining to selected bills -
Flag Setup – Set up the flags that you would apply to a bad check.
-
Systypes – Payment Management Reason Codes - Set up the reason codes to apply to a bad check and the order in which they appear in a list.
-
Accounts Receivable – Payment Allocation Rule Configuration must be set up via Tax > Accounts Receivable > Payment Allocation Setup > Payment Allocation Rule Setup.
-
Set the effective date for the Non-sufficient funds fee calculation type systype via Configuration > Systypes > Select or Add a Systype.
-
Establish the desired flag for the various notices pertaining to NSF and apply the flags during the Bad Check process.
-
The corresponding NSF flag(s) are also set up via Configuration > Flag Setup to link to the Tax Bill/Revenue Object
-
Any flags required to extend the due date must also be linked to the tax bill during Bad Check processing.
Cashiering
-
Collect Payments - Bad check fees.
Info Center
- Bill Information, Financial Transaction History - Bad check fee displays.
- Info Center > Flag Information - Bad check flags display for the revenue objects to which they were applied.
Tips
Reverse Tax Sale Endorsements and redemption payments on certificates with endorsements using this task. The payment be must made on an endorsed current year tax bill that is not in tax sale. The Cashiering Session and Back Office must be reconciled. The endorsement payment and fees are then removed from the current year tax bill and the endorsement bill is written off. Select the fees applied to Endorsements and Endorsements during TDA via Tax > Tax Sale > Tax Sale Settings.