Surplus Notices
Navigate:  Tax > Accounts Receivable > Correspondence > Refund and Surplus Notices
Description
After searching for and selecting refunds and surpluses on the Refund and Surplus Notices screen, you can generate surplus notices.
NOTE: Your Aumentum Implementation team is responsible for configuring the correspondence template and for configuring the applicable Surplus/Refund Criteria and Surplus/Refund Routing Rules to conform to business processes.
Steps
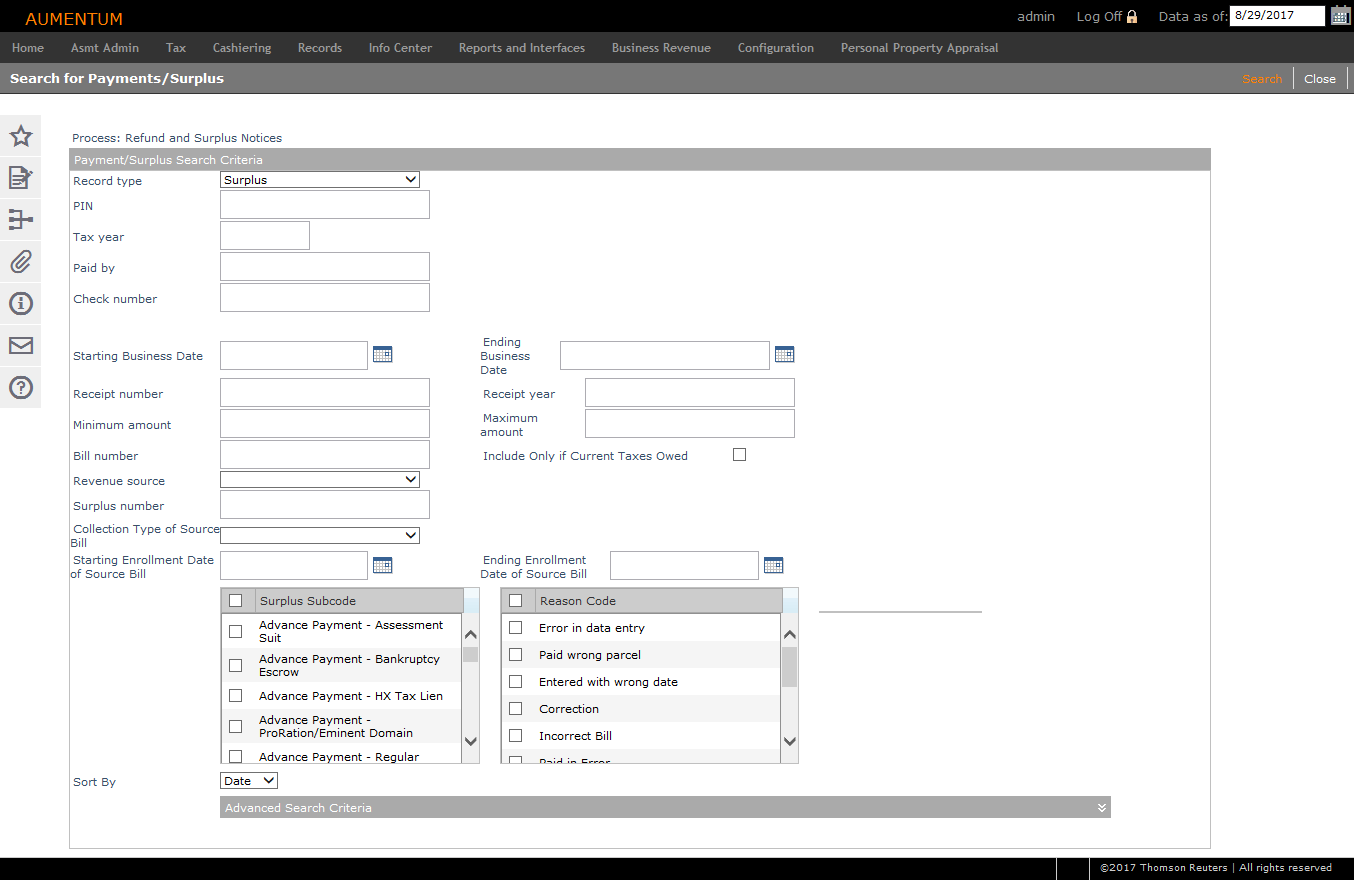
-
On the Search for Payments/Surplus screen, enter your search criteria and click Search.
- In the Payment Search Results screen, select the checkbox for one or more items and click Next.
- In the Print Surplus Notices screen, make a selection from the Report Setup drop-down list.
-
Optionally, enter data in Fields 1 through 10 that you want to include in the notice.
-
In the Surplus/Refund Details panel, click Edit next to the Paid by Name/Address column to open the Refund Correspondent Name/Address.
- Click Create Correspondent to save your edits. You automatically return to the Print Surplus Notices screen.
NOTE: Aumentum Events are created for each address override performed, and depending on your jurisdiction, a workflow is created for the item.
Click here to learn how to make a reason code required for changes.
- Click Configuration > Application Settings.
- In the Maintain Application Settings screen, select Effective Date from the Setting type drop-down list and Tax Accounts Receivable from the Filter by module drop-down list.
- In the Effective Date Application Settings panel, locate Require Reason Code If Edit Refund/Surplus Correspondence, click Edit, and select the checkbox to set the value to Yes.
- Click Apply, then click Save in the Command Item bar.
- Click Close to end the task.
-
Click Print to generate the correspondence.
- In the View Correspondence Process screen, click the Files tab to open the PDF.
- Click Restart to return to the Search for Payments/Surplus screen.
- Click Close to end the task.
Workflow
The Print Surplus Notice screen is workflow enabled, meaning that when editing certain information on the screen, it generates a workflow, depending on your jurisdiction and its workflow requirements and settings. Editing the surplus recipient contact information triggers this workflow. The surplus notice is then selected from the workflow via any sidebar in the application (sidebar > Workflow > View My Worklist).