Maintain Revenue Object Addresses
Navigate:  Records > Addresses > Mailing Address Maintenance > Records Search for Revenue Object > Records Search Results > Maintain Revenue Object Mailing Address
OR
Info Center > Tax Detail > Records Search > Records Search Results > Tax Information
OR
Info Center > Appraisal > Records Search > Records Search Results > Appraisal Information
Description
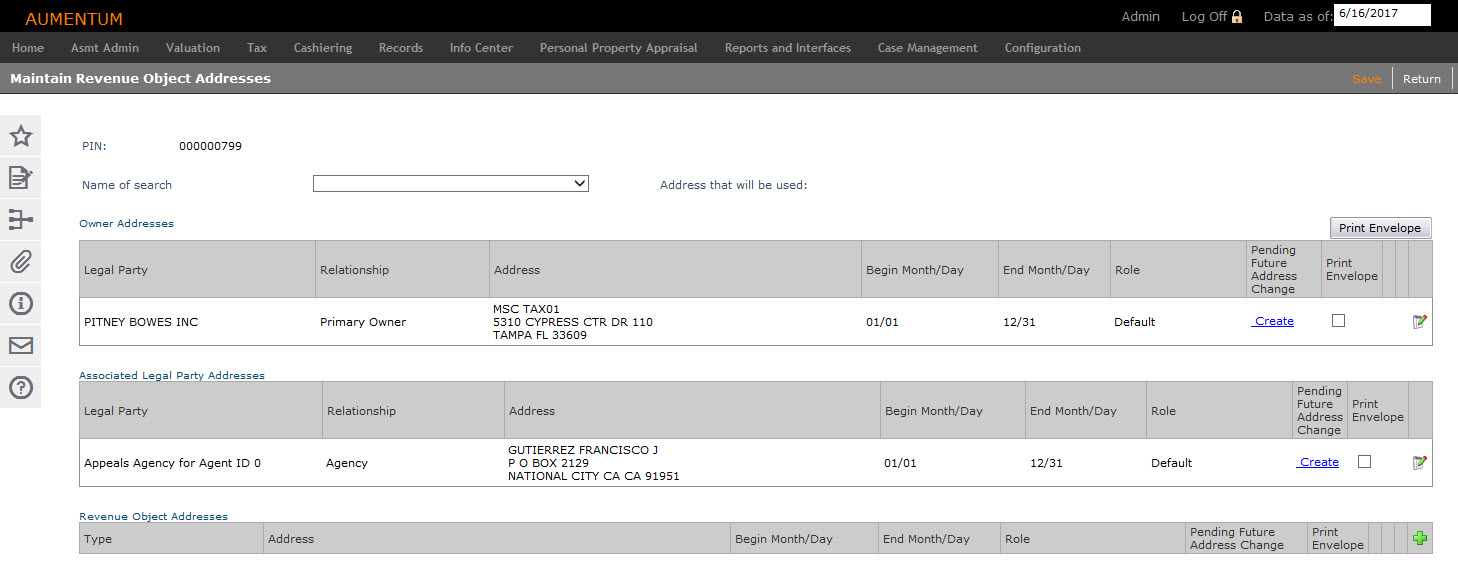
Use this task to view and edit addresses associated with a revenue object. The owner, associated legal party, and revenue object addresses display. You can use this screen to see what mailing address is connected to what search name. For example, you could learn where the real estate tax bill was sent for a revenue object.
IMPORTANT: Define your country before assigning and maintaining addresses. Go to Configuration > Systypes > Select or Add a Systype. Set the effective date for the Systype Category of Address Type, and select Standard. On the Edit a Systype screen, select Edit on My Country in the Additional Information panel. In the Value field, begin typing the name of the country (for example type Tr) and the name of the country displays automatically in the field (for example, Trinidad and Tobago displays in the field when typing Tr). Click Apply and Save. Return to the list of address types. For each type except Standard and Foreign, uncheck the Selectable checkbox to prevent addresses other than the selected country from being available from any drop-down lists on any screens associated with maintaining addresses.
IMPORTANT:
-
Revenue objects have security rights. If you do not have view rights, the Primary Situs field displays the default security message of CONFIDENTIAL ADDRESS. When security rights for user roles do not allow read/write privileges for revenue objects, users are not allowed to change ownership, create or maintain mailing or situs addresses, create or update revenue objects, or set the revenue object effective date.
-
An application setting called Confidential revenue object message was created. If you are the administrator, to set this, go to Configuration > Application Settings > Maintain Applications Settings, set the effective date, and select the Sort by module of Records. Enter the message you want to display.
-
To set security rights, go to Configuration > Security > Roles > Maintain a Role > Edit > Edit Role Details > Non Menu Items > Edit Non-Menu Item Role Details. Select Records and edit the rights for Confidential revenue object message. When performing searches for revenue objects or when performing various tasks associated with revenue objects, if read rights are not set, the mailing address and situs address information are not displayed but are replaced by the message defined.
To change the mailing address used for the various searches, see Set Up Mailing Address Search.
SETUP: See Records and Mailing Address Maintenance for any applicable prerequisites, dependencies and setup information for this task.
Steps
-
Select the Name of the search to display the mailing Address that will be used for that search. The address displays in the Addresses that will be used field.
-
To edit the address information for either the Owner Addresses or the Associated Legal Party Addresses panels, click Edit in the row associated with the address you want to edit to navigate to the Maintain Legal Party screen and edit the legal party information. Edit the information as applicable on that screen and when finished, click Return to return to this screen.
-
To add an address to the revenue object, click Add in the Revenue Object Addresses panel.
-
The Add Mailing Address screen displays so that you can add a mailing address.
-
You will navigate to the Confirm Mailing Address screen.
-
You will then navigate to the Add Address Notes screen, and when you click Finish, will return to the Maintain Revenue Object Addresses screen.
-
To print an on-demand envelope to any of the addresses, check the checkbox in the Print Envelope column of any panel, and then click Print Envelope.
NOTE: This generate a PDF with the from/to address printed in standard business size envelope format for sending to the printer. The from address is set up via Configuration > Localization > Office Contact Information > Maintain Office Contact Information.
NOTE: The Treasurer’s address shows as the return mail address in the upper, left corner of a standard business size envelope when clicking Print Envelope from Records or the Information Center if set up via Configuration > Localization > Office Contact Information > Maintain Office Contact Information. -
Click Save to retain you changes.
-
Click Return to return to the Maintain Revenue Objects Addresses screen.
-
Click Close to end the task.
Tips
At the conclusion of the mailing address maintenance task, Records updates the Aumentum Event tables. See Records.