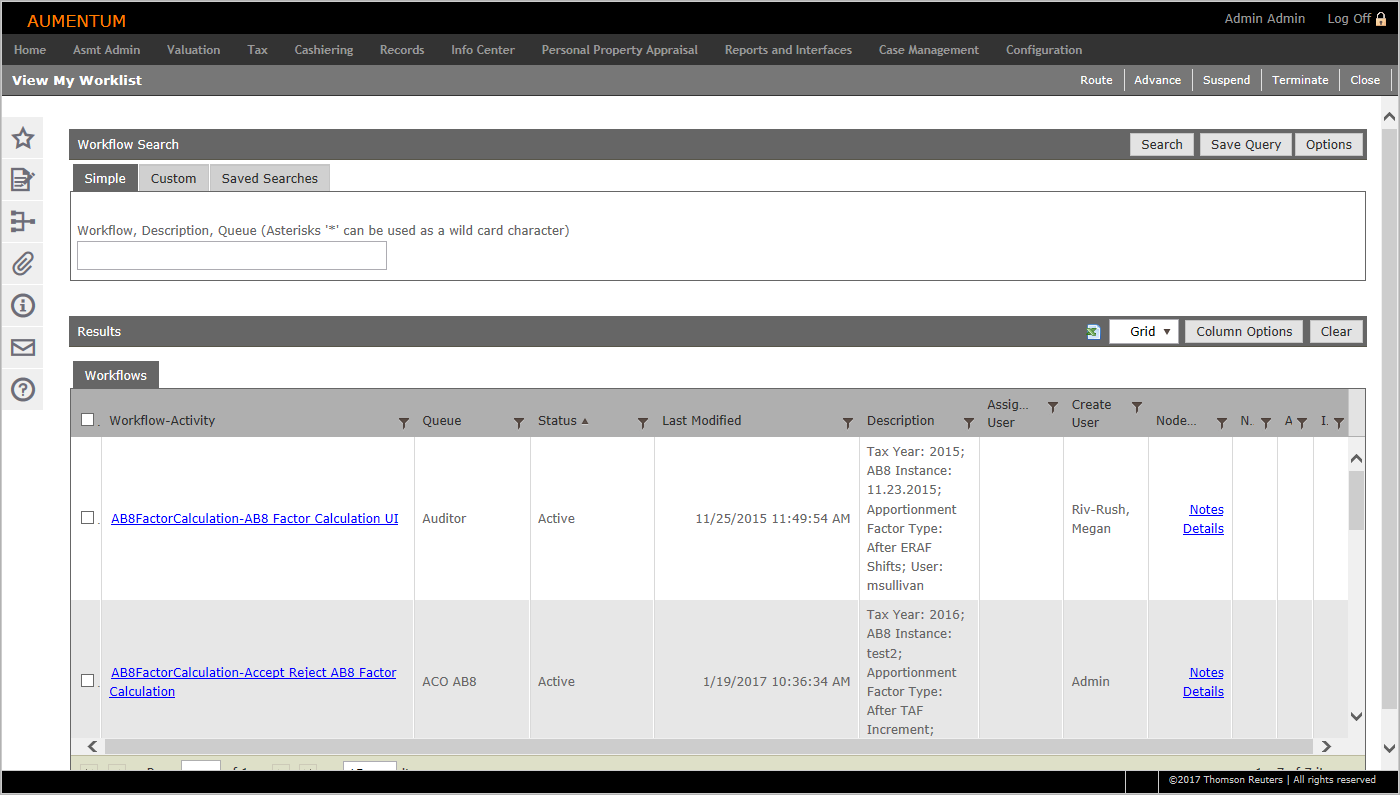
View My Worklist
Navigate:  Sidebar > Workflow icon
Description
Certain activities or tasks can generate workflows, if configured for your jurisdiction. Use the View My Worklist screen to select and view a list of workflow items (tasks) that require additional processing.
For example, documents imported from Documentum via web services, and the manual entry of records using the Official Document Creation task in Records kick off workflows that are sent to your worklist queue.
Workflow items are available for selection from the worklist queue from any screen (click the Workflow icon the sidebar). In the View My Worklist screen, select a workflow item (task) from the queue to process. NOTE: You need permission to view workflow items in the Worklist. If in doubt, contact your system administrator.
Click these drop-down links for more information:
Searching
for and opening Worklist items
NOTE: Workflows use the Aumentum search feature. On the search results screen, a maximum of 100 items are displayed by default.
-
Click the Workflow icon in the sidebar.
-
In the View My Worklist screen, click the Simple, Custom or Saved Searches tab to select a search method.
Click here to learn how to create a custom query.
- In the Workflow Search panel, click the Custom tab.
- Select a data service from the drop-down list.
- Click in the next row, and make a selection from the drop-down list.
- If applicable, make a selection from the operator drop-down list.
- Click in the column to the right and enter or select a value.
- Click the Plus sign to add another line of search criteria to your custom query.
- Click Save Query in the Workflow Search panel header.
- In the Save Data Service pop-up, enter a name.
- Select the checkbox if you want this to be a private query.
- Optionally, enter a description.
- Click Save.
- Click Search to execute the query.
NOTE: The value column can be blank and the query will execute.
-
Enter your search criteria and click Search.
NOTE: You can use wildcard characters, but be aware that using the asterisk (*) wildcard character can significantly slow search performance.
- Click the Options button in the Workflow Search header to specify the maximum number of search results to display.
- In the Results panel, click Clear to define new search parameters.
- Optionally, click Column Options to select the columns that are shown for the search results. In the Column Options pop-up, specify the columns and the order in which you want them displayed, then click Apply.
-
In the Workflow-Activity column of the Workflows panel, click the hyperlink to advance to the first screen applicable to the workflow.
Routing,
Advancing, Suspending, and Terminating Workflows en Masse
In some situations, a workflow item may require routing to another queue, or it may require advancing to someone else's queue with no activity from you prior to being processed. In this situation (and with the proper user role privileges), you can advance the workflow item.
To route a workflow item:
-
In the View My Worklist screen, select the checkbox next to one or more workflow items in the Workflows panel.
- In the Command Item bar, click Route.
- In the Route dialog box, start typing in the Route To field to activate the drop-down list, then select the workflow queue to route the workflow item to.
- Make a selection from the Assign To drop-down list.
- Include any relevant information in the Additional Notes field.
-
Click Route. The item is routed to the applicable queue, and the worklist is refreshed. Or, click Cancel to close the dialog box without routing the workflow item.
In some situations, a workflow item may require routing to another queue, or it may require advancing to someone else's queue with no activity from you prior to being processed. In this situation (and with the proper user role privileges), you can Advance the workflow item.
To advance a workflow item:
-
In the View My Worklist screen, select the checkbox next to one or more workflow items in the Workflows panel.
- In the Command Item bar, click Advance. The selected items are automatically moved to the next applicable stage.
It may be necessary to temporarily suspend a workflow, for example, to step away from your desk or while waiting for additional information. To suspend a workflow:
-
In the View My Worklist screen, select the checkbox next to one or more workflow items in the Workflows section.
- In the Command Item bar, click Suspend. To resume the workflow item, click Resume.
If, for example, an application for an exemption was withdrawn and the application and associated workflow are no longer needed, you can terminate a workflow.
-
In the View My Worklist screen, select the checkbox next to one or more workflow items in the Workflows panel.
- In the Command Item bar, click Terminate.
IMPORTANT: Terminate is controlled by role security.
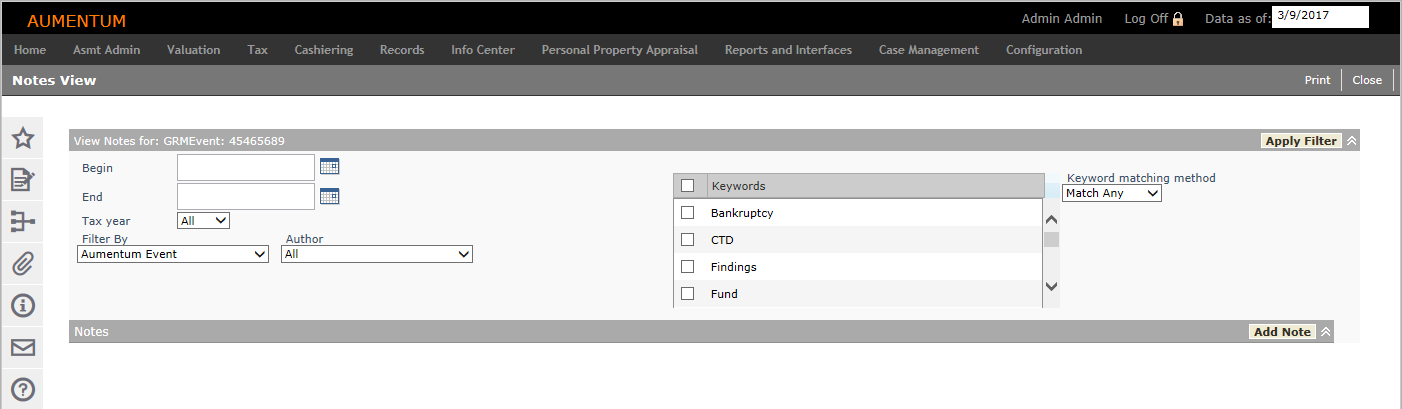
Viewing and Adding Notes
To view or add a note to a workflow item:
-
In the View My Worklist screen, click Notes in the Node Instance Id column in the Workflow panel.
- In the Notes View screen, select parameters and click Apply Filter in the View Items for header, if necessary.
- In the Notes panel, click Add Note.
- Specify a tax year, where to attach the note, keywords and privacy. Provide relevant information in the Note text field.
- Click Save, then click Close.
Workflow Instance Details
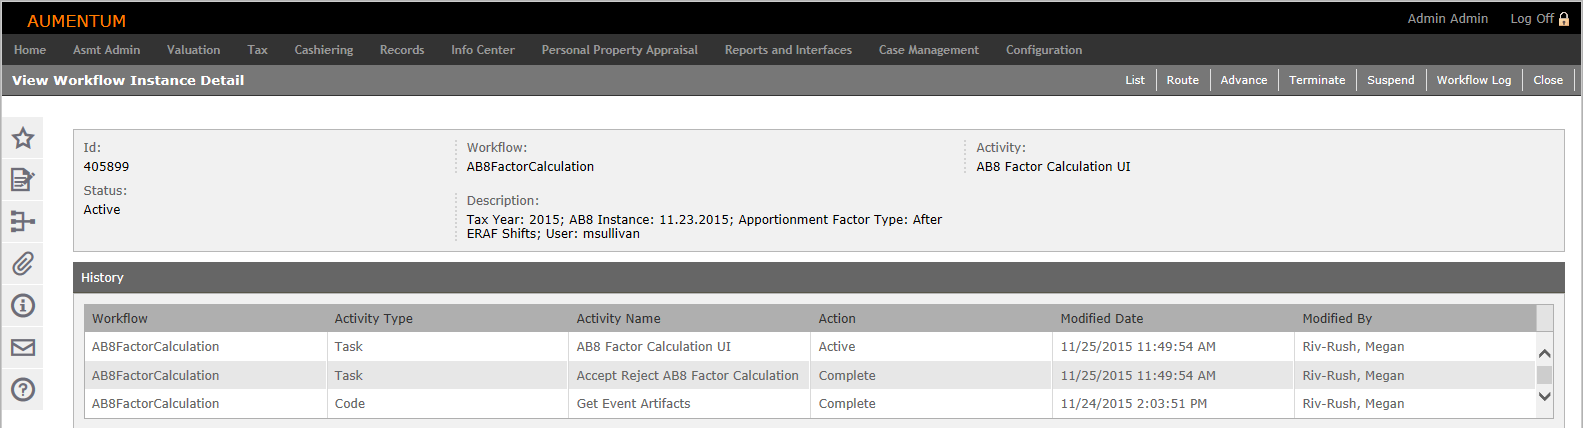
To view workflow details:
- In the View My Worklist screen, click Details in the Node Instance Id column in the Workflow panel.
- In the View Workflow Instance Detail screen – as with the View My Worklist screen – you can route, advance, terminate and suspend workflows.
- Click List to return to the View My Worklist screen, or click Close to end the task.
Workflow Tags
To add tags:
- In the View My Worklist screen, click Tags in the Node Instance Id column.
- In the Workflow Tags pop-up, select or type a tag name and click Add.
- Click Save.
NOTE: Selected tags appear in the Workflow Tags column.
To delete tags:
- In the View My Worklist screen, click Tags in the Node Instance Id column.
- In the Workflow Tags pop-up, click the X for the tag you want to delete from the Selected Tags panel.
- Click Save.
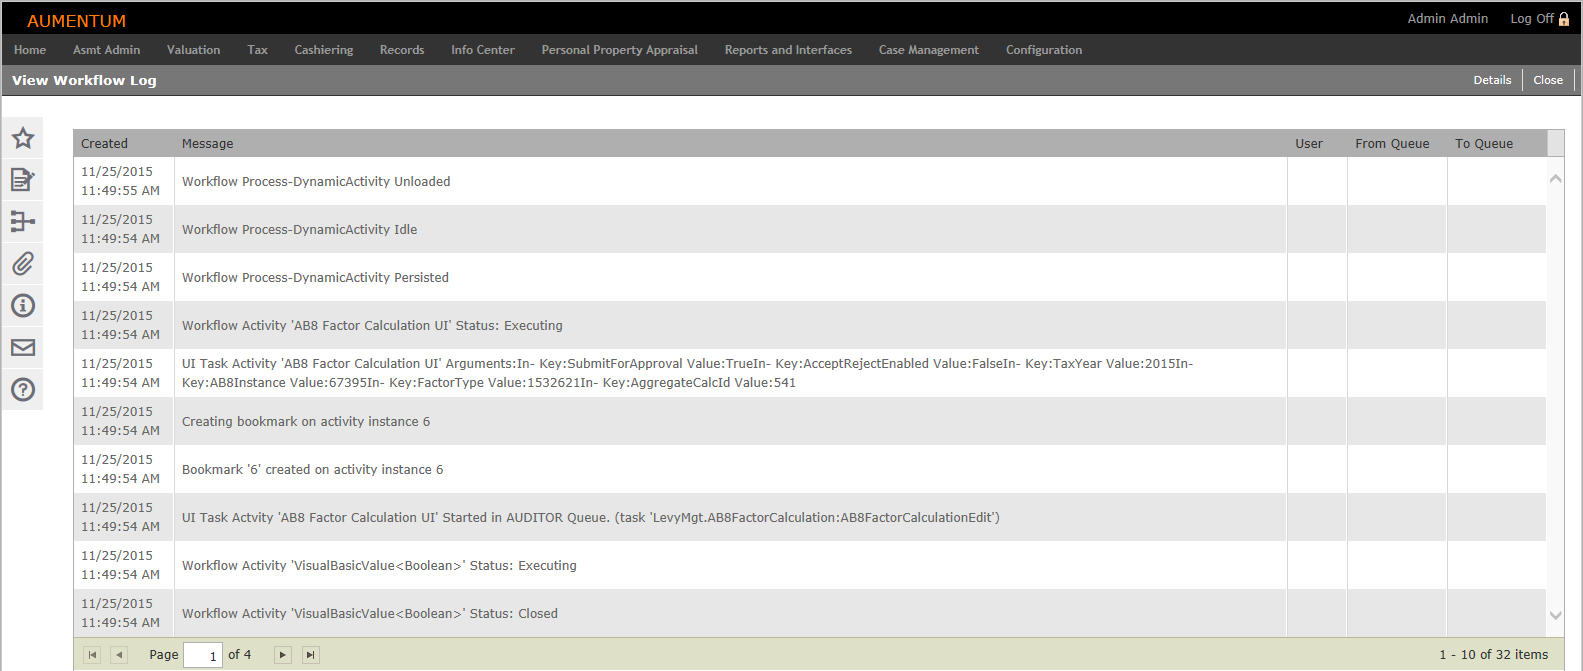
Workflow Log
The View Workflow Log screen is read-only and shows all activity for a workflow item.
- In the View My Worklist screen, click Details in the Node Instance Id column in the Workflow panel.
- In the View Workflow Instance Detail screen, click Workflow Log in the Command item bar.
-
Click Details to return to the View Workflow Instance Detail screen, or click Close to end the View My Worklist task.
Workflow Queues
Your jurisdiction can have various workflow queues with user roles and permissions defined. You can view only those workflow items to which you have user rights.
The following shows an example of queues for a records transfer for one jurisdiction:
-
Intake Clerk. All documents coming into this queue have the default workflow assigned by use of the Document Type. The intake clerk’s dashboard allows them to assign the workflow event to a specific queue to initiate the workflow.
-
Commercial Tech. All Commercial Transfers (defined by the Document Type) are assigned to this queue.
-
Manufactured Home Tech. All Manufactured Home Transfers (defined by the Document Type) are assigned to this queue.
Screens,
Submission Points, and Permissions
The screens and buttons available to you depend on your security rights for the workflow as defined by jurisdictional requirements for user roles. All workflows are similar; once you have a general idea of the process, apply the same concepts to all workflows.
-
All workflows have screens available for review and typically for maintenance.
-
Workflow items typically have one or more submission points , depending on the workflow and your jurisdictional configuration.
-
When processing is at a certain stage, an action button such as Requires Review or Submit to Approve becomes available on the screen, which can initiate the workflow, send the item back to the workflow for additional processing, or submit the item back to the workflow for additional review and approval.
-
Typically, the final screen in the review process has an Accept or Reject button that either sends the items back to the workflow for additional processing when you click Reject, or ends the workflow item when you click Accept.
Workflow
Manager and Worklist Activity and Status
The system administrator for a jurisdiction typically sets the status, except, for example, in the case of an external activity like a record import from Documentum. The list of available queues and activities varies depending on your jurisdictional workflow setup and on your security rights.
-
The worklist displays the queue name and the number of items pending. Once the workflow is created, it is assigned to its initial work queue with a status.
NOTE: Activity and Status vary depending on your jurisdictional requirements.
-
If an activity in the workflow definition is a process or a process step, and the reason code associated with the event is configured for automatic execution, and an attempt is made to automatically execute the activity. When the activity is complete, its status is set to Complete.
-
If an activity in the workflow requires user intervention, you must execute the activity before the status can be set to Complete.
-
When one activity is complete, the next activity is evaluated. When all the activities in a workflow are complete, they are set to Complete and removed from the active work queue.
-
If a workflow activity fails, the activity status is set to Error.
Attachments to Documentum
Attachments can be exported to Documentum, which takes ownership and communicates to Aumentum Tax a new URI for the document attachment.
EXAMPLE: A piece of correspondence is sent to the tax payer. The document is stored and tracked in Aumentum Tax as an attachment. Document can be worked from the View My Worklist screen and exported to Documentum upon completion. Aumentum Tax continues to track the document. Documentum sends a call to Aumentum Tax when it receives the document and updates the reference to the document.
Revenue Object
and Legal Party Lookup
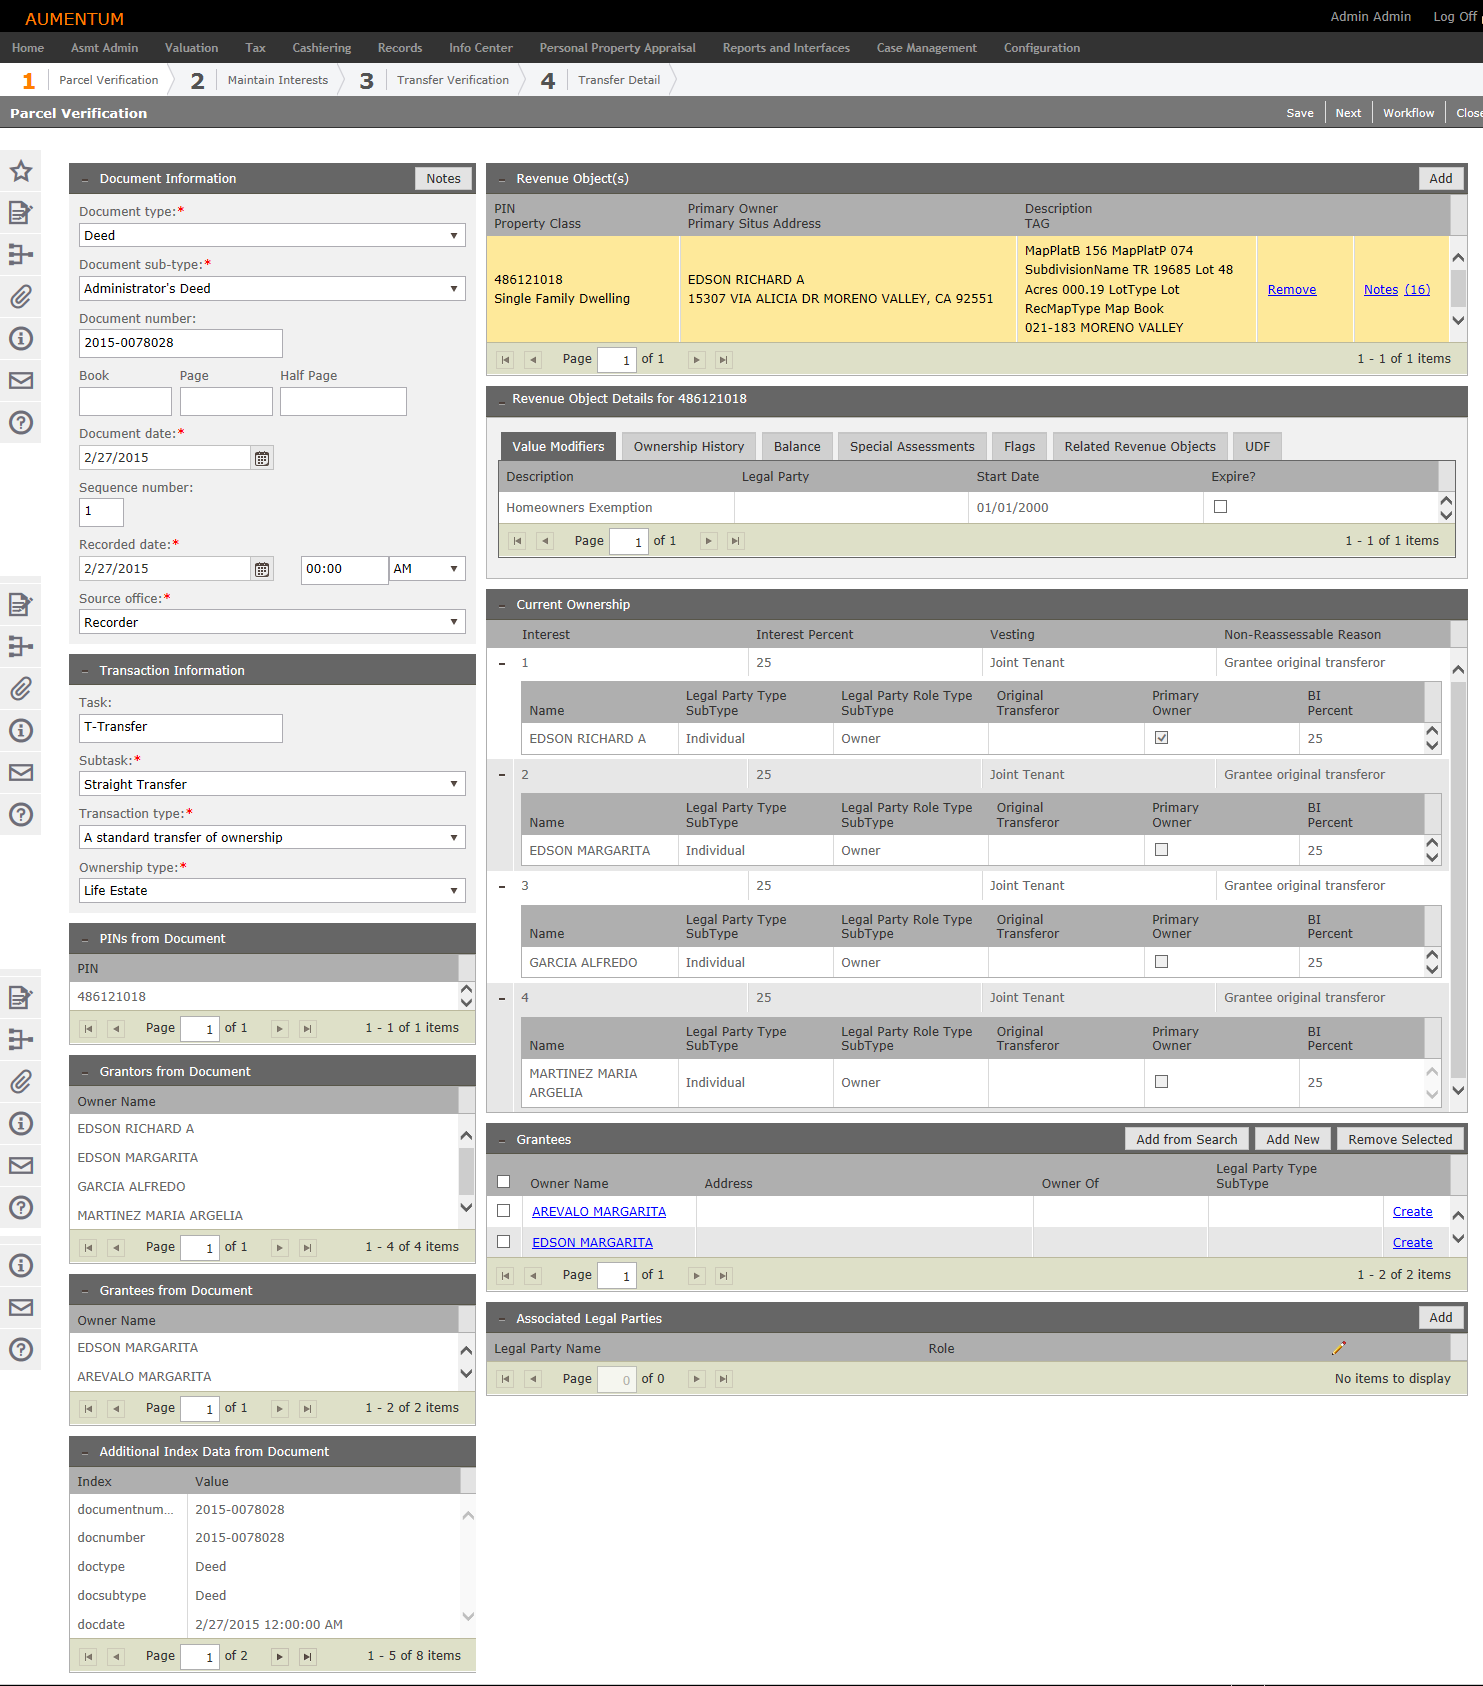
Certain workflows, for example Transfer-Parcel Verification, include links to update and maintain revenue object and legal party information from the workflow screen.
-
Click the Workflow icon in the sidebar.
-
In the View My Worklist screen, enter your search criteria and click Search.
- Click a hyperlink in the Workflow-Activity column.
- From the Parcel Verification screen, click Common Actions in the sidebar and select Revenue Object Modifier Maintenance.
- In the Maintain Revenue Object Modifier screen, make the necessary changes.
- Click Save in the Command Item bar, and specify a change reason in the Add Statutory Reference pop-up.
- Click Close.