Users
Navigate:  Configuration > Security and User Maintenance > Users
Description
Each person who uses the Aumentum Platform must have a user record which contains user (login) name and password, preferences, and the allowed roles, which determines access rights to various tasks, screens, and fields.
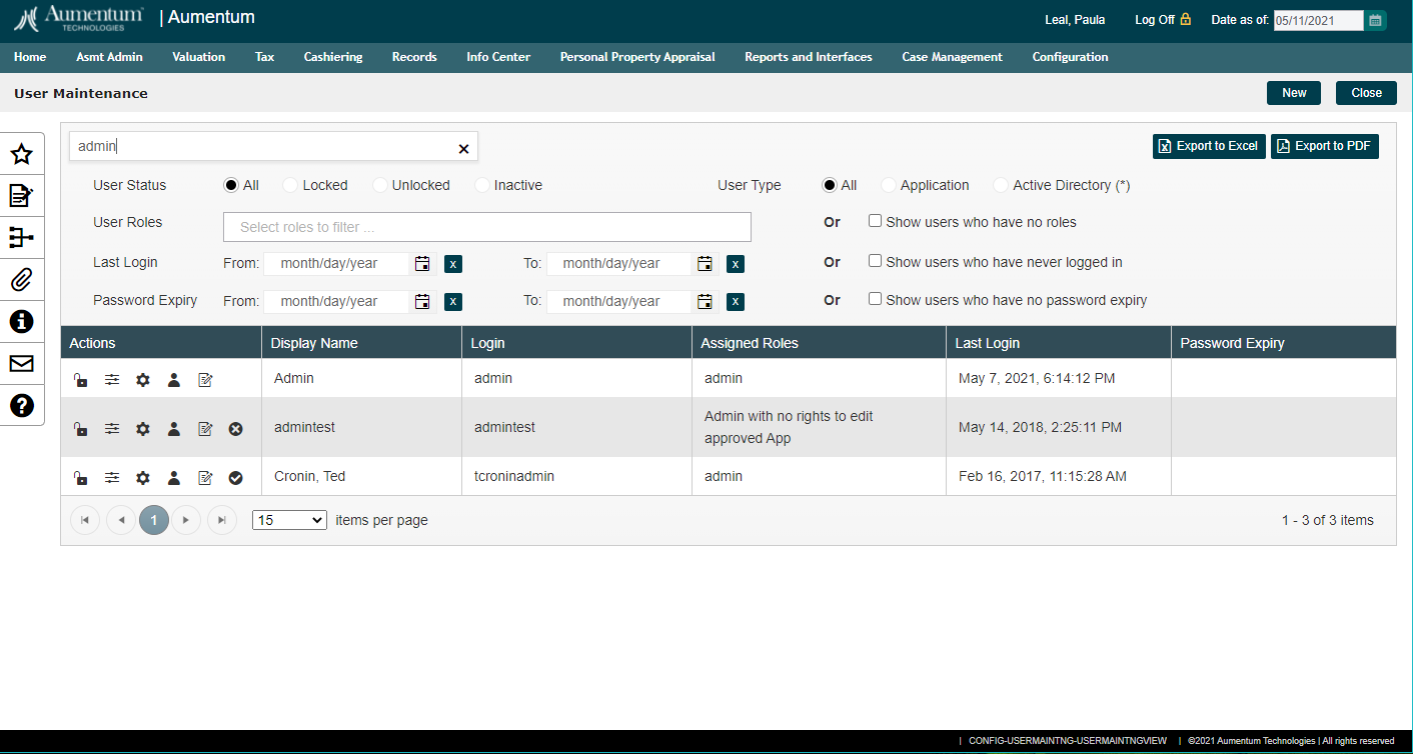
Options at the top of the page, below the Search field allow the administrator to quickly filter the list of users for situations that may need to be addressed. Such as all users who are locked or who are inactive.
Create New User Steps
-
On the User Maintenance screen, click New.
-
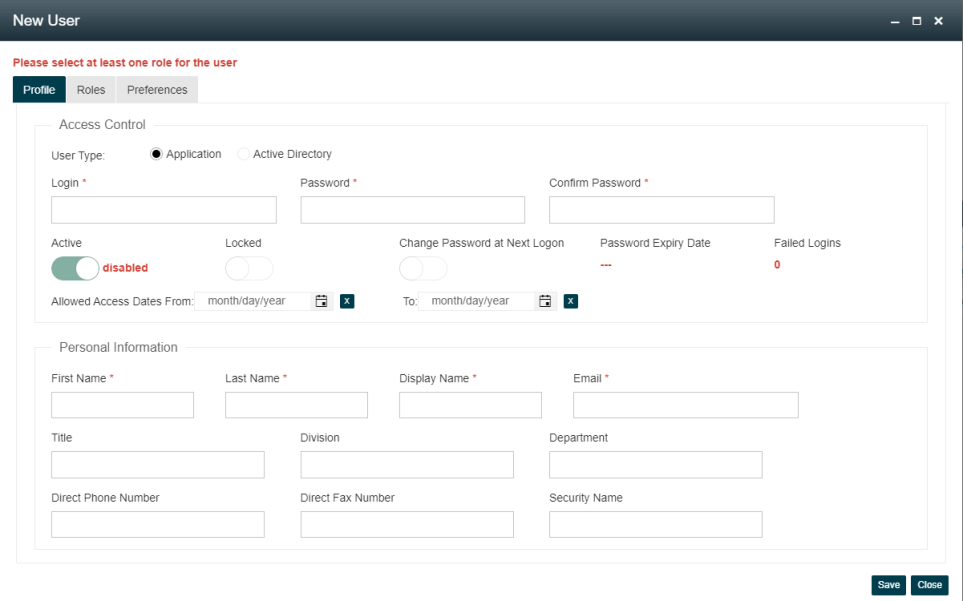
On the New User screen, enter the user's profile, roles and preferences information.
-
Click the Profile tab if not already on it.
-
Choose the appropriate User Type.
- Application users will use a password maintained by the Aumentum application.
- Active Directory users will use the password maintained by the active directory domain.
-
Application users:
- Enter the Login name. This is the unique identifier for the user record and is what the user enters when logging in. It is not case sensitive, can contain letters and numbers, and can be up to 32 characters.
- Enter the Password, then enter the Confirm Password to confirm you entered it correctly. Each user has a confidential password for secure login.
- The password is case sensitive, can contain letters and numbers, and can be up to 32 characters.
- IMPORTANT: If you are also a Proval user, your password is restricted to the Proval password requirement of 8 alphanumeric characters maximum.
-
Active Directory users:
-
Enter the Domain Name. This field will default to the active directory domain associated with the application web server.
-
Enter the User Name. This is the users active directory user name.
-
Click the Check Name button to verify the domain and user name combination. This action will also pre-populate some subsequent fields for you.
-
-
Enter the user's first name, last name, display name and e-mail address.
-
Optionally, define any of the remaining selections, including:
-
Active, Locked and Change password at next login.
-
From and To allowed access dates
-
Title, Division, and Department
-
Phone and Fax Numbers
-
Security Name
-
-
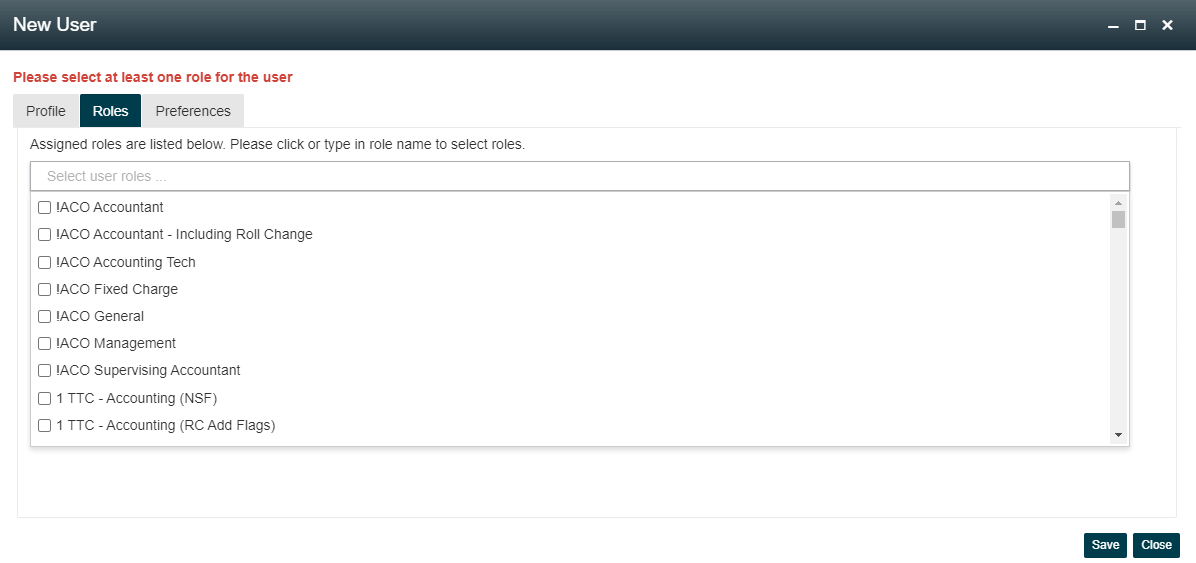
Click the Roles tab.
-
Place your cursor into the Select user roles … field.
-
Select the appropriate roles to assign to the user. Optionally, type the name of the role you want to assign to filter the list of available roles.
-
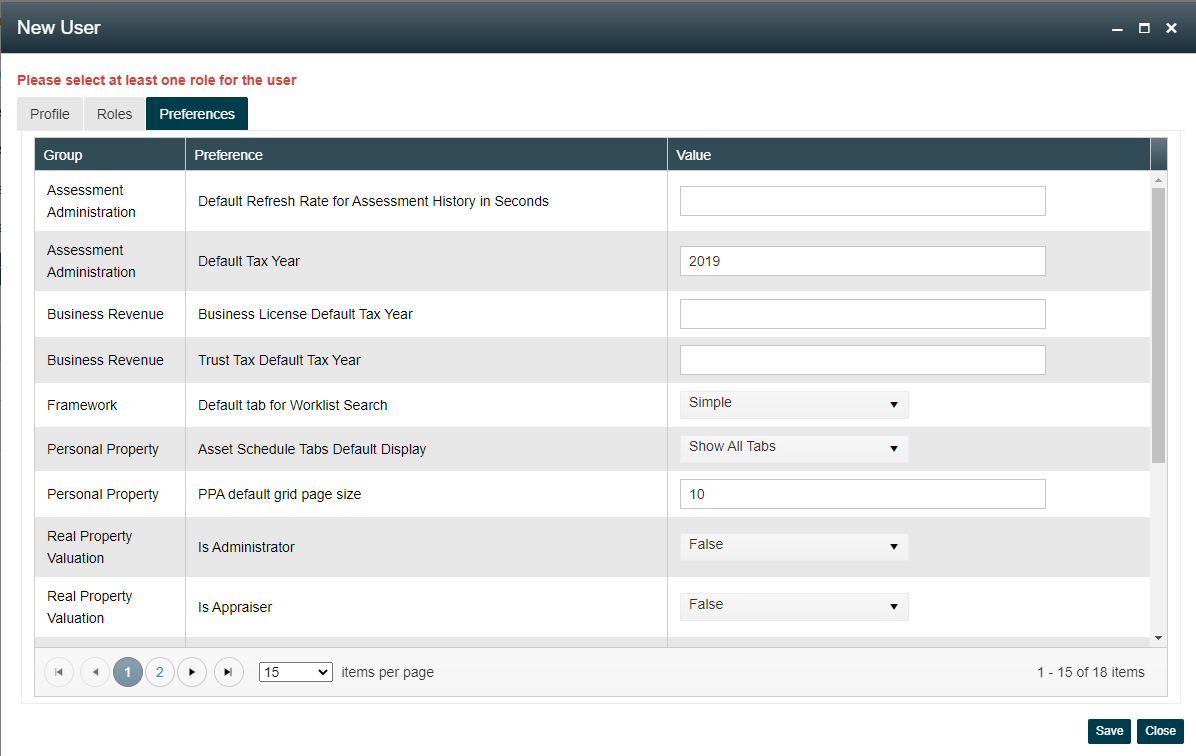
Click the Preferences tab.
-
For each preference, enter or select a value.
-
Click Save to save changes to the user record.
Locking and Unlocking an Account
Admin users can lock and unlock users accounts without having to edit the number of login attempts.
 The Lock icon will display as locked
  when a user has too many failed login attempts. The administrator can click on this icon to lock or unlock the user.
- Users who try to log in to a locked account will be notified that the account is locked. The message will say "User account is locked, please contact system Administrator"
- A system log is maintained to track who has locked or unlocked an account and when.
User Filters and Icons
-
On the User Maintenance screen, use the filtering options to find the user you want to edit.
-
 The Preferences icon allows the administrator easy access to the preferences for the user.
 -
 The Roles icon allows a quick view of the roles assigned to the user and the ability to modify those roles if necessary.
 -
 The Profile icon allows access to the user's profile information.
 -
 The Notes icon allows the administrator to add notes about the user.
-
When one or more notes are associated with the user, the number of notes available will display as part of the Notes icon.
-
-
 Deactivate and
  Reactivate icons allow the administrator to quickly deactivate a user id for someone who has left employment and reactivate if those same users return.
Add a Domain Account to Aumentum
-
On the Maintain User Information screen, click the Domain tab.
-
Enter a name in the Domain name field.
NOTE: The Domain associated with the name is already populated.
-
Enter the first or last name or the account name in the User name field.
-
Click Check Name to associate the name to the account and automatically pull in the information, including name and email. A panel with results displays if multiple matches are found to the name. Click on the appropriate name.
-
Select a role you want to add from the Available Roles list on the left side of the Roles panel, and click Add To to add the role and move it to the Selected Roles list.
-
To remove a role from a user, select it and click Remove.
-
-
Edit the user's preferences in the Preferences grid. For each preference, enter or select a value, such as the default effective tax year or the number of top menus to display.
- Click Notes in the Command Item bar to add or edit a note for the user record on the Maintain Notes screen.
-
Click Save to save the changes to the domain information.
Tips
User accounts now have an Active Date range to control when a user can access the system. Administrators can use this new feature when adding new user account before an employee's first day, or setting the date in advance of a departing employee.
The default effective tax year preference determines which year’s data is automatically displayed for this user. Whenever necessary, the user may change the tax year for the task they are working on by selecting it in the sidebar.
A user's individual startup task preference can only be changed by that specific user. All other preferences can be set by other users with the necessary administrative rights.
The User Role for Transfer Detail Task and Records Import Folder for Flat Files settings are set internally and are not to be modified by the user. They will be removed from this screen in a future version.
You can change the preferences for all users via Maintain Mass User Preferences, available from the Common Actions menu of Maintain Default Preferences.
To set your own personal user preferences click on the User Settings link in the Logged-In User panel. This page is accessible to any logged in user.
NOTE: Some user settings might not be listed on this page due to security reasons.
Dependencies, Prerequisites, and Setup
Configuration Module
-
Set up roles and default user preferences before setting up user records.
-
Click Configuration > Security and User Maintenance > Preferences to set default preferences for all users. There is an option to make individual preferences user modifiable.
-
The selections available in the startup task drop-down list are limited to those modules and tasks to which the user has been granted access rights in Role Maintenance.
-
Make sure each user role has security rights to access this screen. In the Maintain a Role screen, click Edit for a role you want to edit. In the Edit Role Details screen, click Non-Menu Itemsin the upper right corner. Click Configuration, then set View rights for the User Settings task and View and Modify rights for the Maintain User Settings view.