Edit Check Configuration
Navigate:  Configuration > Edit Check Configuration
Description
User-defined edit checks help you to ensure or prevent specific edits to your data. The checks can be soft stops (blue warnings at the top of the screen) or block stops (yellow messages that require fixing the condition to continue).
An Edit Check runs only if the defined events occur in the application. Edit Checks consist of the basic definition of a check, defining what events initiate a check, defining what conditions must be met for the Edit Check process to run, and the Edit Check test.
An Edit Check can have many conditions associated with it, or none. If the Edit Check has conditions associated with it, Aumentum evaluates the conditions prior to the Edit Check being run. If all of the Edit Check conditions evaluate as True, the Edit Check tests are run.
Edit Checks that evaluate as False are automatically saved to the log. Checks that evaluate as True are not saved to the log unless the definition of the Edit Check prompts Aumentum to do so.
Steps
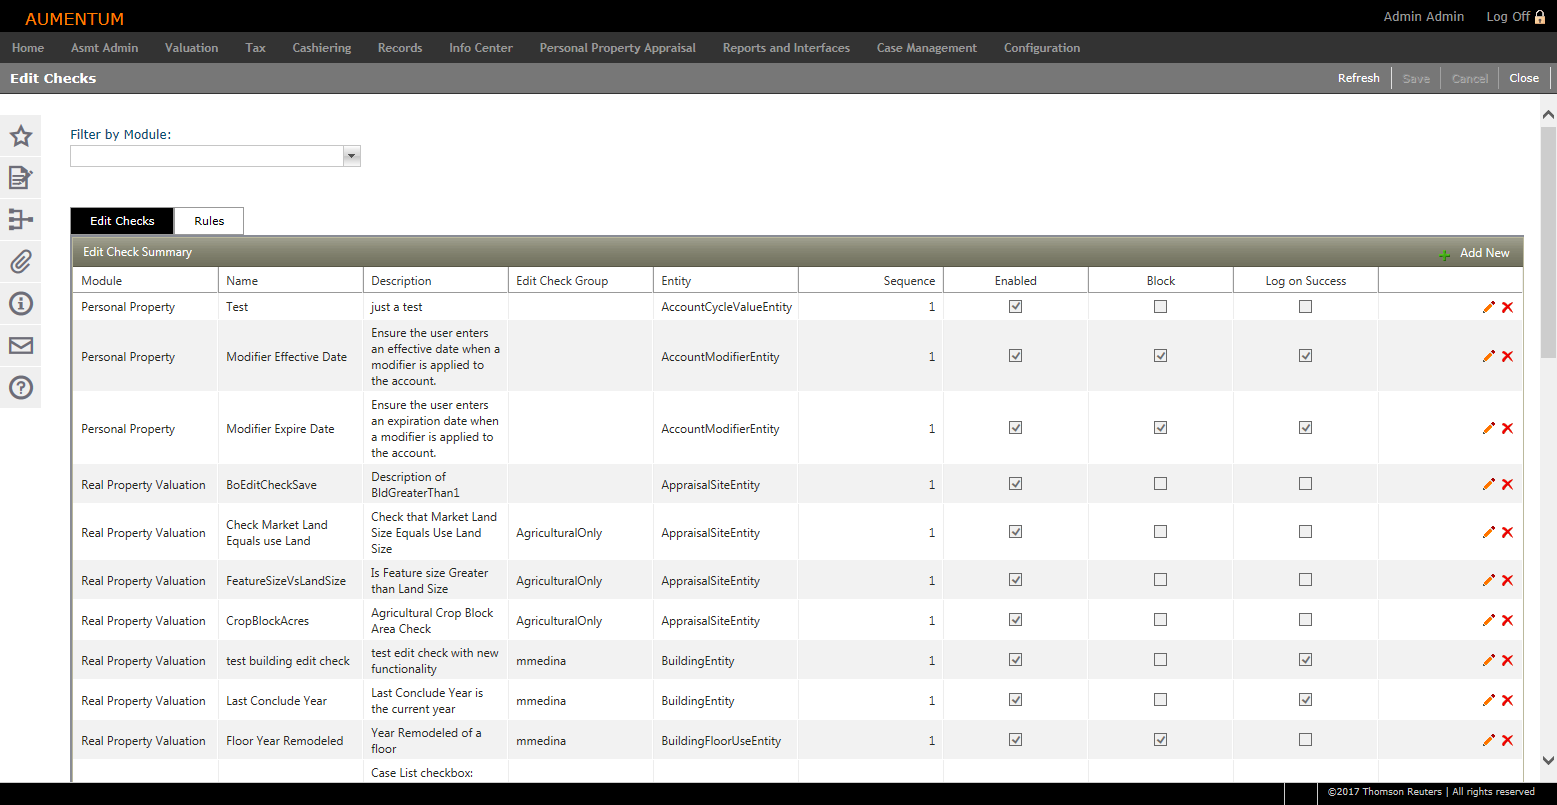
Edit Checks includes two tabs:
-
Edit Checks – View a list of all edit checks that have been defined. Edit and/or add a new Edit Check and Rule Mappings for each Edit Check.
-
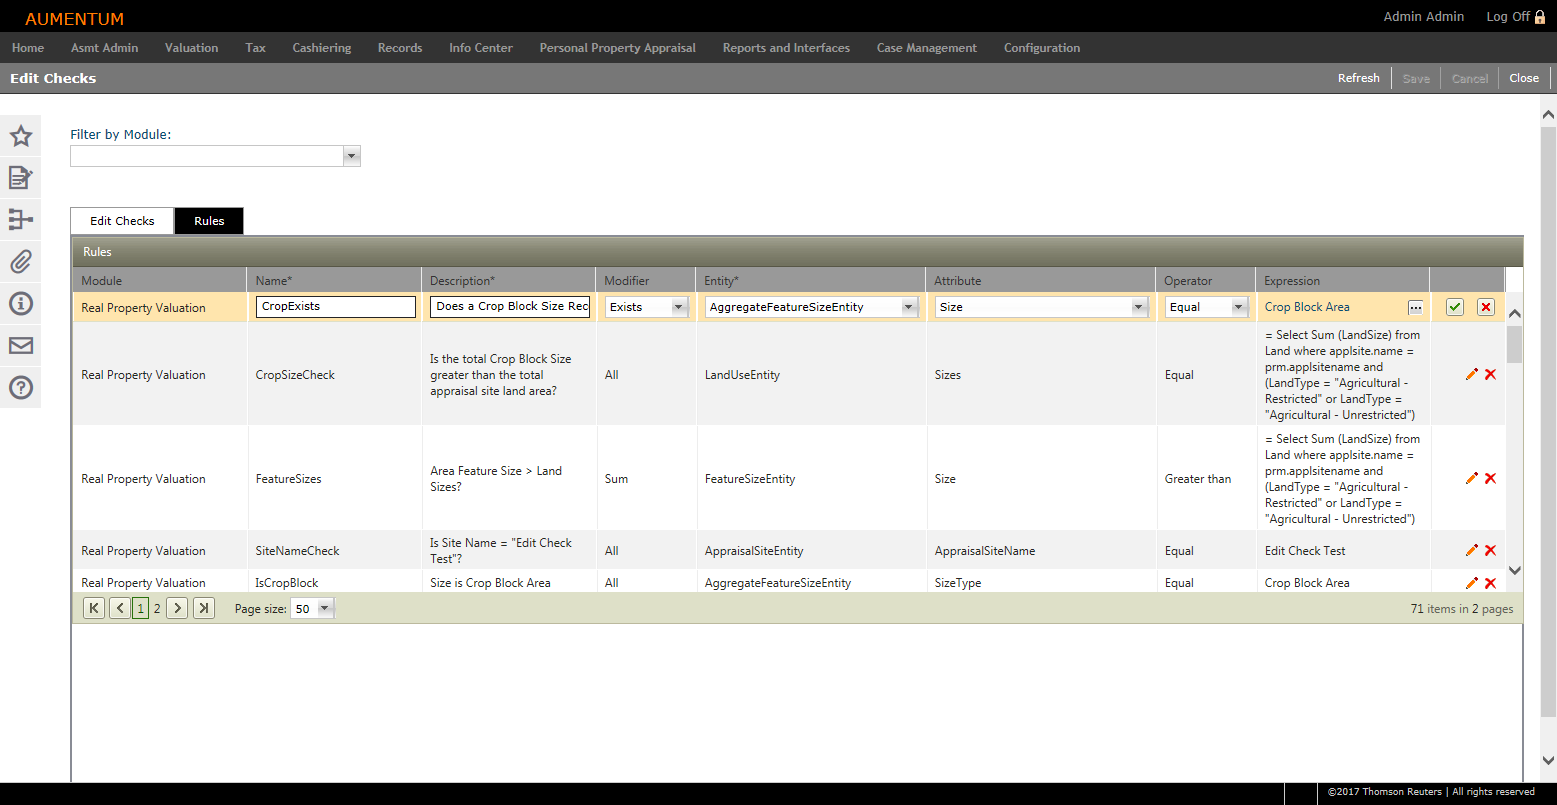
Rules – Define rules to be used in the Edit Checks tab.
Edit Checks
-
On the Edit Checks screen, make a selection from the Filter By Module drop-down list.
-
In the Edit Checks tab, click Add New, or click the Pencil icon to edit an existing check.
-
In the Edit Check Definition sub-tab, enter the Edit Check Name and description.
-
Enter or select an effective date.
-
Select each event that will trigger the edit check.
-
Make a selection from the Edit Check Group drop-down list, or enter a new group name and click Add New Group.
-
Make a selection from the Entity drop-down list.
-
In the Caption Text field, enter the message to display when an edit check fails. This is also stored in the Edit Check Log.
-
Optionally, select the checkbox for Enabled or Blocked (blocked from running the check), as needed.
-
Select the Log on Success if you want to also log edit checks that evaluate to True.
-
In the Sequence field, enter the order in which this check should run (1 being first).
-
Optionally, enter help text. It displays on-screen or in a report to help users understand how edit checks work and what to do with the results.
-
Click Apply at the bottom of the panel to save these changes, or click Cancel to close the panel without saving.
-
In the Rule Mapping sub-tab, you define what conditions and tests are checked to enforce the edit rule.
-
In the Active Conditions panel, click Add New, or click the Pencil icon to edit an existing condition.
-
Enter the group and the order (Sequence field) in which this check should run (1 being first).
-
Enter a Name and Description for the condition.
-
Make a selection from the Operator drop-down list, which defines the operator that belongs between the Entity-Attribute pair and the expression of the condition/rule. The condition/rule then calculates to True or False.
-
And – Considers the entity and the attribute.
-
Or – Considers the entity or the attribute.
-
None – Considers neither the entity nor the attribute.
-
-
Click the green check mark to save all changes.
-
Click the red X to cancel all changes and close the editor.
-
-
Repeat steps 15 through 19 in the Active Tests panel.
-
Click Apply, then click Save in the Command Item bar.
NOTE: Conditions and tests are defined in the Rules tab and the drop-downs are populated based on your selection in the Filter by Module drop-down list. An edit check must have at least one condition mapped as a test associated with it.
Rules
A rule is an expression that compares one piece of data to another. An operator between the Entity-Attribute pair and the expression determines what comparison is made. The rule then calculates to True or False.
-
Make a selection from the Filter By Module drop-down list.
-
In the Rules panel, click Add New, or click the Pencil icon to edit an existing rule.
-
Enter or select information for each column.
-
Select a variable from the drop-down list and click Insert Variable.
-
Select a function. As you build the expression, it displays in the Expression field; click your cursor within the field to build/modify any portion of the expression, as needed.
-
Optionally, Round or Truncate.
-
Round - Enter a number and click Round. Values are rounded according to configuration settings.
-
Truncate - Enter a number and click Truncate. Truncation limits the number of digits to the right of the decimal point to be considered.
-
-
Click Validate to check the syntax of the expression and ensure it is valid. A Valid or Invalid message displays.
-
Click Reset Expression to clear the Expression field and start over.
-
Click OK to save the expression, or click Cancel to exit the expression building wizard without saving.
-
Click the green check mark to save changes.
-
Click the red X to cancel all changes and close the editor.
-
-
Click Save in the Command item bar.
-
Click Refresh to clear all selections and refresh the page.
-
Click Cancel to close all editors without saving changes.
-
Click Close to end the task.
-
Click here for more information on modifiers
Modifiers determine how the Entity-Attribute pairs are calculated and how the dataset is restated. You can also define modifiers for Entity-Attribute pairs.
All – All records for the dataset are processed through the comparison and must pass for the comparison to be True.
Any – All records for the dataset are processed through the comparison. Only a single record in the dataset is required to pass for the comparison to be True.
Same – This comparison is used in conjunction with the preceding comparison, based on its modifier. This is most often used to handle multi-attribute comparisons when using the Any or All modifiers.
Exists – The only requirement is that the dataset specified by the Entity-Attribute pair exists.
First – Only the first record in the dataset is compared. If no records exist in the dataset, the result of the comparison is True.
Last – Only the last record in the dataset is compared. If there are no records in the dataset, the result of the comparison is True. If it is required that the dataset not be empty, then this modifier can be used in conjunction with another comparison that specifies the Exists modifier.
Min – The minimum value in the dataset is used as the value for comparison. This attribute must be a numeric or integer data type.
Max – The maximum value in the dataset is used as the value for comparison. This attribute must be a numeric or integer data type.
Sum – The sum of all of the values in the dataset is used as the value for the comparison. This attribute must be a numeric or integer data type.
Average – The average value for this attribute in the dataset is used as the value for the comparison. This attribute must be a numeric or integer data type.
Click here for more information on operators
Defines the operator that belongs between the Entity-Attribute pair and the expression of the rule. The rule then calculates to True or False.
Equal – whether the attribute equals a value in the expression.
Not Equal – whether the attribute is not to a value in the expression.
Greater than – whether the attribute is greater than a value in the expression.
Less than – whether the attribute is less than the value in the expression.
Greater than or equal to – whether the attribute is greater than or equal to the value in the expression.
Less than or equal to – whether the attribute is less than or equal to the value in the expression.
In – whether the attribute is contained in a list in the expression.
Having – returns attributes where aggregate values meet the specified expression.
Not Having – returns attributes where aggregate values do not meet the specified expression.
Contains – returns attributes that contain a word, expression or phrase or part thereof.
Click here for more information on expressions
Click the ellipses icon in the Expression column to open the expression building wizard.
Click here for function descriptions
SQRT – Square Root
ABS – Absolute Value
POW – Power
ATAN – Arc Tangent
EXP – Exponent
INT – Integer
SIN – Sine
COS – Cosine
LOG – Logarithm
MIN – The maximum (of variable 1 and 2)
TAN – Tangent
COT – Cotangent
LN – Natural Logarithm
MAX – The maximum (of variable 1 and 2)
SEC – Secant
CSC – Cosecant
NOTE: Validation does not verify that the expression will work the way you intend, but that the equation will return results as it has been structured. A transform variable is not accepted until it is validated.