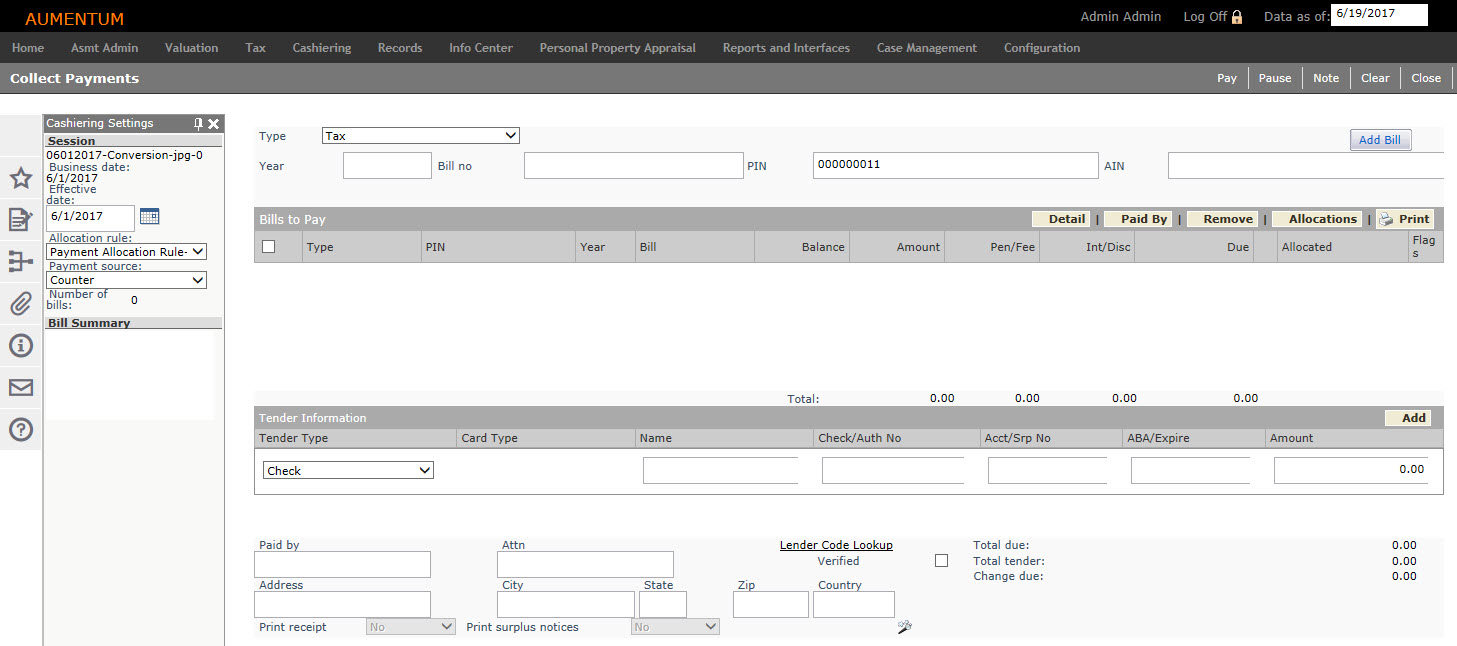
Collect Payments
Navigate:  Cashiering > General > Payment Collection > Collect Payments
Description
Cashiers use the Collect Payments screen to process various types of payments.
-
Payments imported into the system via Accounts Receivable batch process imports.
-
Counter payments from walk-in customers.
-
Mail-in payments.
Payment processing kicks off data for reports, such as for a collections summary report, showing payment collection activities and details.
Screen Features
See these sections for information about the various screen features:
-
Click Configuration > Application Settings.
- On the Maintain Application Settings screen, select Cashiering from the Filter by module drop-down list.
- Locate the Use custom receipt functionality setting and click Edit.
-
Select the checkbox in the Setting Value column to set it to True and click Apply.
- Click Save in the Command Item bar.
-
Click Reports and Interfaces > Correspondence > Setup > Report Setups and select the category of Receipt to set up the custom receipt.
-
To create a mail merge document to use for custom receipts, follow these steps:
-
Download a receipt datasource from Reports and Interfaces > Data Services > Manage Data Services. Select a receipt Data Service. You advance to the View Data Service screen. Select the file type to Download As and click Download.
-
Create a Mail Merge document using Microsoft Word and the data service you downloaded for the notices.
-
Upload the document via Reports and Interfaces > Correspondence > Report Setups > Manage Report Setups. Click the Manage Templates button to advance to the Manage Templates screen. Click Upload and navigate to your mail merge file and upload the file.
-
Create a Report Setup via Reports and Interfaces > Correspondence > Report Setups > Manage Report Setups. Select a custom receipt setup or click New to create it. You advance to the Edit Report Setup screen. Enter/edit a Description, select the Receipt Category, select a receipt Data Service, select the EngineMail Merge, and select the Template you uploaded in step 3.
-
Click Save.
-
-
Click Custom Receipt to display the Custom Receipts pop-up window.
-
Select the receipt(s) to print and click Print to submit the custom receipt to batch process where you can monitor it on the Monitor Batch Processes screen.
-
Simple Search: Retrieve bills by entering/selecting information in the available fields.
-
The information needed varies with theService type: (service types vary, depending on your location)
For a Tax bill, enter the year and bill number, PIN, or alternate identification number (AIN).
-
Advance – Advance type, PIN, alt PIN, amount
-
Miscellaneous – Miscellaneous type, receipt number, permit number
-
Motor Vehicle – Tax Year, VIN, license plate number
-
Tax and Tax Sale – Year, bill number, PIN, AIN
-
Repay reversal – Receipt number, receipt year
-
State Credit – Revenue account
-
Click Add Bill. The bill information displays in the Bills to Pay panel. Repeat until all desired bills are displayed in the grid.
-
Detailed Search: Perform a detailed search using other information related to the bill or revenue object.
-
Click the Common Actions icon in the sidebar.
-
Click the Use Detailed Search link to access the Records Search screen. If your jurisdiction uses the Aumentum Personal Property (PPA) module, the Records Search screen will have a Search for Personal Property Account button you can optionally use to search for personal accounts. Enter the information you know and click Search. On the search results screen, select one or more revenue objects to make payments and click Next to return the bills for the selected revenue objects to the Bills to Pay grid.
-
Scan the Bill: If your office has the proper equipment, you may also scan the bill to receive payment. The bill automatically displays in the Bills to Pay grid. Continue scanning additional bills until all of the items for this payment are included in the panel.
Cashiering Settings Sidebar
Includes information about payment sources and allocation rules to use.
The Cashiering Settings sidebar displays automatically with the Collect Payments screen. To hide it, click the X in its upper right corner. To display it again, click the Cashiering Settings icon above the Common Actions icon.
The sidebar includes business date, effective pay date, allocation rule, payment source, number of bills, bill summary, and universal misc source summary. These settings apply to the payment as a whole, although you can modify the choices for a particular bill.
IMPORTANT: The effective pay date, allocation rule, and payment source can be changed (if you have security rights) before bills are brought into the grid. If bills have already been displayed you can check the box in the appropriate row(s) and then change the effective date and allocation rule for the selected bills. Once the transaction has completed, the session information will revert to what was originally set up. You can also change the effective date at any time, even if you have generated receipts. However, the new receipt numbers will re-sequence to the beginning number again.
If you are working with alternate payment sources, make a selection from the Payment source drop-down list. Lockbox and Web payments are processed on the Collect Payments screen. Changing the payment source to Mail opens the Process Mail Payments screen; changing the payment source to Lender opens the Process Lender Payments screen.
The Bill Summary and Universal Misc Source Summary sections are updated automatically as bills are added to the payment.
Generating Custom Receipts
Details how to generate custom receipts.
The Custom Receipts panel displays at the bottom of the screen. You can print custom receipts from the Collect Payment screen if it is applicable to and set up for your jurisdiction.
To set this up:
Generating Custom Receipts
Searching
for Bills
Simple Versus Detailed via Common Actions – Describes the two types of bill searches and how to perform a detailed search.
Select the bills to pay using one of three different methods:
NOTE: For jurisdictions using the collection type attribute, the Secured and Unsecured charges have been separated and display both Current and Delinquent subtotals for each collection type in the panel.
Override Security
Shows how to define the required security information for overriding amounts, based on user security level and if allowed in the jurisdiction.
If a cashier or if the global cashiering is set up to allow overrides, then an override icon displays when conditions are applicable. Click on the icon to open the Override Security dialog and enter your Username and Password to authorize the change. Click Finish to enable the override.
Types of Payments
The primary, or most frequently received, payments are property tax payments.
NOTE: See the Tax section for detailed instructions for the entire screen. The other forms of payment described include steps applicable to that particular type of collection that precede normal tax collection steps.
The various forms of payments accepted are:
-
Advance – A pre-payment of, for example, future taxes or escrow payment when no balance is due on the revenue object account. Subtypes can include, depending on your jurisdiction.
-
Bankruptcy/litigation – A payment collection for revenue objects in bankruptcy or litigation for which an official case exists in the system.
-
Business license – For jurisdictions that use the system to collect and process business license payments and fees.
-
Miscellaneous – Used to collect a wide variety of payments, perhaps unique to jurisdictions, e.g., photocopies, notary services, license fees, other office charges. See special notes about:
NOTE: The Accounts Receivable > Payment Listing Report (Tax > Accounts Receivable > Reports > Payment Listing Report) includes a Recap: Print Miscellaneous Source UDF checkbox that when selected includes all UDF information for miscellaneous payments in the report.
-
Motor vehicle – A payment received from the Department of Motor Vehicles (DMV) in jurisdictions that use batch processes to import DMV payments.
-
Payment plan – A payment made against a payment plan in which a revenue object is enrolled, typically due to late or delinquent tax payments. See special notes about:
-
Payment Plan Recalculation of Unpaid Plan Installments if Tax Bill Charges are Changed
-
Payment Plan, Protested Payment, and Cashiering Do Not Allow Payment Flags
-
State credit – Certain jurisdictions allow any tax credits applied by the state to the revenue object to be processed and applied as a payment against the account.
-
Tax – The most commonly used type for collecting property tax payments.
-
Tax sale – When real property payments are delinquent, the property goes to tax sale in some jurisdictions. There are various subtypes of Tax Sale payments, depending on your jurisdiction. See special notes about the following:
Special Notes about All Types of Payments
-
Cashiering honors the Accounts Receivable setup of advance payment types for Surplus Subcodes (starting with Aumentum v 9.00.05). Only Advance payment types are shown on the Map Advance Surplus screen (Tax > Accounts Receivable > Setup > Advance Surplus Mapping > Map Advance Surplus) that are:
-
Active and selectable based on the systype configuration
-
Mapped to a surplus subcode on the Map Advance Surplus screen. The Collect Payments screen displays all mapped types of suspense that are configured in Tax > Accounts Receivable > Setup > Suspense Setup to be enabled and valid for Cashiering and that are mapped in Tax > Accounts Receivable > Setup > Advance Surplus Mappings. Cashiering shows all advance payment types and gets the appropriate surplus subcode from the Accounts Receivable mapping screen, which then applies the applicable suspense setup for the revenue account. Also, Cashiering knows to cashier advance surplus mappings with a surplus subcode with a category of suspense differently from regular advance types.
NOTE: Set up the Advance Payments systype for each advance payment type via Configuration > Systypes > Select or Add a Systype. Select the Advance Payments systype to navigate to the Edit a Systype screen To designate specific advance payment types as unavailable for selection on the Collect Payments screen, check the Unselectable checkbox when setting these up. Any advance payment types you designate as Unselectable also display as unselectable on the Map Advance Surplus screen.
IMPORTANT: Other validations also exist that remove certain advance payment types from the list on the Collect Payments screen even if designated as selectable and even if the Surplus Subcode is valid. selected Verify your original list before making items unselectable on the Edit a Systype screen.
-
The type of payments accepted depend on your jurisdiction. For example, your jurisdiction may not be set up to collect payments for motor vehicles or business licenses.
-
If a revenue account is in foreclosure status, it remains in foreclosure status until the delinquency is paid in full.
-
Many options are available when paying each item: full payment, partial payment, allocation change, effective date change, and waive interest and/or penalty. You can also print a bill, view details of the revenue object, or add a note. This is described in the Action Buttons section.
-
If a session has not been opened, the system automatically shows the Open Session by Cashier screen where you select the session to use to accept payments. From that screen, you can select an existing session or create a new session and click Set as Default to return to the Collect Payments screen. However, you will also first need to set up a till via Cashiering > Setup > Tills > Maintain Tills.
-
A Delinquent message is printed on cashiering paid receipts when back taxes remain unpaid. To set this up, go to Configuration > Application Settings, and set the effective date for the new application setting Print delinquent message on small receipt and set it to True.
-
Redemption payments for items assigned to the Agency can also be collected through Cashiering using the Type of Tax. Any redemption fees are removed from these items. Set up late payment rules and penalty/interest criteria via Accounts Receivable > Payment Terms Mapping and Setup. When setting up late payment rule criteria on the Set Up Payment Terms Rule Details screen, Add bill application rules, and select Apply When Tax Bill is in Tax Sale Agency.
-
A cashiering level setting to control the restriction of loading secure/unsecure bills allows restricting of cashiers by collection type. To accommodate this, a Allow payment of the following collection type field was created on the Set Up Cashier screen with available selections of All, Secure, and Unsecured. Jurisdictions who do not work with secured/unsecured bills select the default of All. When the cashier attempts to load bills on the Collect Payments screen for which they are not set up, a message displays indicating that the bill(s) has been removed from loading due to the setting.
NOTE: See Collection Type Transfer and Transfer Collection Type for information about transferring collection types from secured to unsecured and vice versa. If a single defaulted secured bill is loaded into the grid, and that revenue object has other bills with unpaid charges that are defaulted secured, those bills are retrieved automatically into the grid as well. Certain defaulted secured bills can be removed from the set if in Override mode as defined by security rights. All defaulted secured bills can also be removed from the set. However, a payment transaction cannot be completed with only some defaulted secured bills in the set unless in Override mode. Certain counties work around this by using business processes to retrieve bills by PIN, removing current bills if necessary, and manually enforcing payment of all defaulted secured bills. In this situation, for batch collections, enforcement of full payment of all delinquent secured bills is typically handled by CUBS and manually; Aumentum payment import checks that bills are paid in full, but still allows payment of a single delinquent secured bill even if there are others, if that is what is in the payment file.
Here are examples of what happens when bills are defined as secured/unsecured, corrections, and how payment collection is affected.
Partial Payment of Secured with a Correction
Bill original charges are $1000. Original bill is Secured, and is $1000
|
Charge/Pmt |
Collection Type |
Inst |
Amount |
|
Charge |
Secured |
1st |
$500 |
|
Charge |
Secured |
2nd |
$500 |
Partial payment of $200 is made before the Defaulted Date. Payment is recorded as Secured.
|
Charge/Pmt |
Collection Type |
Inst |
Amount |
|
Charge |
Secured |
1st |
$500 |
|
Charge |
Secured |
2nd |
$500 |
|
Payment |
Secured |
1st |
-$200 |
Remainder of bill is unpaid past the Defaulted Date. County runs process to move remaining unpaid charges to Defaulted Secured.
|
Charge/Pmt |
Collection Type |
Inst |
Amount |
|
Charge |
Secured |
1st |
$200 |
|
Charge |
Defaulted Secured |
1st |
$300 |
|
Charge |
Secured |
2nd |
$0 |
|
Charge |
Defaulted Secured |
2nd |
$500 |
|
Payment |
Secured |
1st |
-$200 |
Roll/process correction occurs, lowering the charges on the bill to $800. The $200 in charges that were Secured (and paid while Secured) should remain secured. Levy must ensure that the charges on the 1st installment remain $500, the charges on the 2nd installment are reduced by $200. The remaining unpaid $600 ($300 on 1st, $300 on 2nd) should remain Defaulted Secured.
|
Charge/Pmt |
Collection Type |
Inst |
Amount |
Comment |
|
Charge |
Secured |
1st |
$200 |
1st inst is unchanged |
|
Charge |
Defaulted Secured |
1st |
$300 |
1st inst is unchanged |
|
Charge |
Secured |
2nd |
$0 |
|
|
Charge |
Defaulted Secured |
2nd |
$300 |
2nd inst is reduced |
|
Payment |
Secured |
1st |
-$200 |
|
Partial Payment of Secured and Defaulted Secured; Correction.
This example intentionally does not add penalty/fees
Original bill is Secured, and is $1000
|
Charge/Pmt |
Collection Type |
Inst |
Amount |
|
Charge |
Secured |
1st |
$500 |
|
Charge |
Secured |
2nd |
$500 |
Partial payment of $200 is made before the Defaulted Date. Payment is recorded as Secured.
|
Charge/Pmt |
Collection Type |
Inst |
Amount |
|
Charge |
Secured |
1st |
$500 |
|
Charge |
Secured |
2nd |
$500 |
|
Payment |
Secured |
1st |
-$200 |
Remainder of bill is unpaid past the Defaulted Date. County runs process to move remaining unpaid charges to Defaulted Secured.
|
Charge/Pmt |
Collection Type |
Inst |
Amount |
|
Charge |
Secured |
1st |
$200 |
|
Charge |
Defaulted Secured |
1st |
$300 |
|
Charge |
Secured |
2nd |
$0 |
|
Charge |
Defaulted Secured |
2nd |
$500 |
|
Payment |
Secured |
1st |
-$200 |
Partial payment of $300 is made after the Defaulted Date. Payment is recorded as Defaulted Secured.
|
Charge/Pmt |
Collection Type |
Inst |
Amount |
|
Charge |
Secured |
1st |
$200 |
|
Charge |
Defaulted Secured |
1st |
$300 |
|
Charge |
Secured |
2nd |
$0 |
|
Charge |
Defaulted Secured |
2nd |
$500 |
|
Payment |
Secured |
1st |
-$200 |
|
Payment |
Defaulted Secured |
1st |
-$300 |
Roll/process correction occurs, lowering the charges on the bill to $800. Levy must ensure that the charges on the 1st installment remain $500, the charges on the 2nd installment are reduced by $200. The $200 in charges that were Secured (and paid while Secured) should remain secured. The $300 in charges that were paid while Defaulted Secured should remain defaulted secured. The remaining unpaid $300 should remain Defaulted Secured, and the $300 payment made while the charges were Defaulted Secured should remain Defaulted Secured.
|
Charge/Pmt |
Collection Type |
Inst |
Amount |
|
Charge |
Secured |
1st |
$200 |
|
Charge |
Defaulted Secured |
1st |
$300 |
|
Charge |
Secured |
2nd |
$0 |
|
Charge |
Defaulted Secured |
2nd |
$300 |
|
Payment |
Secured |
1st |
-$200 |
|
Payment |
Defaulted Secured |
1st |
-$300 |
Reallocating a payment on a bill that was partially paid as Secured, and partially paid as defaulted secured must keep payments associated to the appropriate collection type.
-
If a payment was originally made as a secured payment, that amount must stay secured unless there are no longer secured charges to which to apply it.
-
If a payment was originally made as a defaulted secured payment, that amount must stay defaulted secured unless there are no longer secured charges to which to apply it.
-
If the bill is adjusted so that there is now an excess payment, that amount becomes surplus and the secured or defaulted secured buckets are adjusted accordingly.
Here are some examples of this:
Partial Payment of Secured and Defaulted Secured with a Correction
Original bill is Secured, and is $1000
|
Charge/Pmt |
Collection Type |
Inst |
Amount |
|
Charge |
Secured |
1st |
$500 |
|
Charge |
Secured |
2nd |
$500 |
Partial payment of $200 is made before the Defaulted Date. Payment is recorded as Secured.
|
Charge/Pmt |
Collection Type |
Inst |
Amount |
|
Charge |
Secured |
1st |
$500 |
|
Charge |
Secured |
2nd |
$500 |
|
Payment |
Secured |
1st |
-$200 |
Remainder of bill is unpaid past the Defaulted Date. County runs process to move remaining unpaid charges to Defaulted Secured.
|
Charge/Pmt |
Collection Type |
Inst |
Amount |
|
Charge |
Secured |
1st |
$200 |
|
Charge |
Defaulted Secured |
1st |
$300 |
|
Charge |
Secured |
2nd |
$0 |
|
Charge |
Defaulted Secured |
2nd |
$500 |
|
Payment |
Secured |
1st |
-$200 |
Partial payment of $300 is made after the Defaulted Date. Payment is recorded as Defaulted Secured.
|
Charge/Pmt |
Collection Type |
Inst |
Amount |
|
Charge |
Secured |
1st |
$200 |
|
Charge |
Defaulted Secured |
1st |
$300 |
|
Charge |
Secured |
2nd |
$0 |
|
Charge |
Defaulted Secured |
2nd |
$500 |
|
Payment |
Secured |
1st |
-$200 |
|
Payment |
Defaulted Secured |
1st |
-$300 |
Roll/process correction occurs, lowering the charges on the bill to $800. Levy must ensure that the charges on the 1st installment remain $500, the charges on the 2nd installment are reduced by $200. The $200 in charges that were Secured (and paid while Secured) should remain secured. The $300 in charges that were paid while Defaulted Secured should remain defaulted secured. The remaining unpaid $300 should remain Defaulted Secured, and the $300 payment made while the charges were Defaulted Secured should remain Defaulted Secured.
|
Charge/Pmt |
Collection Type |
Inst |
Amount |
|
Charge |
Secured |
1st |
$200 |
|
Charge |
Defaulted Secured |
1st |
$300 |
|
Charge |
Secured |
2nd |
$0 |
|
Charge |
Defaulted Secured |
2nd |
$300 |
|
Payment |
Secured |
1st |
-$200 |
|
Payment |
Defaulted Secured |
1st |
-$300 |
Partial Payment of Secured and Defaulted Secured; Correction resulting in surplus
Original bill is Secured, and is $1000
|
Charge/Pmt |
Collection Type |
Inst |
Amount |
|
Charge |
Secured |
1st |
$500 |
|
Charge |
Secured |
2nd |
$500 |
Partial payment of $200 is made before the Defaulted Date. Payment is recorded as Secured.
|
Charge/Pmt |
Collection Type |
Inst |
Amount |
|
Charge |
Secured |
1st |
$500 |
|
Charge |
Secured |
2nd |
$500 |
|
Payment |
Secured |
1st |
-$200 |
Remainder of bill is unpaid past the Defaulted Date. County runs process to move remaining unpaid charges to Defaulted Secured.
|
Charge/Pmt |
Collection Type |
Inst |
Amount |
|
Charge |
Secured |
1st |
$200 |
|
Charge |
Defaulted Secured |
1st |
$300 |
|
Charge |
Secured |
2nd |
$0 |
|
Charge |
Defaulted Secured |
2nd |
$500 |
|
Payment |
Secured |
1st |
-$200 |
Partial payment of $300 is made after the Defaulted Date. Payment is recorded as Defaulted Secured.
|
Charge/Pmt |
Collection Type |
Inst |
Amount |
|
Charge |
Secured |
1st |
$200 |
|
Charge |
Defaulted Secured |
1st |
$300 |
|
Charge |
Secured |
2nd |
$0 |
|
Charge |
Defaulted Secured |
2nd |
$500 |
|
Payment |
Secured |
1st |
-$200 |
|
Payment |
Defaulted Secured |
1st |
-$300 |
Roll/process correction occurs, lowering the charges on the bill to $100. Levy must ensure that the charges on the 1st installment become $100, the charges on the 2nd installment are reduced by $500 to zero. The payment should go to the Secured charges first and the remainder become surplus.
|
Charge/Pmt |
Collection Type |
Inst |
Amount |
Comment |
|
Charge |
Secured |
1st |
$100 |
Reduced to $100 |
|
Charge |
Defaulted Secured |
1st |
$0 |
Reduced to $0 |
|
Charge |
Secured |
2nd |
$0 |
|
|
Charge |
Defaulted Secured |
2nd |
$0 |
Reduced to $0 |
|
Payment |
Secured |
1st |
-$100 |
Secured pmt reduced by $100 |
|
Payment |
Defaulted Secured |
1st |
$0 |
Def Sec pmt reduced by $300 |
|
Surplus |
n/a |
n/a |
$400 |
Surplus is $400 |
This issue is further complicated by the presence of calculated interest/penalty or fee amounts. If the original penalty calculated on the original basis was $100 and was partially paid as secured, but after correction the penalty is less than was paid, then there is an amount that is free to be reapplied to other charges. It would then be reapplied using payment allocation rules to remaining charges.
Partial Payment of Secured w/Penalty with Correction after Defaulted Date reduces Tax/Penalty
Bill is $1000 and is past both installment Due Dates (but before Defaulted Date) so has $100 in Penalty. A partial payment of $570 is made. Payment allocation rules allocate by installment, penalty then tax.
|
Charge/Pmt |
Collection Type |
Charge Type |
Inst |
Amount |
|
Charge |
Secured |
Tax |
1st |
$500 |
|
Charge |
Secured |
Penalty |
1st |
$50 |
|
Charge |
Secured |
Tax |
2nd |
$500 |
|
Charge |
Secured |
Penalty |
2nd |
$50 |
|
Payment |
Secured |
Tax |
1st |
-$500 |
|
Payment |
Secured |
Penalty |
1st |
-$50 |
|
Payment |
Secured |
Tax |
2nd |
-$0 |
|
Payment |
Secured |
Penalty |
2nd |
-$20 |
After the Defaulted Date has passed, the remaining unpaid charges become Defaulted Secured
|
Charge/Pmt |
Collection Type |
Charge Type |
Inst |
Amount |
|
Charge |
Secured |
Tax |
1st |
$500 |
|
Charge |
Secured |
Penalty |
1st |
$50 |
|
Charge |
Secured |
Tax |
2nd |
$0 |
|
Charge |
Defaulted Secured |
Tax |
2nd |
$500 |
|
Charge |
Secured |
Penalty |
2nd |
$20 |
|
Charge |
Defaulted Secured |
Penalty |
2nd |
$30 |
|
Payment |
Secured |
Tax |
1st |
-$500 |
|
Payment |
Secured |
Penalty |
1st |
-$50 |
|
Payment |
Secured |
Tax |
2nd |
$0 |
|
Payment |
Secured |
Penalty |
2nd |
-$20 |
After the unpaid charges have been moved to Defaulted Secured, a correction occurs, lowering the tax charges on the bill to $600. So the 1st installment will have penalty (because it is paid in full) but the 2nd installment will not have penalty. Results for the charges and payments are:
-
1st installment Secured Tax charge remains $500, with matching payment
-
1st installment Secured Penalty charge remains $50, with matching payment
-
2nd installment Secured Tax charge remains $0
-
2nd installment Defaulted Secured Tax charge is reduced by $500 to $100
-
2nd installment Secured and Defaulted Secured Penalty becomes $0
-
Remaining $20 payment that had been applied towards 2nd installment Secured Penalty is lifted and applied to 2nd installment Defaulted Secured Tax.
-
Balance owed by taxpayer is $80 2nd installment Defaulted Secured Tax. (After 30 days, Aumentum will calculate the 10% penalty, adding it as $8 Defaulted Secured Penalty.)
|
Charge/Pmt |
Collection Type |
Charge Type |
Inst |
Amount |
Comment |
|
Charge |
Secured |
Tax |
1st |
$500 |
Unchanged |
|
Charge |
Secured |
Penalty |
1st |
$50 |
Unchanged |
|
Charge |
Secured |
Tax |
2nd |
$0 |
|
|
Charge |
Defaulted Secured |
Tax |
2nd |
$100 |
Reduced by $400 correction |
|
Charge |
Secured |
Penalty |
2nd |
$0 |
Removed due to 30 day grace |
|
Charge |
Defaulted Secured |
Penalty |
2nd |
$0 |
Removed due to 30 day grace |
|
Payment |
Secured |
Tax |
1st |
-$500 |
Unchanged |
|
Payment |
Secured |
Penalty |
1st |
-$50 |
Unchanged |
|
Payment |
Secured |
Tax |
2nd |
$0 |
Unchanged |
|
Payment |
Defaulted Secured |
Tax |
2nd |
-$20 |
Reapplied to remaining charge – 2nd inst Defaulted Secured Tax |
Partial Payment of Secured w/Penalty with Correction after Defaulted Date increases Tax
Bill is $1000 and is past both installment Due Dates (but before Defaulted Date) so has $100 in Penalty. A partial payment of $570 is made. Payment allocation rules allocate by installment, penalty then tax.
|
Charge/Pmt |
Collection Type |
Charge Type |
Inst |
Amount |
|
Charge |
Secured |
Tax |
1st |
$500 |
|
Charge |
Secured |
Penalty |
1st |
$50 |
|
Charge |
Secured |
Tax |
2nd |
$500 |
|
Charge |
Secured |
Penalty |
2nd |
$50 |
|
Payment |
Secured |
Tax |
1st |
-$500 |
|
Payment |
Secured |
Penalty |
1st |
-$50 |
|
Payment |
Secured |
Tax |
2nd |
-$0 |
|
Payment |
Secured |
Penalty |
2nd |
-$20 |
After the Defaulted Date has passed, the remaining unpaid charges become Defaulted Secured
|
Charge/Pmt |
Collection Type |
Charge Type |
Inst |
Amount |
|
Charge |
Secured |
Tax |
1st |
$500 |
|
Charge |
Secured |
Penalty |
1st |
$50 |
|
Charge |
Secured |
Tax |
2nd |
$0 |
|
Charge |
Defaulted Secured |
Tax |
2nd |
$500 |
|
Charge |
Secured |
Penalty |
2nd |
$20 |
|
Charge |
Defaulted Secured |
Penalty |
2nd |
$30 |
|
Payment |
Secured |
Tax |
1st |
-$500 |
|
Payment |
Secured |
Penalty |
1st |
-$50 |
|
Payment |
Secured |
Tax |
2nd |
$0 |
|
Payment |
Secured |
Penalty |
2nd |
-$20 |
After the unpaid charges have been moved to Defaulted Secured, a correction occurs, increasing the tax charges on the bill to $1200. So the 1st installment will have penalty (because it is paid in full) but the 2nd installment will not have penalty.
Results for the charges and payments are:
-
1st installment Secured Tax charge remains $500, with matching payment
-
1st installment Secured Penalty charge remains $50, with matching payment
-
2nd installment Secured Tax charge remains $0
-
2nd installment Defaulted Secured Tax charge is increased by $200 to $700
-
2nd installment Secured and Defaulted Secured Penalty becomes $0 (because of grace days)
-
Remaining $20 payment that had been applied towards 2nd installment Secured Penalty is lifted and applied to 2nd installment Defaulted Secured Tax.
-
Balance owed by taxpayer is $680 2nd installment Defaulted Secured Tax. (After 30 days, Aumentum will calculate the 10% penalty, adding it as $68 Defaulted Secured Penalty.)
|
Charge/Pmt |
Collection Type |
Charge Type |
Inst |
Amount |
Comment |
|
Charge |
Secured |
Tax |
1st |
$500 |
Unchanged |
|
Charge |
Secured |
Penalty |
1st |
$50 |
Unchanged |
|
Charge |
Secured |
Tax |
2nd |
$0 |
|
|
Charge |
Defaulted Secured |
Tax |
2nd |
$700 |
Increased by $200 correction |
|
Charge |
Secured |
Penalty |
2nd |
$0 |
Removed due to 30 day grace |
|
Charge |
Defaulted Secured |
Penalty |
2nd |
$0 |
Removed due to 30 day grace |
|
Payment |
Secured |
Tax |
1st |
-$500 |
Unchanged |
|
Payment |
Secured |
Penalty |
1st |
-$50 |
Unchanged |
|
Payment |
Secured |
Tax |
2nd |
$0 |
Unchanged |
|
Payment |
Defaulted Secured |
Tax |
2nd |
-$20 |
Reapplied to remaining charge – 2nd inst Defaulted Secured Tax |
NOTE: These examples are not all inclusive. There are potentially various other charges, such as delinquent fees, NSF fees, and other kinds of penalties/interest that may be secured or delinquent secured.
-
Every payment-related transaction in Aumentum is associated with a payment allocation rule (ReceiptDetail.AllocId), and the Cashiering Collect Payments screen allows a user with proper security to manually override the payment allocation rule and assign payments to specific charges. Starting with Aumentum v 9.00.04, this has been enhanced so that when this occurs, an override indicator is set at the ReceiptDetail level in a new field called 'ReceiptDetail. AllocOverrideYN' so that the user information for the individual performing the override is stored with the transaction. This information is also stored for manual readjustments to the allocated amounts at the roll type, charge type, charge code, or charge subcode level. NOTE: Verify this onsite by querying generated receipts.
-
Use the Cashiering > Setup > Related Revenue Object Rules task to define types of tax against which not to accept payments and/or to allow overrides. When attempting to collect payment against which a rule has been set not to collect payment, the message XXX Tax is Delinquent - Cannot Collect Payment (where XXX is the type of tax) is displayed.
-
Important Notes about Special Assessment Posted Project Payoff. See also the following topics:
Special Assessment Posted Project Payoff, a common action from the Payment Collection screen, uses the application setting 'Value Change Reason for Special Assessment Corrections' to trigger a tax bill correction when paying off an amortized special assessment. Previously, if this setting was set to a value change reason that did not trigger a correction, an 'object reference' error would occur. The payoff process has been updated to no longer throw the error and instead sets the Special Assessments to 'paid in full' and to change the values in Assessment Administration. However, no changes are made to the Tax Roll or the Tax Bill. A message indicating this is also displayed.
If you receive the message "Values Successfully posted to AA, but no Correction was created. Tax Bill not yet updated," you must go to Assessment Administration > Assessment Maintenance > Valuation Maintenance, select the PIN and continue on to the Maintain Revenue Object Valuation Information screen. Make sure to select the appropriate effective year (the assessment year for the most current tax bill). Select a change reason that triggers a correction. Change reasons are configured via Assessment Administration > Setup > Value Change Reason Mappings. Click Save to trigger the correction. If you selected a change reason that requires manual acceptance, you will need to accept the correction via Assessment Administration > Roll Corrections > Roll Correction.
Once you have successfully corrected the tax bill, you can return to Cashiering > General > Payment Collections and pay off the corrected tax bill with the special assessment payoff amount. To avoid these steps for future special assessment payoffs, go to Configuration > Application Settings > Maintain Application Settings and set the tax year Special Assessment setting 'Value Change Reason for Special Assessment Corrections' to a value change reason that triggers a correction.
NOTE: If the selected change reason is not specifically configured in Assessment Administration, the 'default' value change reason is used during the Special Assessment Payoff process.
Contact your Aumentum Support representative if you require assistance with the payoff process.
-
Pay Off Non-Posted or Deferred Amortized Special Assessments – Pay off amortized special assessments for a revenue object when the special assessment has not yet been posted to Assessment Administration.
-
Pay Off Posted Amortized Special Assessments – Pay off amortized special assessments for a revenue object that has already been billed. If the special assessment is a ditch, you can select the tract(s) to pay off.
See Common Actions for additional tasks you can perform.
NOTE: The numbering on the following screens shows typical sequence of operation, which may vary depending on the various scenarios as described below.
SETUP: See Cashiering and Payment Collection for any applicable prerequisites, dependencies and setup information for this task.
Jurisdiction Specific Information
All sites
-
The Default Interest Calc Display application setting determines the text displayed on an F/I (full payment or installment) toggle button in Info Center > Tax Information screen, Bill Detail screen, and View Delinquents screen as well as on the Cashiering Collect Payments screen. The button toggles between viewing balances for a full payment versus a partial payment.
-
The toggle button displays only when set to Installment or Full. If set to None, the toggle button does not display.
-
If set to Installment, when first viewing a Revenue Object in Info Center, the button is labeled Inst Pmt and the interest calculated is based on the taxpayer paying by installment.
-
If set to Full, and when first viewing a Revenue Object in Info Center, the button is labeled Full Pmt and the interest calculated is based on the taxpayer paying the bill(s) in full.
-
You can click on the button to toggle the interest calculation from being based on installment payments to being based on a full payment for all bills with a balance due.
-
If the displayed interest is based on installment payments, the button displays Inst Pmt.
-
If the displayed interest is based on full payments, the button displays Full Pmt.
-
NOTE: Non-PTOC customers should accept the default of None.
California
-
Defaulted Secured: A Cashiering application setting Required payment in full for Defaulted Secured requires full payment on the tax bill if set to true.
IMPORTANT: This must be set to true for all California jurisdictions and can be set as applicable for other jurisdictions. Any overpayment in the system is automatically applied to delinquent/defaulted unpaid bills. -
A Real Property Transfer Fee Excel Import is available to import an Excel spreadsheet of real property transfer fees. These fees are cashiered as Miscellaneous payments. Import the spreadsheet via Tax > Accounts Receivable > Batch Collections. Select the Miscellaneous Payment Import process.
SETUP: The File I/O import process must be configured with two additional fields for Miscellaneous Sources and for Amount. Contact your Support Representative for assistance setting this up.
Riverside, California
-
Teeter Loss: The ability to cashier a payment using teeter loss calculations is available.
-
Allocation rules must be set up via Tax > Accounts Receivable > Payment Allocation Setup > Payment Allocation Rule Setup for:
-
Pre-sale and redemption fees
-
Charges other than pre-sale and redemption fees
For both of these, use the Property Sale Teeter TAF Rule custom rule. Make sure the pre-sale and redemption fees is sequence #1 to ensure that fees get paid first.
-
Go to Accounts Receivable >Payment Allocation Setup > Payment Allocation Configuration Setup and select the setups in Step 1 and specify that the rule application setup in be used for the Cashiering Buyer Service. Check the Is Default checkbox and click Save.
-
Use Property Sale Settings to set up the tax sale item fees that need to be calculated, making sure the fees match the allocation rule setup
-
When cashiering, use the Type of Tax Sale and Advanced Type of Buyer Service.
-
Pass-Throughs: When redevelopment pass-through amounts are returned to the county by the RDAs, they are reallocated to the tax authorities that contributed to the RDAs. Since these amounts are not tied to a specific PIN they require a method for redistributing them to the contributing TAF. Cashiering allows a payment to be allocated to TAFs so that when pass-through amounts are repaid by RDAs they can be cashiered and allocated to the specific TAFs the are due the funds.
-
The Secondary Rule List panel on the Manage Distribution Rules screen was created specifically for the district net apportionment amount (prior year secured). The system calculates the net amount to be apportioned to a district by factoring current year total adjustments (if any), Refunds (if any), and administrative fees (if any) during current tax year. The District Net Apportioned Amount = General Purpose +/- Debt +/- Adjustments +/- Penalty +/- Interest +/- .25 Percent Admin Fees +/- Cost +/- PTAC +/- Redevelopment Pass-Through +/- Tax Losses Reserve Fund +/- Accounting Fees +/- Treasurer-Tax Collector Fees +/- Teeter Debt Service +/-.
-
IMPORTANT: You will also need to set up TIF Adjustment Limits via Distribution > Setup > TIF Adjustment Limits > Maintain Redevelopment Limits
-
Set up Cashiering Miscellaneous Sources for this via Cashiering > Setup > Miscellaneous Sources. Select the Misc type of Payment in lieu of taxes and the Distribution method of TAF.
-
The CA Distribution Rule Allocation Report (Distribution Reports > SRS Distribution Reports) includes the secondary schedule defined. If amounts are adjusted you should see them in SubDistDetail where the SecondaryDistCalcRuleId != 0 for your DistHeaderId. Those amounts match the amount shown on the report for the secondary rule in the bottom section of the report. The top section shows the Pre-Distribution data that qualified for the Secondary Rule.
-
PTAC Costs: Aumentum Distribution calculates the distribution of PTAC Costs for each district. The formula for calculation is PTAC Costs Allocation Factors X Total Administrative Costs = PTAC Costs. The calculation of the commission pulls in the original charges and applies apportionment factors to spread the 1% general tax across TAFs. The calculation prioritizes so that the direct credit commission is calculated first, then the PTAC cost commission calculates second and uses the results of the first commission in its calculation. As with other commissions, the PTAC commission amount shows as a reduction to gross distributions on all distribution process and distribution history reports. However, the commission sums together on these reports with other calculated commission since only a single column exists to show all distributions.
SETUP: Set up an administrative (commission) PTAC fee via Tax > Distribution > Setup > Advanced Commission Setup. Set up the entitled distribution schedule via Tax > Distribution > Distribution Setup > Entitled Distribution Schedule > Set Up Entitled Distribution Schedule.
-
Unclaimed excess proceeds: These can be distributed back to taxing authorities using the prior year’s AB8 apportionment factors. To accommodate this, a distribution override rule was configured to distribute the tax sale excess proceeds. An EP Distribution process applies the Treasurer-Tax Collector’s costs to outstanding excess proceeds (aka surplus) amounts and applies the remainder of the proceeds to make them available for distribution. A distribution override rule has been configured that distributes the remaining applied unclaimed excess proceeds to taxing districts. A distribution commission to represent the .25 administrative fee was configured on Special Districts, County Fire, County Library, and County Road districts.
SETUP: Configure the distribution override rule via Tax > Distribution > Setup > Distribution Rules. For Collection Criteria, include the Charge Code of Tax Sale: Excess Proceeds. Go to Tax > Distribution > Setup > Agencies > Edit Agencies. Click Add in the Commission Fee panel to navigate to the Edit Fee Criteria screen. Click Add in the Commission Criteria List panel, select the item type of Charge Code, and select the .25 Administrative Fee Rule.
-
TAG Area Distribution Rule: A new distribution rule collection called TAG Area and four new distribution calculation rules were added to accommodate tax distribution to specific TAFs within a TAG using predetermined percentage breakdowns for:
-
Racehorse Tax
-
Non-commercial Aircraft Tax
-
Highway Rental
Aircraft tax is configured as a tax type in Aumentum and is used in distribution rule collection criteria to identify non-commerical aircraft tax payments. Incorporated TAGs used to cashier racehorse and non-commercial aircraft have been configured to include at least one city tax authority with at least one general fund. Unincorporated and incorporated TAGs used to cashier racehorse and non-commercial aircraft have been configured to include at least one school tax authority with at least one general fund. Incorporated TAGs used to cashier highway rental have been configured to include at least one supervisory road district tax authority with at least one general fund.Unincorporated TAG’s used to cashier highway rental have been configured to include at least one road tax authority with at least one general fund.
-
TAG/TA - City
-
TAG/TA - Schools
-
TAG/TA - Supervisor Road District
-
TAG/TA - Road
To utilize theTAG Area rule collection and associated rules, you will need to configure six new distribution rules, one each for incorporated and for unincorporated for racehorse tax, non-commercial aircraft tax, and highway rental on the Edit Calculation Rule screen (Distribution > Setup > Distribution Rules > Manage Distribution Rules > Edit Distribution Rules > [Add/Edit – Calculation Rule List panel] > Edit Calculation Rule > [Add/Edit]).
Racehorse Tax is configured as a miscellaneous source in Aumentum Cashiering (Cashiering > Setup >Miscellaneous Sources > Set Up Miscellaneous Sources). When setting this up the Set Up Miscellaneous Sources screen, the Misc Type should be Standard, the Tie to PIN checkbox must be checked, and the Rate Type should be Certified.
Highway Rental is configured as a miscellaneous source in Aumentum Cashiering (Cashiering > Setup > Miscellaneous Sources >Set Up Miscellaneous Sources). When setting this on the Set Up Miscellaneous Sources screen, the Misc Type should be Standard, the Tie to PIN checkbox must be checked, and the Rate Type should be Certified.
NOTE: Also see Sample Distribution Rule Calculation and Rule Configuration for TAG Area in the Edit Calculation Rule topic.
- Redemption Group Bad Check: When cashiering a payment for a redemption group with multiple defaulted secured bills as well as secured bills, the oldest bill in the redemption group includes the bad check fee on the receipt while the remaining items do not have the fee applied.
Cashiering Sidebar, Settings, and Calculator
The Session information on the Cashiering tab in the sidebar displays automatically when you open the screen. You have the option to dock the side bar so it is not displayed by clicking the calculator icon, which is a toggle to display/hide the sidebar. The sidebar includes Business date, Effective pay date, Allocation rule, Payment source, Number of bills, Bill Summary, and Universal Misc Source Summary. These settings apply to the payment as a whole, although you can modify the choices for a particular bill.
IMPORTANT: The effective pay date, allocation rule, and payment source can be changed (if you have security rights) before bills are brought into the grid. If bills have already been displayed you can check the box in the appropriate row(s) and then change the effective date and allocation rule for the selected bills. Once the transaction has completed, the session information will revert to what was originally set up. You can also change the effective date at any time, even if you have generated receipts. However, the new receipt numbers will re-sequence to the beginning number again.
If you are working with alternate payment sources, change the Payment source in the sidebar to another source. Lockbox and Web payments are processed on the Collect Payments screen. Changing the payment source to Mail switches to the Process Mail Payments screen, and changing the payment source to Lender switches to the Process Lender Payments screen.
Collect Advance Payments
An Advance Payment is made when there is no balance due, such as a pre-payment of future taxes or escrow payment.
Advance Payments, Surplus, and Workflow
An advance payment often creates an account surplus. Surplus payments are managed via Tax > Accounts Receivable > Payment Management > Surplus Management. Certain surplus account items are accessed via workflows, if applicable to your jurisdiction, on the View My Worklist screen via the Workflow icon on any screen.
NOTE: Workflows available the Surplus Management task vary. The Aumentum Engineering team and Aumentum Implementation team set up each workflow specific to your jurisdiction setup and requirements.
IMPORTANT: When a surplus item has an active workflow associated with it, and you are attempting to use Surplus as tender for payment, you cannot do so if the item is in a workflow. Instead, a warning message displays indicating that the surplus is in an active workflow.
Paid By
NOTE: The Paid By defaults to the Account Contact for Advance Payment. Advance retrieves the data differently than Tax because it doesn’t have a tax bill ID. Advance retrieves by account ID rather than by revenue object bill ID. If the Cashiering Global setting Use Current Owner is defined, the same query is executed, except this one uses the revenue object ID. If that setting is off, a Levy API requires the tax bill ID, and Advance Payment uses the Contact by Account ID information for the Contact Party Information.
NOTE: A Tax Sale task is also available that pulls current year taxes and penalties into the Tax Sale and calculates the minimum bid. To accommodate this, Cashiering creates two surplus amounts in the event in which there is a Current Tax and an Overbid amount on a record.
The Advance type of Tax Sale Surplus is available for this purpose.
-
If the property is redeemed, the amount is refunded to the Buyer.
-
If the property is unredeemed and is conveyed to the Buyer, the surplus is used to pay the current taxes and any residual amount remains in surplus waiting to be refunded to the Tax Payer when they have completed all of the required steps.
NOTE: For surplus being applied to a bill, if the amount tendered is more than amount due for all the bills selected to pay, upon clicking Pay, a message is displayed, indicating the surplus amount is greater than the total bill amount due. This prevents a new surplus from being created from an existing surplus. -
If the Tax Sale setting of Create Advance Pay Surplus for Tax Sale is set to true, Cashiering puts the amount in the Current Tax Amount field, into the new Advance Pay –Tax Sale surplus type. Any amount that is Overbid is placed in Surplus as an Overbid type.
-
If bundled items are associated with the particular record, the overbid amount from tax sale is used to pay the delinquent taxes on the bundle items. Anything remaining is placed in Overbid Surplus. Agency Items will have no buyer payment associated with them after the tax sale.
-
If the item being redeemed is an Agency item, the Tax Sale process sends the full Minimum Bid Amount to Cashiering as the amount that is due, interest is calculated on the amount never exceeds the amount, and the amount to pay the taxes/penalties/fees is applied accordingly. Any overage is applied to the Advance Pay Surplus Type, which is then refunded to the Buyer as usual.
Fee Bank
Fee Bank accommodates the Treasurer Deed process to apply for and add endorsements and to allow payments using a surplus payment for the fee bank amount. The Info Center > Tax Detail > [Common Actions - View Delinquents] > Apply For or Add Endorsements includes a Fee Bank Remaining field that contains the remaining balance of the fee bank surplus when applicable.
Escrow
To accommodate dealer escrow, the Advance type ofEscrowis available for certain jurisdictions. This enables accepting payments towards escrow, using escrow as tender towards FRVIS charges, and accurately tracking balances in escrow accounts for each dealer. When the escrow Account Number is entered, the associated escrow Account Name displays. The Cashiering Session Reconciliation, Back Office Reconciliation, and Daily Balance reports as well as the Accounts Receivable Payment Listing, Surplus, and Collection Summary reports all include escrow information.
The following systype categories/systypes are associated with escrow: 1.) 'Escrow Type' (user definable), 2.) 'Dealer' (FL only), 3.) 'Escrow Account' (systype in 'Object Type and Legal Party Role Type' category), 4.) 'Escrow Account Contact’ (systype in 'Legal Party Role Type' category), 5.) 'Escrow’ (systype in 'Surplus Category' category), and 6.) ‘Dealer Escrow Deposit’ (systype in 'Surplus Subcode' category).
NOTE: MVP Tax Manager currently includes this functionality, which has now been implemented in Aumentum for those jurisdictions switching from MVP to Aumentum.
-
When using escrow money to pay a bill, first load the bill, then change the Tender Type to Escrow. Enter the escrow account number in the Account Number field to look up available the fund and pay the bill.
-
When adding money to an escrow account, enter the escrow Account Number and Amount, add and then pay the bill. Perform mapping setup for this via Tax > Accounts Receivable > Setup > Advance Surplus Mappings. Select Escrow and select the mapping.
Advance Pay Surplus
This payment allows taking advance pay surplus for unsecured tax sale payment. You can cashier buyer payments as advance payments for unsecured sales, and you can print a Bill of Sale at the time of payment collection. A close out process is run on unsecured sales that have been collected that applies the payments to the applicable items and runs all of the calculations to allocate the teeter amounts appropriately.
IMPORTANT: A Cashiering Use custom receipt functionality application setting displays a Custom Receipts grid of selectable Report Setup names at the bottom of the Cashiering Collect Payment screen when set to True. This enables selection of a custom receipt report to print for a Bill of Sale, for example. The selected document(s) prints in addition to the receipt. You can also print the receipt via the Collect Payments screen and the Print Mass Receipt screen as well as from the Tax Information screen. A Report Setup tied to a Receipt data service category must be set up using the Reports and Interfaces > Data Services and Correspondence tasks. Contact your Aumentum Support representative if you need assistance setting this up.
Advance Surplus
An Advance Surplus task pulls surplus and surplus subcodes. Accounts Receivable processes Treasurer-Tax Collector trust account payments and for all trust account payments posts the amount applied to the Collection Type for the trust account. To accommodate this:
-
Surplus subcodes were created in Cashiering as an Advance payment type.
-
Suspense Setup (Tax > Accounts Receivable > Setup) allows multiple types of suspense.
-
Three Surplus Sub Code systypes were created and must be set up via Configuration > Systypes.: 1.) Pre-Deposit - When a wire or physical checks is received for payment files the PINs/Bills to which to apply the payment is unknown; 2.) Tract Map Bond Trust - Money received for Tract Maps before final charges are known but for which at least one PIN is known at the time of payment receipt, and 3.) Replacement Payment - The county knowingly receives a replacement check for a known PIN before processing an NSF and the replacement check is placed in the surplus subcode until the NFS is processed.
-
The Set Up Suspense screen (Tax > Accounts Receivable > Setup > Suspense Setup) includes a Suspense Surplus Subcode Configuration panel with a Surplus subcode field for selecting the surplus subcode.
-
A Map Advance Surplus screen (Tax > Accounts Receivable > Setup > Advance Surplus Mappings) is available for mapping advance payment types with the surplus subcode.
-
SETUP: Go to Configuration > Systypes > Select or Add a Systype. Select the Surplus Sub Code systype category and set the Effective Date. Click Edit on each of the three new systypes respectively, Pre-Deposit, Tract Map Bond Trust, and Replacement Payment, to navigate to the Edit a Systype screen and define details for each as applicable to your jurisdiction.
NOTE: The 'Advance Payment-Suspense’ and ‘Pre-Deposit’ systypes should be configured as ‘suspense’ subcodes. Currently, Pre-Deposit is available for Riverside, CA only. Go to Tax > Accounts Receivable > Setup > Suspense Setup to associate default revenue accounts with the new Advance Payment - Suspense surplus subcode or with the new Pre-Deposit surplus subcode available from the Set Up Suspense code field. Go to Tax > Accounts Receivable > Setup > Advanced Surplus Mappings > Map Advance Surplus and map the advance payment types with the surplus subcode.
Advance Surplus - Wire Transfer
An Advance Payment - Wire Transfer type of advance surplus mapping must be set up on the Map Advance Surplus screen and then selected as the Surplus subcode on the Set Up Suspense screen to set up details for wire transfer payment and to associate the revenue account to the wire transfer. Also, the File I/O for Accounts Receivable batch collection payment types of wire transfer must be set up via Configuration > File Input/Output Configuration. When collecting payments, the Collect Payment screen includes a selection of payment type of Advance Payment - Wire Transfer.
Collecting Advance Payments
See Escrow (above) for additional steps.
-
Select the Advance Type of Advance Surplus - Wire Transfer.
-
Define the PIN and Amount.
-
Click Add Bill. The amount field clears when the Bills to Pay grid is populated.
-
Continue as for a regular tax payment beginning with Step 3 in the Collect Tax Payment section to enter the tendered and paid by information and complete the payment.
NOTE: Accounts Receivable applies advance payments, and when the bill is produced for the property, it shows a payment corresponding to the advance.
Assessment Suit, Bankruptcy Escrow, Deferred, HX Tax Lien, Tax Sale Surplus, ProRation/Eminent Domain, Regular, Specials, Tangible Personal Property
For these payments:
-
Select the Advance Type.
-
Define the PIN, AIN, Year, and Amount. Minimally, the PIN must be defined.
-
Click Add Bill. The amount field clears when the Bills to Pay grid is populated.
-
Continue as for a regular tax payment beginning with Step 3 in the Collect Tax Payment section to enter the tendered and paid by information and complete the payment.
NOTE: Accounts Receivable applies advance payments, and when the bill is produced for the property, it shows a payment corresponding to the advance.
Pre-Pay
This type of payment is for advance pre-payments as allowed by certain jurisdictions. This is used for future estimated taxes for installment plans. Collected money is placed into a separate fund from real estate or manufactured homes and may be requested and returned to the taxpayer at any point in time prior to the posting to real estate.
After the end of each collection cycle, the money is posted to the taxpayer’s real estate (or Manufactured Home) taxes. An account can consist of multiple properties. This type of pre-pay installment plan is for current money only and does not include delinquencies.
NOTE: The State of Ohio accepts three types of payments: Delinquent, Pre-Pay, and Current Year. A taxpayer can be on a delinquent payment plan in addition to being in a pre-pay plan. Thus if the taxpayer has pre-paid more than the installment amount, that amount is not associated with any pre-payment for delinquents. Instead the money is held in the advance pay status to be available for the next set of advance pre-payments.
-
Enter the Plan Number.
-
Enter the Name
-
Enter the Amount.
-
Click Add Bill. The amount field clears when the Bills to Pay grid is populated.
-
Continue as for a regular tax payment beginning with Step 3 in the Collect Tax Payment section to enter the tendered and paid by information and complete the payment.
Buyer Transfer Surplus
This Advance type is used to process a certificate transfer in the amount greater than the amount of the transfer.
NOTE: Buyer Transfer Surplus is associated to the surplus subcode Buyer Transfer Surplus on the Map Advance Surplus screen via Tax > Accounts Receivable > Setup > Advance Surplus Mapping.
-
Select the Advance Type of Buyer Transfer Surplus.
-
Define the PIN and Amount.
-
Click Add Bill. The amount field clears when the Bills to Pay grid is populated.
-
Continue as for a regular tax payment beginning with Step 3 in the Collect Tax Payment section to enter the tendered and paid by information and complete the payment.
NOTE: Accounts Receivable applies advance payments, and when the bill is produced for the property, it shows a payment corresponding to the advance.
Collect Bankruptcy/Litigation Payment
Steps for Collecting Bankruptcy/Litigation Payments
-
Select the Type of Bankruptcy/Litigation.
-
Enter the Case number and Claim number.
-
Continue as for a regular tax payment beginning with Step 3 in the Collect Tax Payment section to enter the tendered and paid by information and complete the payment.
Collect Business License Payment
Steps for Collecting Business License Payments
-
Select the Type of Business License.
-
Enter the Year, Bill number and License number.
-
Continue as for a regular tax payment beginning with Step 3 in the Collect Tax Payment section to enter the tendered and paid by information and complete the payment.
Collect Miscellaneous Sources Payment
IMPORTANT: The ability to associate each Miscellaneous Source to distinct GL Fund/Account information is available, depending on your state/jurisdiction. This allows the GL Export to include the Miscellaneous Source transactions mapped to the appropriate GL Fund/Account when exporting. To enable this functionality, two checkboxes need to be selected on the Set Up Global Cashiering screen. 1.) When checked on that screen, the Allow creation of new misc source from Collect Payments checkbox provides the ability to create a new source on the Collect Payments screen by selecting the type Miscellaneous, and then clicking + next to the Misc type drop-down list; 2) When checked, the Allow miscellaneous source free form fund mapping checkbox provides the ability to select GL fund/account information on the Collect Payments screen when creating a new source. When checked, this setting also provide the ability to select GL Fund/Account information on the Set Up Miscellaneous Sources screen.
Miscellaneous payments are used for a variety of non-tax payment collections, such as copies, notary services, license fees, or other office charges. Set Up Miscellaneous Sources defines the amounts to collect and the distribution for each miscellaneous type.
NOTE: A DAC (Data Access Control) setting in the application uses your login Effective Tax Year and Effective Date to retrieve data. Changing the date/year either from the login/security settings, or using the day/year picker in the toolbar changes the DAC Effective Tax Year and DAC Effective Date. These dates are used by some processes to determine the records to retrieve based on the Beginning Effective Year or the Beginning Effective Date of the record. Some transactions may also specifically set the DAC date/year. Currently, Miscellaneous Source uses DAC to determine the effective-dated record retrieved. Fees, such as NSF fees and credit card fees are retrieved as of the DAC date in effect in the toolbar date picker, which can be modified, and is the date the payment is made.
IMPORTANT: Miscellaneous Source payments cannot be made on the Collect Payments screen until all UDFs are defined for any UDFs created with the Required checkbox selected on the Set Up Miscellaneous Sources screen.
NOTE: The Accounts Receivable > Payment Listing Report (Tax > Accounts Receivable > Reports > Payment Listing Report) includes a Recap: Print Miscellaneous Source UDF checkbox that when selected includes all miscellaneous payments in the report.
HOX Subvention Payments
NOTE: HOX Subvention payments are cashiered using two miscellaneous sources:
-
HOX current secured is used to cashier the current secured portion of each payment.
-
HOX current supplemental is used to cashier the current supplemental portion of each payment.
See Setup for 601 Homestead Claim Allocation in Distribution for details.
MHTCC Request Payments
Mobile Home Tax Clearance Certificate request payments are received using Miscellaneous Sources. Prior to collecting payments for MHTCC:
-
Set up the applicable MHTCC reissue fee via Configuration > Fee Maintenance.
-
Go to Configuration > Application Settings > Maintain Application Settings.
-
Selecting the Setting Type of Effective Date and the Filter By Module of Tax Billing.
-
Click on the Reissue Tax Clearance Certificate Request. Add Reissue Request Miscellaneous Source prior to posting payment application setting and set to True to active the automatically apply miscellaneous fees.
-
Go to Cashiering > Setup > Flag Payment Rules > Maintain Flag Payment Rules, select the flag of the same name as the application setting and set as applicable to your jurisdiction.
NOTES: -
Once the flag is configured and set up, apply the flag to the specific revenue object account(s) via Info Center > Manage Flags.
-
After entering the PIN with the flag applied and clicking Add Bill, the message Reissue Tax Clearance Certificate Request. Add Reissue Request Miscellaneous Source prior to posting payment displays. Define the miscellaneous amount prior to posting.
Steps for Collecting Miscellaneous Sources Payments
-
Select the Type of Miscellaneous.
NOTE: If your jurisdiction has a Cashiering Web Services Interface, the associated URL opens based on the URL you defined on the Set Up Miscellaneous Sources screen.
-
Select the Misc Group.
-
Select the Misc type and fill out the other fields, including the Amount. Depending on how the miscellaneous source was set up, there may be more than one amount to enter.
NOTE: Various additional fields display based on the Type and Misc Type selected. For example, if FRVIS Payment is select, additional fields include Batch Number, Transaction User ID, and Dealer License Number. If you select Hunting/Fishing, an Input File Location field becomes available with a Browse button for searching for/selecting the input file.
NOTE: A flat amount is view-only; no entry is allowed. -
To define miscellaneous source details for a payment type of Miscellaneous, click the plus+sign to open the Create Miscellaneous source pop-up dialogue.
-
Enter a Name and Short Description.
-
Select the miscellaneous group from the Misc group drop-down list.
-
Select the Credit fund or Debit fund from the drop-down list.
-
Select the Credit Account or Debit Account from the drop-down list.
-
Click Finish to save the information.
-
Click Add Bill to add the payment as a line item in the Bills to Pay panel.
-
Continue as for a regular tax payment beginning with Step 3 in the Collect Tax Payment section to enter the tendered and paid by information and complete the payment.
Collect Motor Vehicle Payment
Steps for Collecting Motor Vehicle Payments
-
Select the Type of Motor Vehicle.
-
Enter the Year, Bill number, License plate number and VIN number.
-
Continue as for a regular tax payment beginning with Step 3 in the Collect Tax Payment section to enter the tendered and paid by information and complete the payment.
Collect Payment Plan Payment
NOTE: This may not apply to your jurisdiction.
NOTE: The ability to apply plan payments directly to tax bills included in the plan is available. When setting up the plan select Apply plan payments to bills from the Apply Payments field on the Edit Payment Plan Type screen, and select the Payment Allocation Rule from the drop-down list in the Calculation Detail panel. When collecting the payment, payments are applied directly to the bills. When the plan is paid off the status of the plan is Fulfilled rather than Paid because the apply payments process does not need to be used with plans that take payments against bills.
Since a payment plan record can potentially include both regular charges (Principal and Interest on the plan) as well as fee charges (Plan Fees), the collect payment plan process now creates 2 receipt detail records if these conditions are met:
-
installmentHeader.Inst == 0 && // Down Payment;
-
installmentHeader.PaymentPlan.PaymentPlanType.AddlFeeType ==
-
installmentHeader.PlanFeeAmountCharge +
Payment Plan Recalculation of Unpaid Plan Installments if Tax Bill Charges are Changed
An option when editing the payment plan type allows payment plan recalculation when a change occurs to a tax bill, such as a roll correction. See Edit Payment Plan Type for scenarios how unpaid plan installments are recalculated if bill changes occur.
If your jurisdiction accepts recalculations to payment plans if a change occurs to a tax bill, for a declining balance payment plan, the bills are pulled into the grid in sequence of oldest bill on top. The line shows all penalty, interest, and fees, and you are also allowed to edit any line and change the PIN as well as the Allocated Amount.
If a payment plan exists on an account and payment plan recalculation is allowed on a roll change based on your setting on the Edit Payment Plan Type screen, the Info Center Tax Information and Event History screens show an information icon next to the Pmt pln field in the header.
Payment Plans in Pending/Void Status
The ability to create and set the status of a payment plan as Pending as well as to Void a plan that has been in the Pending status a defined length of time is available. Aumentum permits enrollment in an installment payment plan (IPP) if certain eligibility requirements are met. If not met, an IPP can still be created manually, in which case a deficiency/denial notice is generated and the plan is marked as Pending.
If the plan has been Pending for the user-defined period of time, for example 30 days, Aumentum automatically sets the status to Void. Two Payment Plan Status systypes of Pending and Void were created and are available for selection from the Plan Status drop-down list in the Defaults section of the Edit Payment Plan Type screen (Tax > Accounts Receivable > Payment Plans > Plan Type Setup > Set Up Plan Type > [New/Edit] > Edit Payment Plan Type). A Void if not active within X days field on the Edit Payment Plan Type screen is used to define the number of days the plan remains in Pending status before defaulting to Void status.
The Edit Payment Plan screen (Tax > Accounts Receivable > Payment Plans > Payment Plan Setup > Set Up Payment Plans > [Edit or New] > Edit Payment Plan) also includes the Void if not active within X days field for the purpose of overriding the original number of days defined in the setup. Data changes can be made and saved on the Edit Payment screen, but calculations cannot be performed if the status is Pending. The plan status is updated to Void if the number of days exceeds the predefined number.
Info Center shows any PINs that are in a payment plan with a Pending status. The Balance Due calculations treat Pending status plans the same as a Void. For example, a bill that is in a payment plan with a status of Pending does not have Plan Fees added, no Plan Maintenance Fees added, and does not have standard Pen/Int deferred. Info Center includes a hyperlink to the Payment Plan Setup task for the purpose of performing a calculation to see what the balance due for a plan would be.
The Cashiering service types that check to see whether a bill is in a payment plan does not treat Pending status like a Void. Instead, a bill in Pending status cannot accept payments using the service type of Payment Plan or Tax. The Collect Payments screen instead presents the message,Bill is in a Payment Plan in Pending status. Activate or Void the plan before taking payment.
For batch collections payment import, the payment is rejected; or, if suspense is turned on, the payment goes into Surplus-Suspense. In any other situation (e.g., roll correction, reduced/increased charges, removing/reapplying a previously made payment on a tax bill now in a Pending state), the payment is applied to the bill as if the plan did not exist or was Void.
SETUP: Go to Configuration > Systypes > Select or Add a Systype. Select Payment Plan Status from the drop-down list and set the effective date. Click Pending to navigate to the Edit a Systype screen and define any details as applicable, click Save, then click List to return to the Select or Add a Systype screen and repeat this for Void.
Payment Plan, Protested Payment, and Cashiering Do Not Allow Payment Flags
Payment is not accepted, either via Cashiering > General > Payment Collection or via Tax > Accounts Receivable > Batch Collections > Daily Remittance Import, when the following two conditions exist simultaneously:
-
An account is in a Payment Plan
-
The tax payer is protesting some or all of one or more tax bills, meaning it is a Protested Payment and the account includes a Protest Flag.
The Protest Flag is set via Cashiering > Flag Payment Rules to not allow payment when a Protest Flag exists on an account and when the account is in a payment plan.
NOTE: The Flag Payment Rules can be set at the revenue object level and legal party level as well as the account level for payment plans.
When attempting to cashier a payment via Cashiering > General > Payment Collection, a message displays on the Collect Payment screen indicating a Do Not Allow Payment flag exists and payment cannot be accepted. Batch collection payments on accounts meeting both criteria are rejected automatically during batch processing.
Also, Payment Plan Notices recognize the Cashiering Do Not Allow Payment flag and send the notices appropriately, depending on whether the flag exists.
When an account is in a payment plan, and there is a roll correction to the account, the roll corrected bill is typically excluded from payment plan calculations for 30 days.
After the Cashiering Do Not Allow Payment flag expires, the payment plan is recalculated via a Payment Plan Recalculation workflow available on the View My Worklist screen, accessed via the Workflow icon in the sidebar.
Steps for Collecting Payment Plan Payments
-
Select the Type of Payment Plan.
-
Enter the Payment plan number and/or the PIN.
-
Click Add Bills to open the Payment Plans pop-up dialogue. The bottom Plan Bills panel lists all bills in the plan. The top panel lists installment information.
-
Select the Plan number.
-
Click on the installment and click Finish.
-
Click Yes or No as applicable.
-
Continue as for a regular tax payment beginning with Step 3 in the Collect Tax Payment section to enter the tendered and paid by information and complete the payment.
NOTE: This pop-up is displayed if there have been changes to bills in the plan that have not yet been processed.
Collect State Credit Payment
Steps for Collecting State Credit Payments
-
Select the Type of State Credit.
-
Enter the Revenue account number.
-
Continue as for a regular tax payment beginning with Step 3 in the Collect Tax Payment section to enter the tendered and paid by information and complete the payment.
Collect Tax Payment
Tax payments are the most commonly collected payment. Tax payments come into the system a variety of ways, such as imports, counter customers, mail-in payments, web payments, etc.
Steps for Collecting Tax Payments
-
Select the Type of Tax.
NOTE: Redemption payments are also collected using the Type of Tax. The Tax Sale Override payment rule is applied to redemption and endorsement payments to indicate the endorsement gets the same interest rate as the certificate. Accounts Receivable and Cashiering apply the endorsement fee charge based on the Tax Sale setting when the Tax Sale > Endorsement service type is selected. No endorsement fee is charged for a zero payment County Held Endorsement. For these types of payments set up payment terms rule details to utilize the Tax Sale Override Rate via Tax > Accounts Receivable > Payment Terms Mapping and Setup > Payment Terms Rule Setup > Search for Payment Terms Rules > [Add or Edit] > Set Up Payment Terms Rule Details. This rule is utilized for both Agency and Sold Item Endorsements and for calculating endorsements created from cashiering or from the Tax Deed processing program. Set up a new payment term rule group for endorsements via Tax > Accounts Receivable > Payment Terms Mapping and Setup > Payment Terms Rule Groups. -
Enter the Year, Bill number, PIN, and AIN (AIN is option) and click Add Bill.
-
Verify the bill information, including the allocated Amount.
-
You can make a partial payment by entering the amount being paid in the Allocated column in the Bills to Pay panel.
-
An override option allows override of the Allocated amount. Click the T icon in the Bills Pay panel for the bill you want to override. Enter your User name and Password and click Finish. Enter the override value. The total amount is recalculated and the resulting value displays in the Amount field in the Tender Information panel.
-
Enter the tender information for the payment. The default Tender type (such as cash, check, credit card, or money order) is automatically displayed in the Tender Information grid with the total Amount due.
-
Change the tender type, if necessary, or click Add to add a line to the grid for each tender type remitted.
-
Depending on the tender type, enter any additional identifying information needed, such as the Account number, Credit card type, Expiration date, or Check number.
-
Enter the dollar amount being paid with each tender type.
-
-
The Paid by information is defaulted to the taxpayer, or if no taxpayer party exists, it defaults to the deeded owner. Change the information if needed. You can change all address information.
-
If the bill is paid by a mortgage company, click Lender Code Lookup. Find the correct mortgage company code. It then returns the mortgage company information to the Paid by panel.
-
-
Select the Verified checkbox after confirming that the paid by information is correct. Depending on your county's setup, this verification may be required before you can continue.
-
Review the Total due, Total tender, and any Change due amounts.
-
Select NO for the Print receipt or Print surplus notices options, if appropriate. These options allows you to not print the receipts or surplus notices if they are not necessary, for example, if you are working on a large volume of transactions.
-
-
Click Pay to finalize the payment.
-
(GA) If this is a mobile home payment, a prompt is displayed. Click Yes through the prompt. The Assign Mobile Home Decal Number screen appears.
-
Click Pause if you need to step away from this process. This puts the current collection information on hold until you recall it using the Retrieve button.
-
Click Clearto remove the information from the screen and begin a new payment collection. All information on the screen at the time Clear is selected is removed without making any changes or payments.
-
Click Noteto add a note about the payment to print on the receipt. This note is only applied to the receipt, not the account or bill. It prints on the receipt at this time and again if the receipt is printed from the Inquire on Receipt option.
-
Click Closeto end the task.
-
Changing Allocations
The allocated column defaults to the amount due based on the current allocation rule; there are multiple options for changing this allocation.
-
To allocate a payment according to a different rule, change the default Allocation rule on the Cashiering tab in the sidebar.
OR
Enter a different amount in the Allocated column in the Bills to Pay grid.
OR
If you are collecting a partial payment that needs to be allocated differently than according to an allocation rule, you can manually enter the amounts to allocate to the various installments, charges, and funds.
Steps for Changing Allocations
-
Select the checkbox for each bill to reallocate.
-
Click Allocations. The Adjust an Allocation screen displays on which you can change both the allocation rule and the individual allocations for the charges.
NOTE: You can display the amount due for real estate when the customer is paying one installment. An Allocate either current or total due toggle button allows viewing of either current or total due payment. This provides a method of paying an individual installment or all installments, rather than having to key in the override amount. The ability to view and use this toggle button is set on the Set Up Global Cashiering screen by selecting Use current/total due payment allocation toggling. Here is what the toggle button looks like:
NOTE: An allocation that has been modified can be viewed through Cashiering > General > Receipt Management.
Waive Penalty and Interest
If a payment is short, you can elect to waive penalty and/or interest,ifyour cashier setup has indicated a maximum dollar amount of interest or penalty to waive (greater than zero).
There first must be an allocation rule set up to ensure charges are paid in the correct order. Penalty and/or Interest would be paid last, any remaining amounts due (within the dollar limit in Cashier setup) would be waived. Make sure to select the correct allocation rule for waiving the interest, waiving the penalty, or waiving both interest and penalty. If the allocation rule in the sidebar is not correct, the payment may be allocated to the wrong charge.
Steps for Waiving Penalty and Interest
-
Select the bill to waive penalty and/or interest for.
-
Click Waive P&I to open a pop-up window appears for entry of the amount.
-
Select the Waive interest checkbox, and enter the amount of interest to waive,
AND/OR
Select the Waive penalty checkbox, and enter the amount of penalty to waive. -
Click Finish to return to the Collect Payments screen.
-
Click Cancel to close the pop-up window without saving.
-
-
Continue as for a regular tax payment to enter the tendered and paid by information and complete the payment.
NOTE: Once this transaction is complete a Lock Penalty and/or Interest flag is attached to the bill. Penalty and/or Interest amounts are locked and no further calculation will be done on that bill. If payment is reversed or canceled, the lock flag will need to be manually removed from the bill if the amounts were locked in error.
Overpayments and Underpayments
A combination of the Tender Type (i.e. Check, Cash, etc.) and where the amount is entered controls whether surplus or change due will be created.
If the amount next to the bill (the allocated column of the Bills to Pay grid) is increased, then surplus will always be created for any amount in excess.
If the amount next to the tender (the amount field of the Tender Information panel) is increased, then change due will be created only if that tender type allows change. (This is controlled in Tender Type setup.) If change is not allowed for that tender type, any amount in excess will also create surplus.
By manipulating the amounts in the two fields and the tender type used, it is possible to create both surplus and change due on a single receipt.
-
Surplus will be created if an overage amount is entered.
-
Change due will be calculated if an overage is entered.
Steps for Making a Surplus Payment
-
Enter an amount in the Allocated field that is greater than the Balance amount (not the due amount) and is outside of the tolerance. The surplus amount displays at the bottom of the screen.
NOTE: If a payment is greater than the amount in the Due column but not greater than the Balance amount and there are additional installments, the overage may be allocated to future installments rather than going into surplus. -
Continue as for a regular payment to enter the tendered and paid by information and complete the payment.
-
When surplus exists for a revenue object, a Surplus button shows in the Tender Information panel. Clicking on that icon requires that you enter user information and password to override the surplus.
-
Enter the full amount to be tendered in the Tender Information section rather than allocating it to a bill.
-
If change is owed but you do not want to return it, for example, if the taxpayer is not present to receive the change, clear the Return change checkbox to allocate the overage to surplus.
-
If a surplus is available to pay the charges, an icon is visible on the Tender Information panel, next to the Add button.
-
Click the icon. The Available Surplus pop-up window displays showing one or more surpluses and the amount of each one.
-
Select the surplus or multiple surpluses to use as a tender type.
-
Click Finish. The selected surplus amount will be listed with a tender type of Surplus in the Tender Information panel.
-
Continue as for a regular payment to enter the tendered and paid by information and complete the payment.
-
If an under amount is entered in the Bills to Pay grid, then it is a partial payment.
-
If an under amount is entered in the Tender Information panel, it is regulated by the tolerance limit set in Global Cashiering or by cashier.
Collect Tax Sale Payment
Tax sale processing is also available on this screen. Cashiering accepts a variety of payments for Tax Sale Items. Select the checkbox and click Remove to remove any bills you do not want to pay.
NOTES:
-
Payment is not allowed for items that meet special assessment payoff criteria set by the Tax Sale module when making a payment using the payment Type of Tax Sale and Sale Type of Buyer. A message is displayed indicating the special assessment must be paid off before the Buyer payment can be made. See the Maintain Tax Sales screen for details about adding SPASS payoff details.
-
A Sale Type of Unsecured Sale Payment is available for advance payment for assets bid on during a tax sale with the option to select the applicable sale items to advance pay on the sale. When selected, The Bills to Pay panel shows Tax Sale Items from unsecured sales as well as the Asset description for the item.
-
A Tax Sale application setting Charge redemption fee on purchase of Agency Certificate determines whether to include redemptions fees on purchases of Agency Certificate in payment collection.
IMPORTANT: Arapahoe, Colorado only: This must be set to false for your jurisdiction. -
When a Tax Sale purchase payment (a payment reversed for a purchase) is reversed in Cashiering, the certificate reverts to an agency certificate, and all data for the receipt on the Advanced Receipt Inquiry screen reverts to the pre-purchase state (agency certificate, no buyer payment checkbox, assigned to agency checked, etc.) prior to the Tax Sale purchase payment being applied (and then reversed).

Steps
-
Select the Type of Tax Sale.
-
Select the Sale type: Buyer, Endorsement, Pre-Sale, Purchase, or Tax Deed.
NOTE: For Excess Proceeds, select the Buyer and enter the buyer number. -
Enter the necessary information to load a bill. Different input fields display depending on the Sale type you select.
-
Buyer – Enter a Buyer number and click Add Bill. You can also enter a Tax sale id and Sequence number to narrow the results returned.
NOTE: Group is a separate number from the Buyer number and is part of TaxSale-Buyer for look up. Tax Sale Payments can be accepted for Group Buyers. Select Tax Sale as the payment type and Buyer as the sale type. Enter the Group buyer number and click Add Bill to find bills to pay. -
Endorsement – Enter a PIN or year/bill number and click Add Bill. Cashiering returns a normal levy bill, not a tax sale bill. The Paid By is populated with a bidder who holds the prior year certificate. Depending on the jurisdiction, multiple certificate holders can exist. In this situation, whomever pays first gets the endorsement. Payment creates the certificate.
-
Pre-Sale – Enter a PIN or AIN. You can also enter a Year and Bill number to limit the results returned.
-
Purchase – Enter a Certificate year and Certificate number to purchase. Enter the Buyer number that is purchasing the certificate.
-
Tax Deed
-
-
Click Add Bill to load your results.
-
Click the Tax sale item fees button to open a pop-up to maintain fees.

-
Click Add to add a fee or Edit to edit an existing fee, and define the required information.
-
Select the Reason.
-
Click Save.
-
Click Return to return to the previous screen, depending on your navigation path, in this instance, to the Collect Payments screen.
-
-
Click Detail to view detail information about the bill.
-
Click Paid By to view a pop-up of Paid By information, if applicable.
-
Click Allocation to open the Adjust Allocations screen on which you can maintain allocations. When finished, you return to this screen.
-
Click the flag icon in the Flags column on the far right to open the Flag Details pop-up dialogue.
-
Click Close to close the pop-up dialogue.
-
-
Continue as for a regular tax payment beginning with Step 3 in the Collect Tax Payment section to enter the tendered and paid by information and complete the payment.
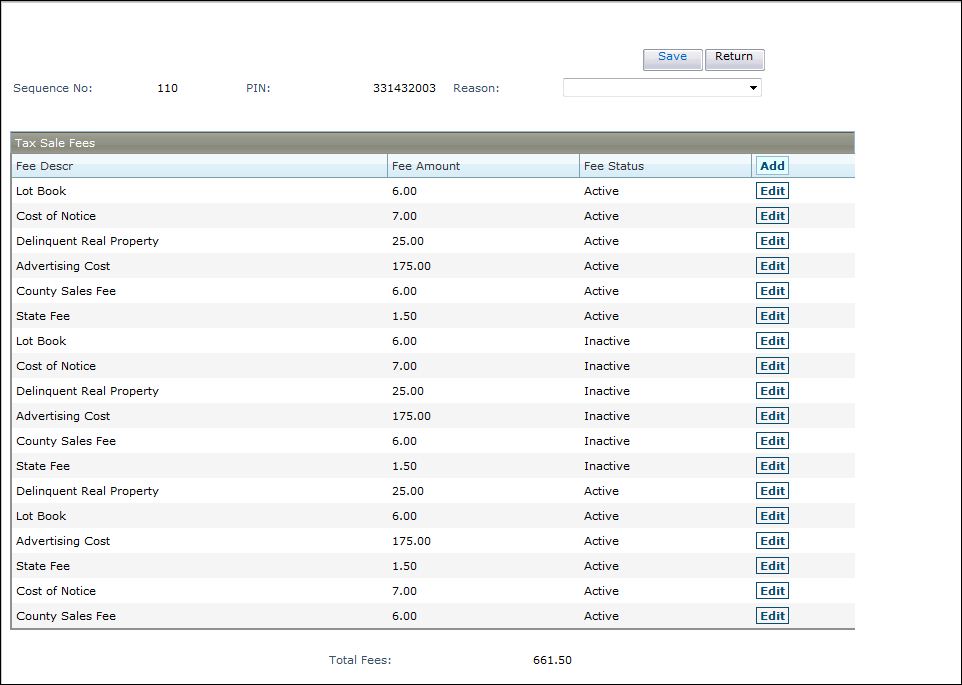
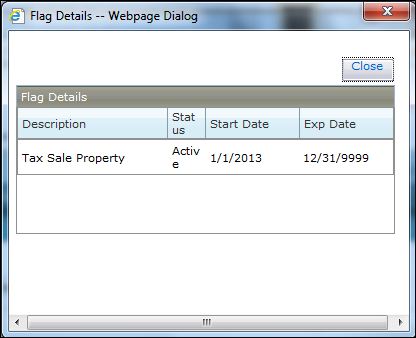
Property Sale Excess Proceeds and Claim Maintenance
Excess proceeds are generated in cashiering when selecting the type of Tax Sale, Sale type of Buyer. Enter the buyer number and click Add Bill. When processing, the exceed proceed is generated. See the following topics for information about Excess Proceeds and Claim Maintenance.
-
Excess Proceeds (Tax > Tax Sale > Property Sale > Excess Proceeds)
- Claim Maintenance ( Tax > Accounts Receivable > Manage Payments > Claim Maintenance)
Tax Sale Bundle Bids
Certain jurisdictions have tax sale bundle bids. Cashiering handles posting of tax sale bundled records and creates the Tax Sale Bill with a new charge code for bundled items.
NOTE: This charge code is added by the Aumentum Implementation team, which also identifies the charge code used for a new charge row in Cashiering for bundled bids as the special Bundle Charge Code in Tax Sale Settings.
Manual Bundling
Cashiering looks for a setting of True for the Is Manual Bundling Supported Tax Sale Setting. Bundled items are paid along with the master item when a buyer payment is processed. Also, the tax sale tax bills and charges are created at the time of payment and reference back to the master bundle item.
When a bundled item is redeemed, the redemption amount is calculated including all of the bundled items amounts. The payment is then properly applied to all of the items included in the bundle.
Cashiering also allows subsequent tax endorsements to be processed on for any PIN that is included in the bundle. The amount for that endorsement is added to the overall bundled certificate. There can be multiple subsequent tax endorsements per certificate per year.
Owner Bundling
The Cashiering process looks for a setting of true for the Is Owner Bundling Supported Tax Sale application setting. If set to true, Cashiering checks the Bundle Sequence Number (BundleSeqNo) on items pulled into the Pay grid.
-
If any one of the items displayed has a Bundle Sequence Number, all items with that same Bundle Sequence Number are displayed. Bundle Sequence Numbers of '0' are ignored.
-
If the Bundle Sequence Number is not the same as the Sequence Number, Cashiering pays the Tax Sale Tax Bill amount, but no Tax Sale Bill is created, and the buyer name is displayed in the Paid By field for the payment.
-
For the Bundle Master item (Bundle Sequence Number= Sequence Number), Cashiering creates a Tax Sale Bill with an additional charge row with the full amount of the bundled items in it.
-
The Tax Sale Tax Bill amounts for all items bundled and paid by the Master item overbid amount are added together and placed in the new charge row. The payment is made to the appropriate records.
-
Anything over the amounts being paid are placed in Tax Sale Surplus for Overbid. The Current Tax Amount is placed in the surplus type of Advance Pay – Tax Sale.
-
When the Certificate is redeemed, the buyer gets back all of the money, including the amount paid toward the bundled items. This is accomplished by paying the Tax Sale Bill with the new charge row so that all the money paid on the tax sale bill is distributed to the buyer. Any surplus for overbid and current tax amounts is manually refunded to the Buyer.
Voiding Bundles
When Voiding Tax Sale Bundles, all bundled records are voided together. The payments for the entire bundle are cancelled, so the entire amount paid by the buyer is placed into surplus for refund back to the buyer.
Adjusting Bundles
If bundled items are adjusted to increase taxes, then no changes are made. The result is an amount due on the Bundled item, which can be sold the next year if no payments are made.
If bundled items are adjusted to decrease the taxes owed and thereby create surplus, then the correction process completes the following:
- Check the if the item is bundled.
- If it is not bundled, it is processed as normal.
- If it is bundled, then the overbid amount is increased on that item to include the surplus amount created by the adjustment on the Bundled item.
- The Overbid Surplus amount on this original bundled item is also increased by the surplus amount from the bundled item.
- The Bundled item surplus is adjusted to zero and an indicator is noted that the overbid was applied to the Bundle Master item.
- The second charge code row of the Bundle Master item is also reduced by the amount that was refunded from the bundled item, so that the redemption amount to be paid is the corrected amount.
-
If the Master Item has already been redeemed, then any amounts refunded for the Bundled items are paid to the Taxpayer and not the Buyer.
-
Since the correction happens to the Levy bill, the Buyer is defaulted on the Refund Pay To field. Be sure to enter the correct Pay To information at the time the surplus/refund is processed.
-
Agency Items never have overbid amounts and therefore never have bundles associated with them. As a result, no special processing is necessary for Agency items regarding bundles.
Buyer
When the Sale, Sale item, and Buyer are entered, if the buyer amount is over the Delinquent effective date integer Credit bid threshold application setting, a Credit Bid/Full Pay toggle button is available to alternate the Amount Paid between the percentage of the Buyer Amount (Credit Bid) and the Total Buyer Amount (Full Pay).
If the Buyer Amount is below the threshold, a message displays indicating the credit bid amount is not allowed to be paid.
Set this setting via Configuration
> Application Settings > Maintain Application Settings. Selecting
the Setting Type
of Effective Date and the Filter By Module of Delinquents. Click Edit on the Credit
bid threshold application setting
and set as applicable. Click Save and Close.
Tax Sales Certificates Transferred from Existing PIN to New PIN
Payment Collections accommodates transferring tax sale certificates from an existing PIN to a new PIN. When an old PIN is entered on the Collect Payments screen with a Service Type of Tax Sale and Tax Sale Type of Endorsement, a pop-up displays asking if you want to load bills for the new pin. Select the new pin and click Finish. Bills are loaded in the payment grid and can be paid.
Tax Sale - Random Selection Process
NOTE: The random selection process may not apply to your jurisdiction.
Cashiering also includes a method for Tax Sale to pass information to Cashiering for creating Miscellaneous charges for the random selection process, paying them and then passing the information back to Tax Sale.
Once all the information about the random selection process is saved and the Pay Registration button is selected on the Buyer Maintenance screen in Tax Sale (Tax > Tax Sale > Buyer Maintenance), navigation to the Collect Payment screen occurs automatically and the Miscellaneous Source information is pulled into the screen based on the Misc Source for Buyer Registration Tax Sale setting for buyer registration.
If the miscellaneous source is set up as a unit based payment calculation, the paddle numbers that were added on the Buyer Maintenance screen Paddle Nos tab is loaded into the# of Unitsfield on the Collect Payment screen, and the amount for that number of units is calculated. The buyer information for which registration is being paid also defaults into the Paid By fields. When payment transaction is complete, the Paid indicator on the Registered Sales grid on the Tax Sale Buyer Maintenance screen is set to true.
SETUP: All of the information for the random selection process must be defined and saved on the Buyer Maintenance screen. The Tax Sale Setting of Misc Source for Buyer Registration must have a Miscellaneous Source created for it. This Miscellaneous Source must have two unique user-defined fields of 'TaxSaleId' and 'BuyerNo., both numeric. If these are not set, the Pay Registration button on the Buyer Maintenance screen that submits the data to the Collect Payments screen will not work. Go to Tax > Tax Sale > Tax Sale Settings > Maintain Tax Sale Settings to create the miscellaneous source for the Misc Source for Buyer Registration setting.
Current Month Tax Sale Redemptions
Cashiering prohibits current month tax sale redemptions until after the sale has been balanced based on the Tax Sale setting, Allow payments on unsold items during tax sale before balancing. If set to True, the current month tax sale redemptions are prohibited in Cashiering until after the sale has been balanced. When attempting to take the payment in Cashiering, the message Item in tax sale – no presale payments allowed on any items during tax sale is displayed.
SETUP: Go to Tax > Tax Sale > Tax Sale Settings. Select the 'Allow payments on unsold items during tax sale before balancing' and set as applicable to your jurisdiction.
Tax Deed Application (TDA)
Cashiering processes endorsements, TDAs, and bank fees for tax deed applications. Once everything is entered and saved on the Delinquent screens and the Save and Pay button is clicked, the Collect Payment screen opens automatically and the due information is displayed. The amount in the Surplus field is paid into the Fee Bank advance pay surplus and all normal cashiering rules are followed. Once paid, the TDA can be viewed via Info Center > Tax Detail > View Delinquents (common action > Delinquent Detail.
To process a TDA:
-
Select the Sale Type of Tax Deed Redemption.
-
Enter the TDA Number.
-
Click Add Bill to populate the Bills to Pay pane with only those bills associated with the defined TDA Number.
IMPORTANT: When setting up Payment Terms Rule Details (Tax > Accounts Receivable > Payment Terms Mapping and Setup > Payment Terms Rule Setup > Search for Payment Terms Rules > Set Up Payment Terms Rule Details), select Date Comparison as a Bill Application Rule to Apply When if using two unique billing dates to implement a date comparison rule.
NOTE: When a TDA is created from an Agency (county held) item, only the item that was applied on is brought in to the Collect Payment screen and only the fees show as due.
Tax Sales items in Multiple Sales
California. The Tax Sale > Property Sale > Application Setting Allow Property to be in Multiple Secure Sales (effective date boolean) allows tax sale items to be in multiple tax sales, and the tax sale in the Publication List to be in multiple secure sales when set to True. When a tax sale with multiple items is cashiered, the status of any tax sale item also in another tax sale is set automatically to Non Participant in the non-cashiered tax sale with a Change Reason set to Sold in Another Sale. The Assessor, Auctioneer, and Tax Sale Balance reports include an additional Multiple Sales column that contains a count of the number of tax sales in which an item is participating if this setting is set to True and there are multiple items in a secure tax sale.
Unsecured Sale Payment
This type of payment is for assets bid on during a tax sale. After adding a PIN, the items displayed in the Bill panel are the Tax Sale Items from unsecured sales. The Asset description for the item is displayed.
Collect Trust Tax Payment
NOTE: When a Trust Tax bill is paid in full through any batch payment import (e.g., Web/IVR, LockBox, etc.), Accounts Receivable calls a Business Revenue Application Programming Interface (API) so that the Business Revenue module can update the Revenue Object Status from Filed to Paid on the Trust Tax Return.
Steps for Collecting Trust Tax Payment
-
Select the Type of Trust Tax.
-
Enter the Year, Bill number, and Account number.
-
Continue as for a regular tax payment beginning with Step 3 in the Collect Tax Payment section to enter the tendered and paid by information and complete the payment.
San Francisco, California
-
Trust Tax Return Quarterly True-Up Payments. A Business Revenue effective dated, systype application setting Trust tax VT for recap payment validation is used to select the value type for recap payment validation for quarterly true-up payments for trust tax return processing. The trust tax type must be set up via Business Revenue > Setup > Trust Tax Types as requiring Last Period Recap (checkbox). When the application setting is set to True, and the trust tax type requires last period recapping for quarterly true-up payments, clicking Post on the Process Trust Tax Returns screen initiates a validation to determine if the period being filed is the last period of the year for that trust tax account. If so, posting occurs; otherwise, a message displays indicating why posting cannot occur. When set to True, the Maintain Trust Tax Accounts screen includes a view only Last Period is Total Year Recap checkbox that is selected if the trust tax account has been set via Setup > Trust Tax Types as requiring the Last Period Recap. Once the trust tax return is processed, a Levy Management API calls the values and processes them to include the quarterly true-up billing in levy calculations. Accounts Receivable then supports collection of the quarterly true-up payments.
Collect Repay Reversal Payment
NOTE: If a payment is still pending, you can reverse it using the Receipt Management screen. You would use the service type Repay Reversal on the Collect Payments screen to enter the receipt number and receipt year. This was designed as a quick fix in the event that the cashier entered, for example, an incorrect date, or allocated money incorrectly, etc. Once the payment is posted, however, you cannot reverse it using Repay Reversal. You would need to cancel the payment using the Cancellation process via Manage Payments in Accounts Receivable to repay it.
Steps for Collecting Repay Reversal Payments
-
Select the Type of Tax Sale.
-
Enter the Receipt number and Receipt year.
-
Continue as for a regular tax payment beginning with Step 3 in the Collect Tax Payment section to enter the tendered and paid by information and complete the payment.
Action Buttons
The buttons available on the Bills to Pay panel vary, depending on your jurisdiction.
Use the action buttons in the Bills to Pay panel title bar to view and edit specific details for the bill and/or payment. Select the checkbox for each bill you want to work with.
Click Detail to view the primary owner information, tax details, flag details, and a breakdown of amounts, including due amount, fees, interest, penalties, discount, and specials amount. You can change the effective pay date (the same date that is in the sidebar), and prorate the paying amount by days or percent.
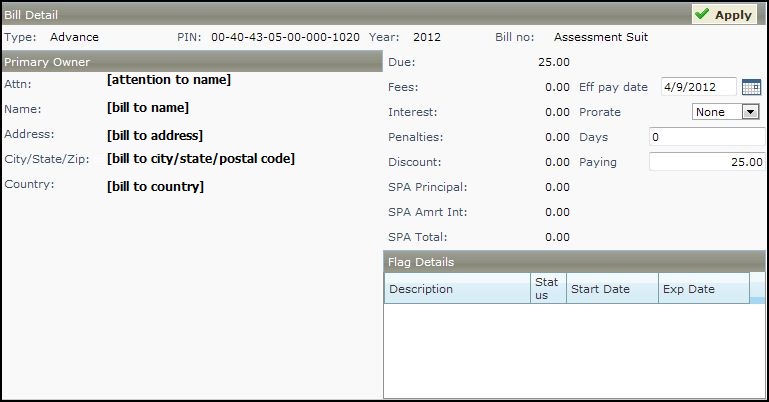
You can also view details for a single bill by clicking on the PIN to display the Bill Detail panel in a pop-up window. Click to view field information.
-
Type – The type of transaction, such as a relocation.
-
PIN – The primary identification number uniquely assigned to a revenue object.
-
Amount – The dollar amount of the bill highlighted in the Bills to Pay grid.
-
TAG – A group of taxing authorities that together make up the combined taxing authority over a particular revenue object.
-
Rev acct – The identification for the revenue account.
-
Year – The year in which the item is active.
-
Bill number – The number of the bill associated with the item.
-
Primary owner – The name of the primary owner.
NOTE: The primary owner is the owner name that will be displayed when only one name can be shown due to space restrictions on forms, reports, or screen layouts. The term ”primary owner” in Aumentum has no legal implication. -
Due – The amount due on this revenue object.
-
Tax – The total tax for this revenue object.
-
Penalties – The current penalties due.
-
Discount – The current discount that applies to the total due.
-
Eff pay date – The effective date of the payment.
-
Prorate – The proration for the revenue object.
-
Value – The total value of the revenue object.
-
Paying – The dollar amount to be paid for the revenue object.
-
User-defined fields – These are any fields that were defined for your county in Set Up Miscellaneous Sources.
NOTE: Prorate maybe not be available for your jurisdiction. If for example, a property sells part way through the year, you can prorate how much the previous owner paid and how much the current owner pays when purchasing the property.
NOTE: Flags
are edited in Manage Flags of the Information
Center's Tax Detail. Flags must be set up in Flag
Payment Rules in order to display on this screen, regardless of whether
or not there are actual rules associated with the flag.
After viewing bill details, click Apply to
place any changes made in the Detail section in memory and in Accounts
Receivable and to again show the Tender
Information.
Click Paid By to view who is paying the selected bills. The default information is shown automatically in the Paid By panel, but you can change it as needed. Select the checkbox for a bill and click Paid By to set the Paid By information for the transaction to the current primary owner name and address of the Revenue Object associated with the selected bill.
-
Click Remove to remove the selected items that will not be paid at this time. For example, you may want to remove bills with a zero balance.
-
Click Allocations to access the Adjust an Allocation screen to change the allocation information for the selected bills. See more about changing allocations below.
-
Click Print to print the selected bills.
-
Allocation and I/F toggle buttons:
-
Certain jurisdictions have an allocation toggle button to toggle between allocating the current or total amount due.
-
Certain jurisdictions have an Installment (I) or Full (F) toggle button to toggle between viewing balances for a full payment versus a partial payment.
NOTE: Accounts Receivable enforces the usage of either the Full or Partial interest calculation rule if there is a previous payment. The previous payment then determines the option that will be used. Cashiering disables the toggle option between Full or Partial if a prior payment exists on the bill. If so, the F/I toggle button is dimmed to show the option was used in the previous payment.
-
See the Jurisdiction Specific Information section in this Help topic for details about the Installment/Full toggle button and application settings pertaining to the toggle button.
-
Full Pmt checkbox. Checking the Full Pmt checkbox for a given row causes the calculation to display the Allocated amount as the full bill payment using the appropriate interest rate based on the effective pay date in the session bar. Unchecking the Full Pmt checkbox for a given row causes the calculation to display the Allocated amount as the installment payment amount using the appropriate interest rate based on the effective pay date in the session bar.
-
See the Jurisdiction Specific Information section in this Help topic for details about the Full Pmt checkbox and application settings pertaining to this checkbox.
Common Actions
These Common Actions are available on the sidebar tab.
-
Use Detailed Search – Goes to Records Search to allow searching by a wider range of parameters.
-
View Tax Information – Goes to Info Center's Tax Information screen, with the Collect Payment's PIN and bill displayed. If no PIN is selected, you are directed to the Records Search screen to search for and select and PIN.
-
Open Session – Returns to the Open Session by Cashier screen, where you can choose or being another cashiering session.
-
Reconcile Session – Opens the Session Reconciliation screen, where you can balance a session.
-
Maintain Allocation Rules – Goes to Maintain Allocation Rule Configuration, where you can edit an existing allocation rule or create a new one.
-
Adjust Charges – Opens the Levy Maintenance screen Adjust Charges and automatically carries to that screen the PIN and bill you were working with on the Collect Payments.
-
Manage Receipts – Goes to Inquire on Receipt, where you can find a receipt and view the details, reprint it, print a credit voucher, or reverse payments.
-
Reconcile Checks – Goes to Enter Checks for Reconciliation.
-
Non-Posted Special Payoff – Opens the Pay Off Non-Posted or Deferred Amortized Special Assessments screen for the purpose of paying off amortized special assessments before they are posted to Assessment Administration.
-
Posted Special Payoff – Opens Pay Off Posted Amortized Special Assessments screen, where you can perform an early pay off of a amortized special assessments that has been billed.
-
Protested Payments – Opens the Search for Bills to Protest screen for the purpose of searching for the bill to protest, applying a Protested Payments flag to the entire bill or to selected allocations, and then returning to the Collect Payment screen
NOTE: A bill must be loaded on the Collect Payments screen and selected in the grid to perform a project special assessment payoff.
Tips
When cashiering for a forfeiture, select Tax as the type, then Tax Forfeiture as tax type. Enter the amounts in the pop-up. Note that the tax year that appears when entering forfeiture payments is currently required, even though the forfeiture does not pertain to a single tax year and the tax year is irrelevant. When saved, they appear in the Values field of Collect Payments. Note that miscellaneous sources must be set up for the forfeiture payments, and the till and cashier also require setup to collect forfeiture payments.
If you back date a payment before a future payment, even if the future payment has been cancelled, the system provides a warning message that there is a future payment. The payment is allowed so long as the payment amount applied to tax bill charges is zero.
If a bill is retrieved by entering the year and bill number and there are additional years owed for a PIN, a message displays that additional years are owed for the PIN. No message displays when searching by PIN.
If the tendered amount differs from the amount allocated, a warning message displays asking if you want to allocate the tendered amount.
To change the effective date, first enter the PIN, then add a bill, then change the effective date.
The TIF and non-TIF charges are separated so they can be paid separately.
You need security authorization for these options:
-
Payment sources
-
Allocations button
-
Prorate fields