Hearing Processing
Navigate:  Case Management
> Hearing Processing
Case Management
> Hearing Processing
Description
Use Hearing Processing to begin and process a hearing after the hearing schedule has been finalized. Navigating through the sub-tabs on the page (e.g., Hearing Summary, Disclosure, History, etc.) provides a natural flow through the data entry process used to conduct a hearing.
Steps
- On the Case Management Search screen, enter your search criteria and click Search.
- In the Results panel, select the checkbox for one or more items in the grid and click Next.
- Click Configuration > Application Settings.
- On the Maintain Application Settings screen, select Effective Date from the Setting type drop-down list, and select System from the Filter by module drop-down list.
- Locate Search result limit and click Edit.
- Enter the maximum number of records you want to see in search results in the Setting Value column.
- Click Apply, then click Save.
NOTE: The number of records displayed in the search results is based on the Search Result Limit application setting.
Click here to learn how to set this limit.
Security settings can be applied to roles for specific fields in the Hearing Processing screen. Click here for more information.
- Click Configuration > Security and User Maintenance > Roles.
- In the Maintain a Role screen, select a role and click Edit.
- In the Edit Role Details screen, click Case Management > Hearing Processing > Details in the Granted Menu Items panel. You can also set security rights for Batch Processes.
- If you don’t see this in the Granted Menu Items panel, find it in the Available Menu Items panel and click Add Selected. Click Save in the Command Item bar.
- In the Edit Additional Role Details screen, click Hearing Processing in the Details panel. You can also set security rights for Determination Main in this screen.
- For each item, set the security rights for the selected role and click Save in the Command Item bar.
- Click Previous to return to the Edit Role Details screen.
- Click Close to end the task.
NOTE: When the case has a scheduled date and time, the Set Context bar is visible. If any of the hearings in the set is continuous, then "Continuous" appears after "Schedule Date."

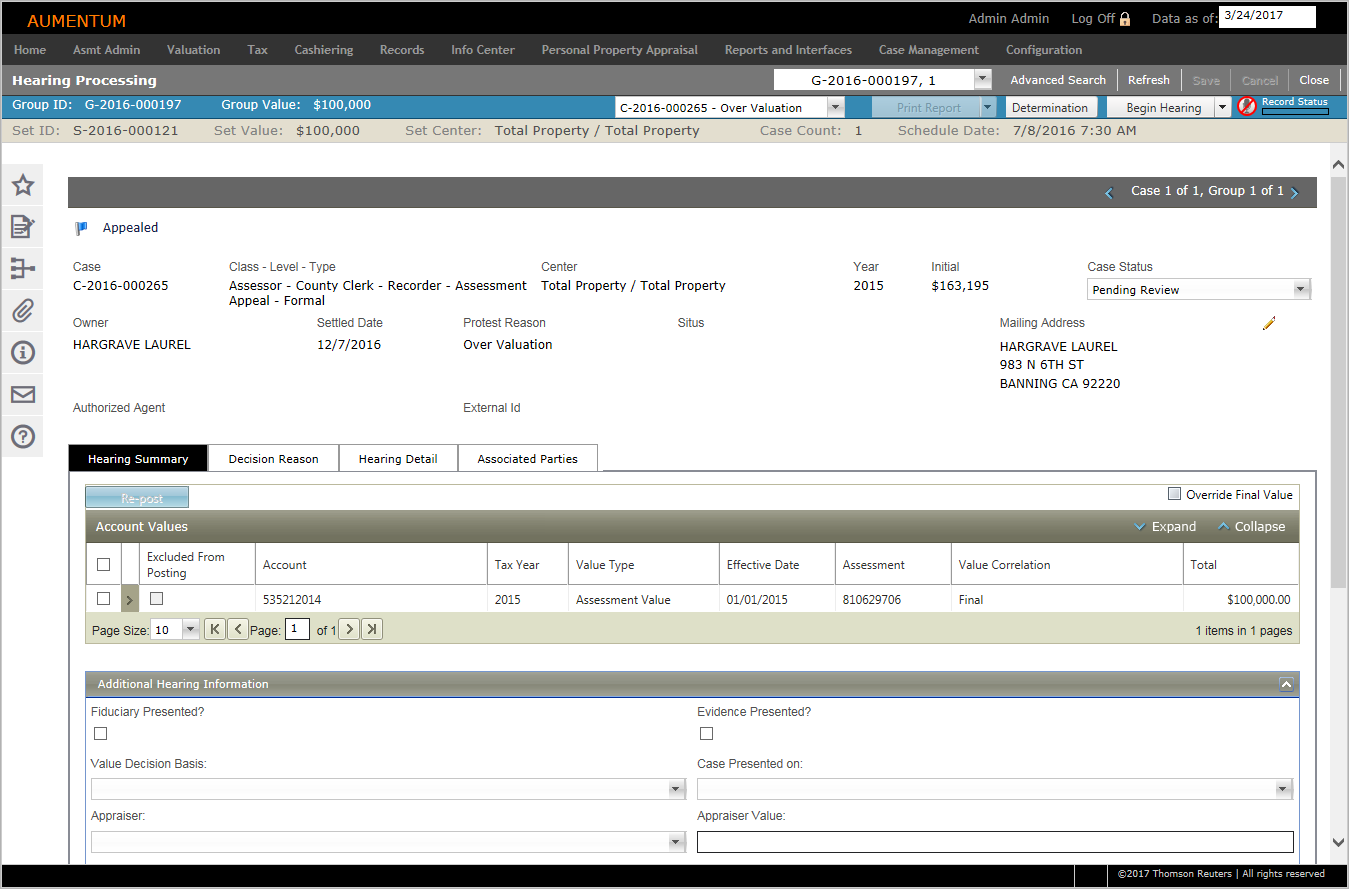
The top portion of the Hearing Processing screen displays detail information for the selected case.
NOTE: Hearings may consist of single cases associated to a group, where multiple groups are established as a set. When a single case is associated with a single group, the Group ID appears in the worklist drop-down list and the Case ID is the only number in the Case worklist drop-down list.
Header/Top Panel
Steps for Header Area
-
Optionally, select another Group ID or Case number to view from the Group or Case worklist drop-down lists.
- The Group worklist header contains static data that is represented for every group in the worklist drop-down list.
-
Group ID – The ID number of the group selected in the Group worklist drop-down list.
-
Group Value – Total appraised value of all cases associated with this Group ID.
Click the Group Value hyperlink to see values related to grouped cases (for example, multiple PIN AIN appeal and Business Master related accounts appeal).
On the Grouped Cases Values screen, the related summed values are displayed for the grouped cases. The PIN count in displayed in brackets at the start of each row. Grand totals for each value correlation are shown below the grid.
-
Case worklist drop-down list – Work list of all unsettled cases associated with this Group ID.
-
Print Report button – Print the Disclosure and/or Settlement Report(s).
- Determination
-
Case Status – Select the case status from the drop-down list.
-
Begin button – Starts the timer for the hearing.
-
View high level, static information for the selected Group ID/Case in the panel:
-
Set ID
-
Set Value – Total appraised value of all cases, within all Groups, associated with this Set ID.
-
Set Center – Established Center Code for the set.
-
Case Count – Total number of cases associated with this Set ID.
-
Schedule Date – Earliest scheduled date/time of any case associated with this Set ID.
-
Click Begin when the hearing has started; the hearing timer begins. You can also launch the third-party recording software/device at this time (if configured).
-
Click Browse to search for a recording.
-
Enter a comment.
-
Click Add Attachment.
-
Click Stop when the hearing has ended. You can also stop the recording software/device at this time. A pop-up appears prompting you to upload the recording file as an attachment for the hearing.
NOTE:
Once you click Begin, the
label changes to Stop, allowing
you to stop the timer once the hearing has ended. Click the Attachment
icon in the sidebar menu to attach the
hearing recording, if desired.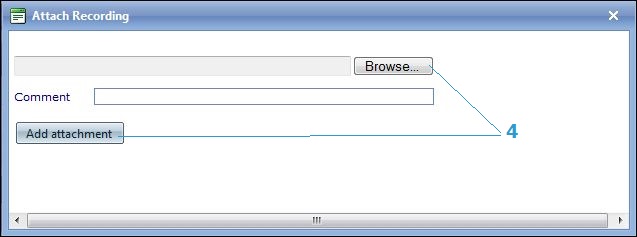
NOTE: Once the recording file is attached, it can be accessed at any time from Attachments in the sidebar.
Hearing Processing Tabs
The Hearing Processing task is comprised of the following tabs, which may vary by jurisdiction and particular hearing.
-
In the Account Value History panel, click Add New in the title bar. Enter or select information and click Apply to save the new value correlation.
NOTE: The Conclusion drop-down list is only accessible when Final is selected from the Value Correlation drop-down list.
-
Maintain any applicable fields displayed in the Additional Hearing Information panel, which contains user-defined elements that are maintained via Case Management > Configuration > General.
-
Click Save in the Command Item bar.
-
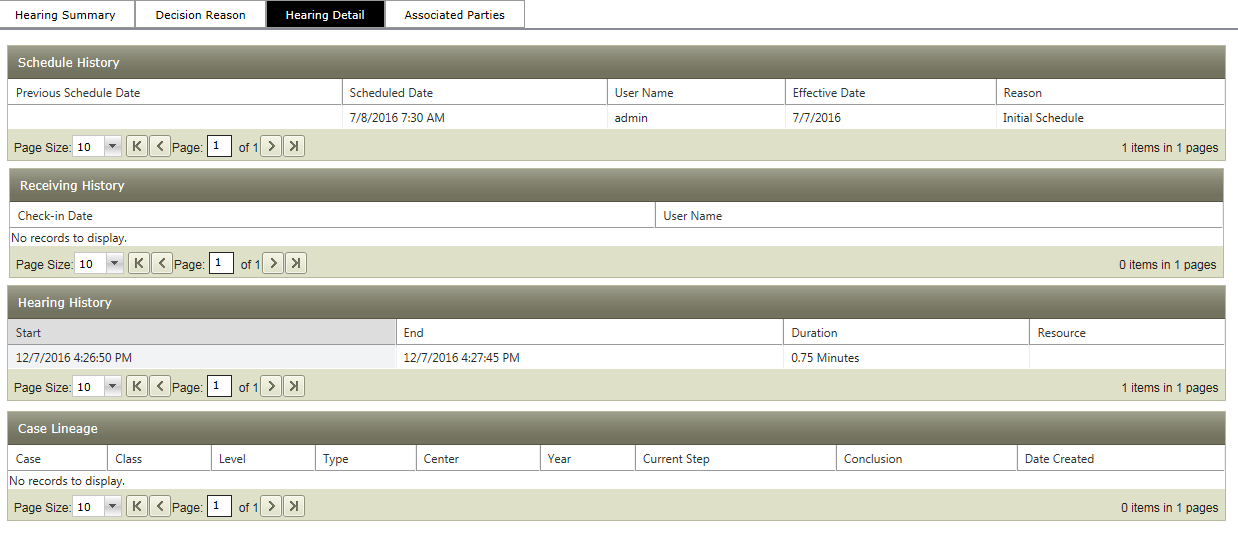
Schedule History – Displays all historical occurrences of rescheduling, if the hearing scheduled date was altered.
- Receiving History – Displays a history of check-in dates.
-
Hearing History – Displays a history of all recordings (Begin/End function) associated with the hearing.
-
Case Lineage – Displays a list of all cases associated with the Master ID for the case involved in the hearing.
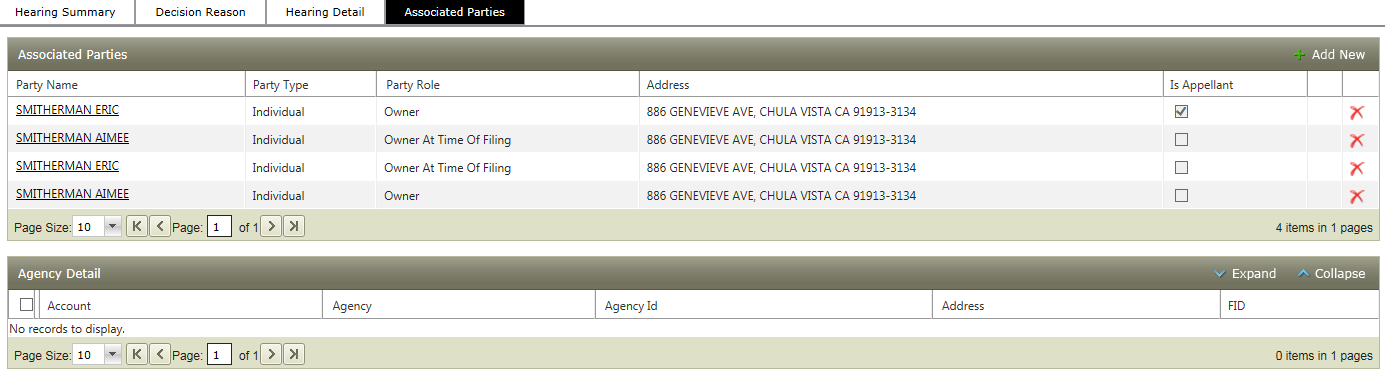
-
Click Add New to add legal parties.
-
Select any existing row and select the Is Appellant checkbox to define the legal parties that are the appellant(s).
-
Click the red X on any row to delete it.
-
In the Agency Detail panel, click the Expand and Collapse buttons to show or hide details for the selected legal party.
- Disclosure – Access acknowledgment statements intended for the Owner/Agency to provide a signature of agreement to from the Disclosure tab.
-
Signatures – Add Board Member and Appraiser signatures to the hearing, acknowledging the decision.
Hearing Summary
Displays a single line entry for every account associated with the hearing.

Click the Expand/Collapse
buttons in the panel or in the panel header to view additional details.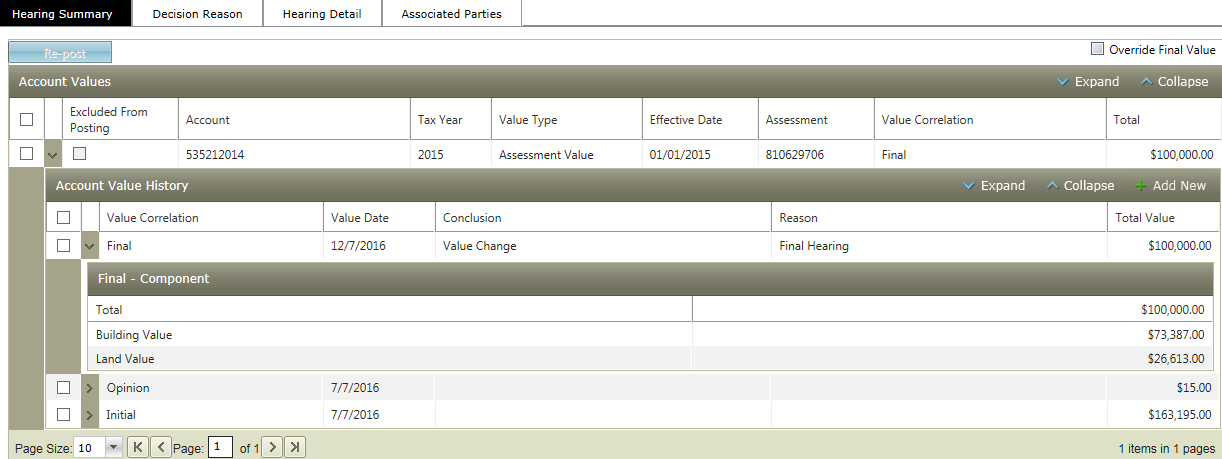
NOTE: Cases display an Initial value until another value correlation is made to the case (via Case Management > Configuration > General).
Decision Reason
In the Decision Reason Entry panel, select the checkbox for one or more items in the grid and click Edit. Or, click Add New to add a new reason.
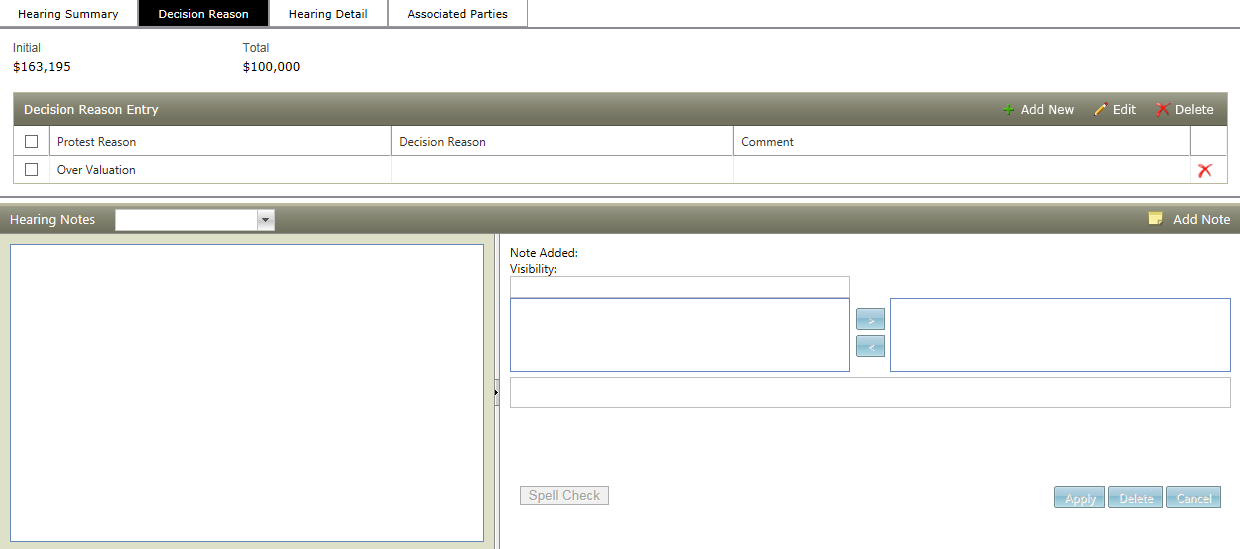
Select any row and click Delete to remove it.
Hearing Detail
View all actions and edits that have historically occurred for the hearing. This information is read-only.
Associated Parties
Maintain associated party details on this panel.
Notes
In the Hearing Notes panel, you can add notes associated with the hearing. This panel usesthe standard Aumentum Notes functionality.
Saving
Click Save when you are finished updating all application information.
-
Click Advanced Search to return to the Advanced Search screen.
-
Click Refresh to clear all selections and refresh the page.
-
Click Cancel to discard changes since the last Save and retain the current view.
-
Click Close to end the task.
Common Actions
Case Detail – Advances to the Case Detail screen.
Valuation Property Characteristics – Opens the RPA Main Page screen, on which you can maintain valuation characteristics.
Audit Trail – Opens the Audit Trail screen.
Tips
When a case status is changed, a Status Maintained event is triggered, which captures caserecordid and status as artifacts for the event.
When a value correlation is added, a ValueCorEstab event is triggered, which captures artifacts specific to the case and value event.
Once all PINs associated with the case are finalized, the hearing detail information can be accessed via:
-
Case Management > Hearing Processing
-
Case Management > Cases > Case Search
-
Case Management > Cases > PIN Search