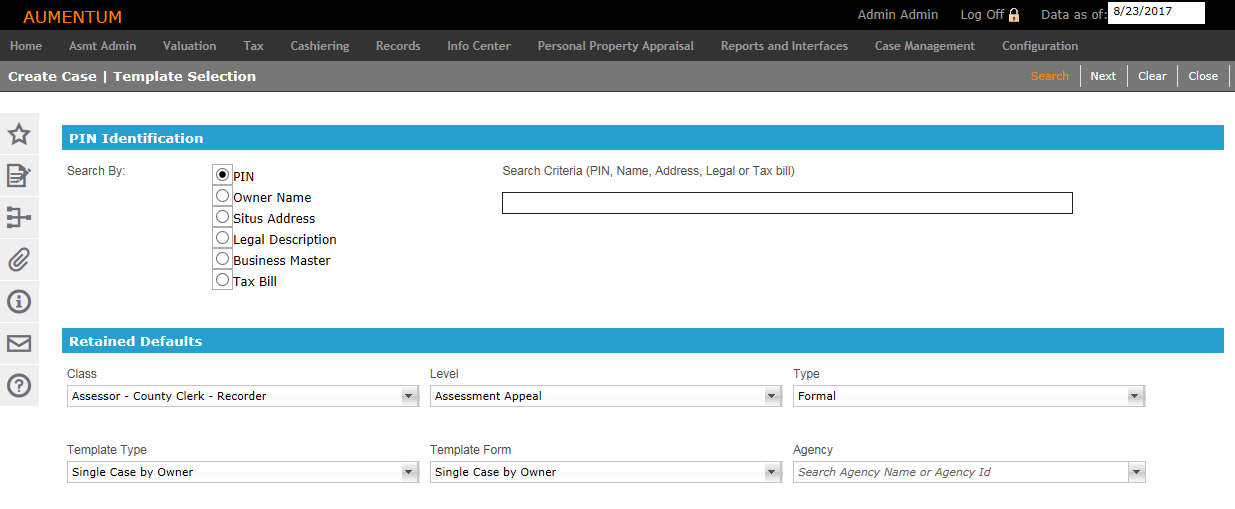
Create Case Template Selection
Navigate:  Case Management
> Cases > Add Case
Case Management
> Cases > Add Case
Description
Use Create Case | Template Selection screen to create a case and to select the template associated with the new case.
NOTE: Case templates are set up based on your jurisdiction and business processes and may require configuration. To setup, navigate to Case Management > Configuration > Cases.
Steps
-
Select the type of search and enter parameters for PIN Identification for the appeal.
-
PIN
-
Owner Name
-
Situs Address
-
Legal Description
-
Business Master
-
Click Search. Search Results populate in the Search Results panel.
-
Select the PIN(s) for which you want to create a case.
-
Edit any appeal or template fields within the Retained Defaults panel, if desired.
-
Select the Case Class.
-
Select the Case Level.
-
Select the Case Type. NOTE: The template types and forms that are available for selection are based on the Case Class, Level and Type you have selected. Also see the Tips section in this help topic.
-
Select the Template Type. The available template types include six pre-defined, fixed, base templates which are available for all jurisdictions.
-
Select the Template Form. The Template Form drop-down list contains all of the forms you have configured.
-
Enter the Agency name. As you begin typing the name, legal parties that match the characters you've typed populate in a drop-down list for your selection.
-
Single Case by Agency
- Single Case by Representative
- Group Case by Representative
-
Single Case by Other
-
Single Case by Owner
-
Group Case by Agency
-
Group Case by Other
-
Group Case by Owner
OR
Use the case/template defaults which have been configured and click Next to navigate to the appropriate case template (depending on your selections) to continue adding the case. Possible navigation paths include:
-
Click Cancel to discard changes since the last Save and retain the current view.
-
Click Close to end the task.
Tips
When you select to create a case for a PIN which already has a resolved/concluded case associated with it, step 2 of the case entry process displays an override checkbox - Override: Concluded case exists - to prevent the creation of a duplicated case. The checkbox is only available when there is an exact match to the PIN and year for the specified case Class, Level and Type for which a concluded case exists, otherwise, the checkbox is hidden from view.
The Retained Defaults grid includes default case attribute fields which are configured to streamline the manual case creation process. The fields which appear in the Retained Defaults panel can be changed at any time from the CM Configuration - General task (see the Default Class - Level - Type Definitions panel).
When a case is created, Aumentum automatically assigns an appeal case number to the instance, which can be overridden during the workflow approval process.