Participants
Navigate:  Case Management > Configuration > Participants
Description
Use this screen to manage Participant and Panel resources.
CM Configuration - Participants is comprised of the following tabs:
-
Participants – View, add and edit participant resources.
-
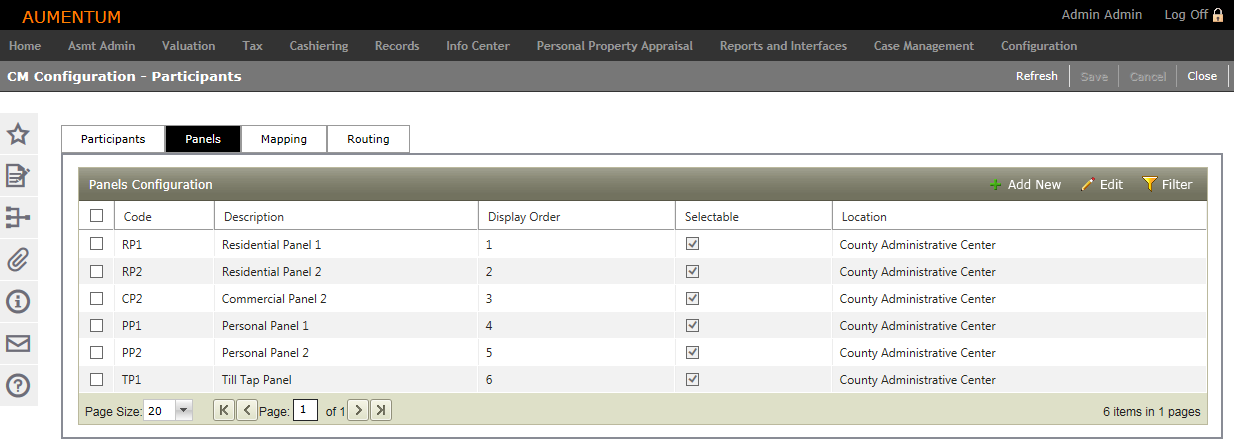
Panels – Define the number of panels that will be used by your jurisdiction for hearings and associate panels with configured Locations.
-
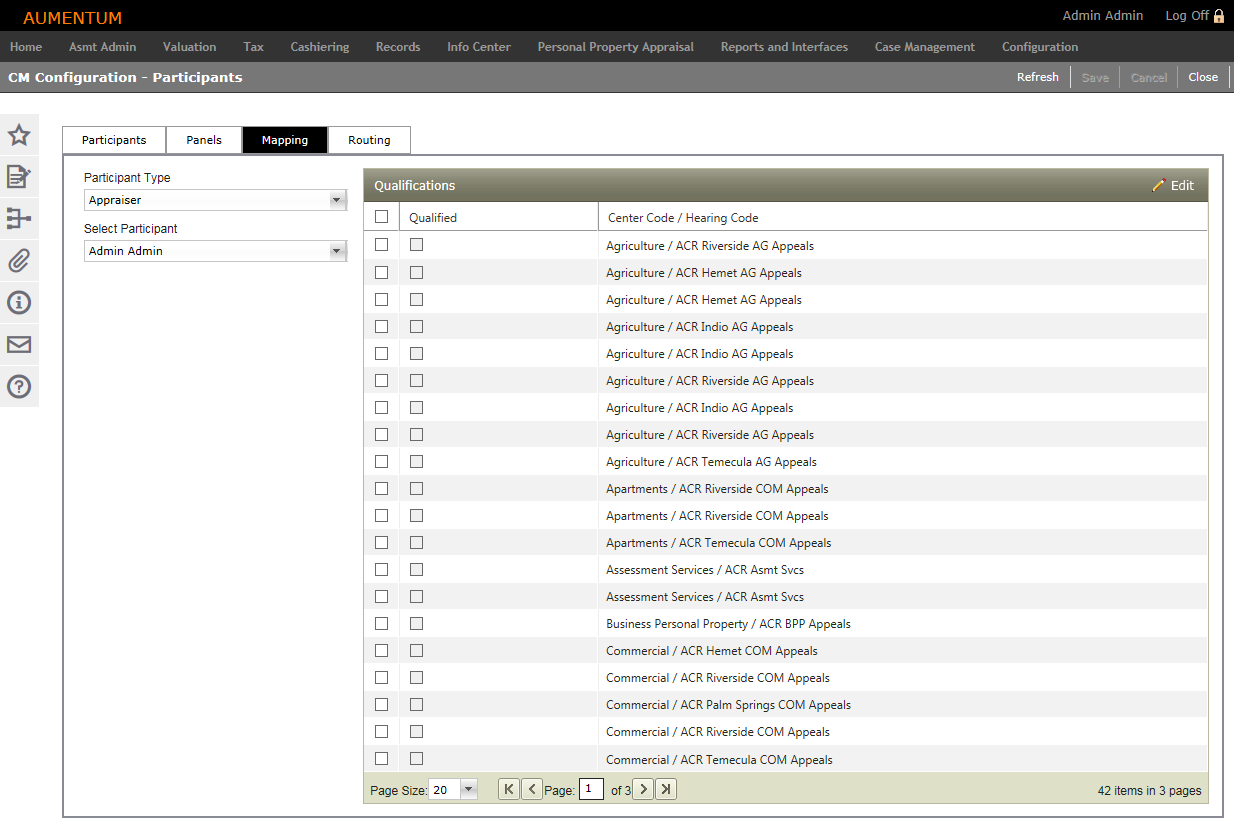
Mapping – Define specific skills/qualifications for each select Participant.
-
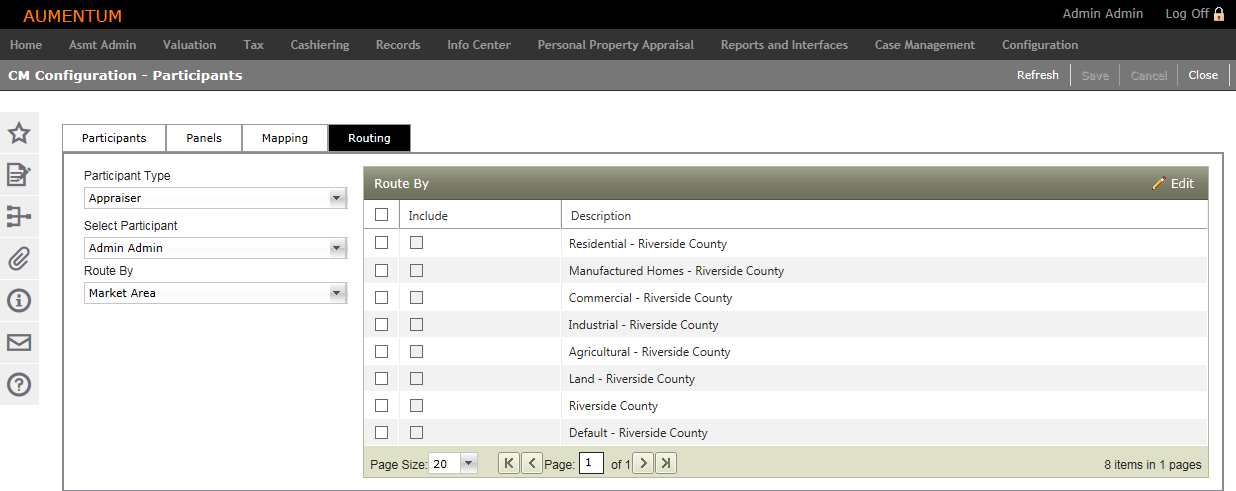
Routing – Route the case to the appropriate participant for case management.
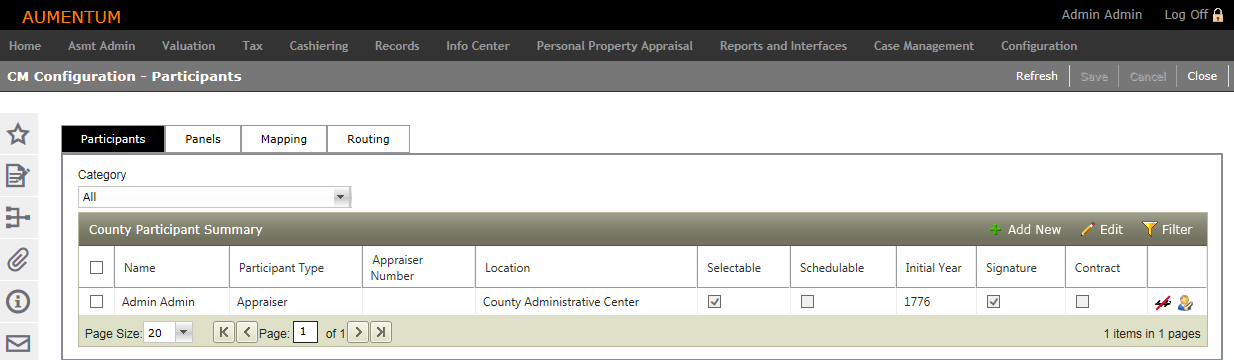
Participants
Steps
-
Optionally, select a Category.
-
All – All defined participants
-
Users – All users defined as participants
-
Legal Parties – All legal parties defined as participants
-
Click Add New in the County Participant Grid to add a new participant. Clicking Add New navigates you to the Advanced Search task to search and define users or legal parties as Participants.
-
Select one or more Name from the County Participant Summary grid and click Edit. The selected row(s) is activated for editing. NOTE: Alternatively, double-click on a single row to enable the edit functionality.
-
Name – The Legal Party name, as defined.
-
Participant Type – Appraiser or Board member.
-
Appraiser Number (optional) – Jurisdiction-assigned Appraiser ID number. NOTE: This field is unavailable if Board is the selected Participant Type.
-
Location – Select one, Multiple, or All (default) available Locations, as configured.
-
Selectable – Defines whether or not the Participant can be access by other tasks in the application (e.g., calendars for scheduling).
-
Schedulable – Defines whether or not the Participant can be accessed by the scheduling tasks/wizard.
-
Initial Year – The Participant's year of hire at the jurisdiction.
-
Signature (view only) – Selected when there is a signature associated with the Participant's record on file.
-
Contract – Indicates the Participant is a contract employee.
-
Click Apply.
-
Click Save.
NOTE: Participants must be linked to an attribute type to be accessed in the Participants grid.
Panels
Steps
-
Click Add New in the Panels Configuration grid to add a new panel. A new row is available for editing.
-
Enter the panel criteria and click Apply.
-
Click Save.
OR
Select one or more panel from the Panels Configuration grid and click Edit. The selected row(s) is activated for editing.
NOTE: Alternatively, double-click a single row to enable the edit functionality.
Mapping
NOTE: Available qualifications are user-configurable via the CM Configuration - Codes menu. Navigate to Case Management > Configuration > Codes.
Steps
-
Select a Participant Type. The Qualifications grid updates to display the columns applicable to the selected Participant Type.
-
Appraiser (default, pictured above)
-
Board
-
Select a name from the Select Participant drop-down list. The Qualifications grid updates to display all available qualifications.
-
Select one or more Qualifications to add/edit for the participant and click Edit. The selected qualifications are highlighted and active for editing in the Qualifications grid.
-
Check each Qualified Center Code/Hearing Code applicable to the selected Participant's qualifications.
-
Click Apply.
-
Click Save.
NOTE: When Board is selected as the Participant Type, an additional Chair column appears in the Qualifications grid. For hearings conducted by a Panel (versus Individual), it is required that a Chair person be designated for the hearing type. The Participant that is selected as Chair for any Center/Hearing Code must also be checked as Qualified for that Center/Hearing Code.
Routing
Workflows can be defined to prompt you with a recommended appraiser to assign to a case and give you the option to select another so that you are not required to determine case assignment manually for every case.
The Routing tab does not apply to all jurisdictions and may not be available.
Steps
-
Select the Participant Type. Select Participants populate based on those participants configured for the selected type.
-
Select the Participant for which to route cases.
-
Select how the cases are routed to the selected Participant.
-
Market Area
-
SubMarket Area (only available when a Market Area is selected)
-
Neighborhood Code
-
Class Code
-
Land Type Code
-
Click Save.
Optionally, edit any existing routing configuration in the grid.
-
Click Refresh to clear all selections and refresh the page.
-
Click Cancel to discard changes since the last Save and retain the current view.
-
Click Close to end the task.
Tips
Click Filter to activate the filter header in the County Participant Summary grid. A new row displays containing grid controls to provide standard sort and filter functionality.