Single Case by Owner
Navigate:  Case Management > Cases
> Add Case
Case Management > Cases
> Add Case
Description
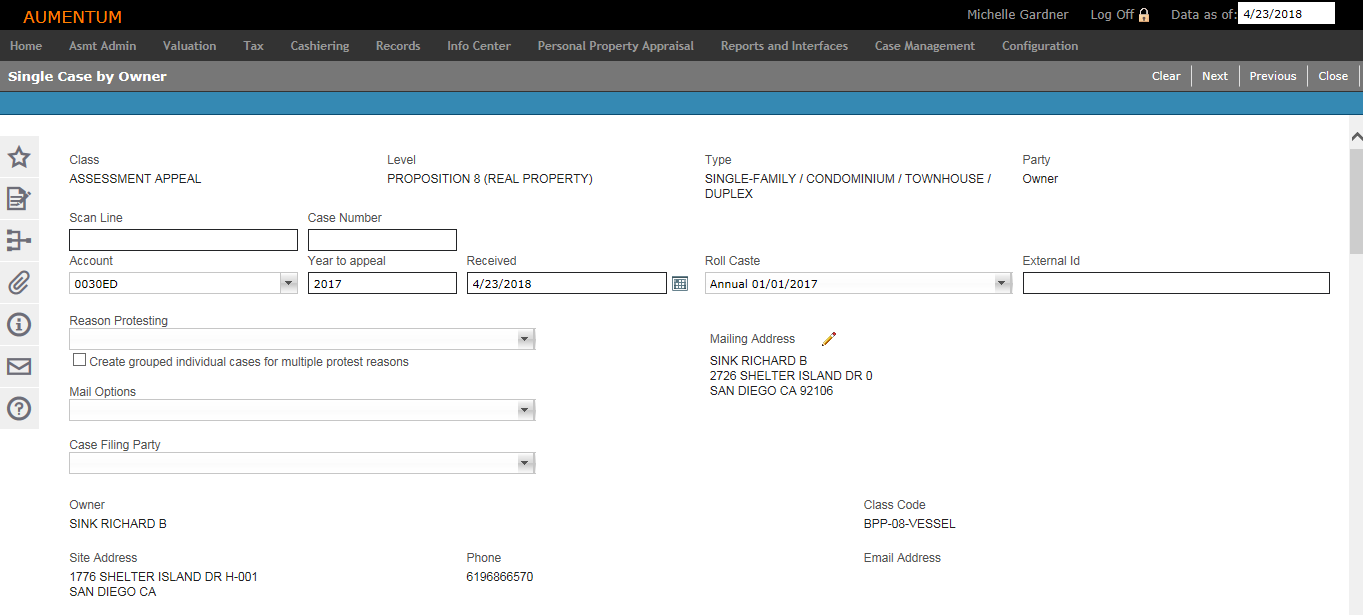
The Single Case by Owner screen displays the template to be completed for the form you selected on the Create Case | Template Selection screen.
NOTE: Case templates are set up based on your jurisdiction and business processes. The fields shown in the screen capture below may not reflect your jurisdiction.
Steps
-
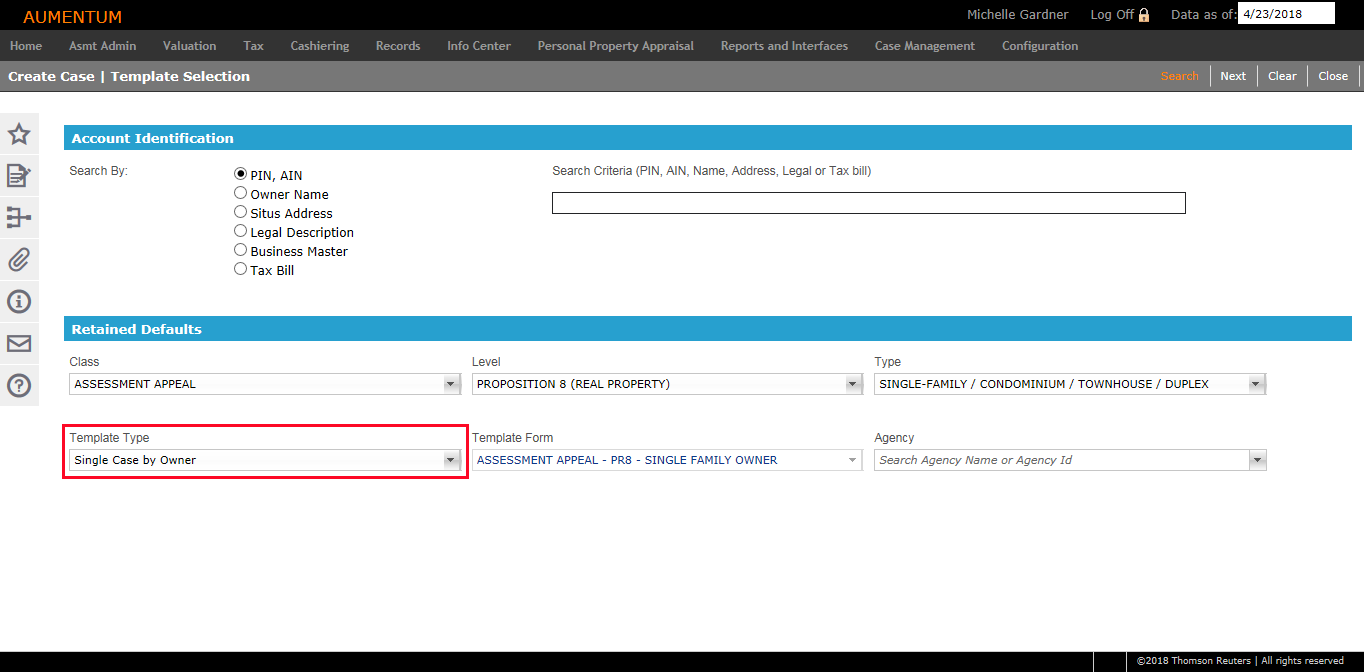
On the Create Case | Template Selection screen, select Single Case by Owner from the Template Type drop-down list and click Next.

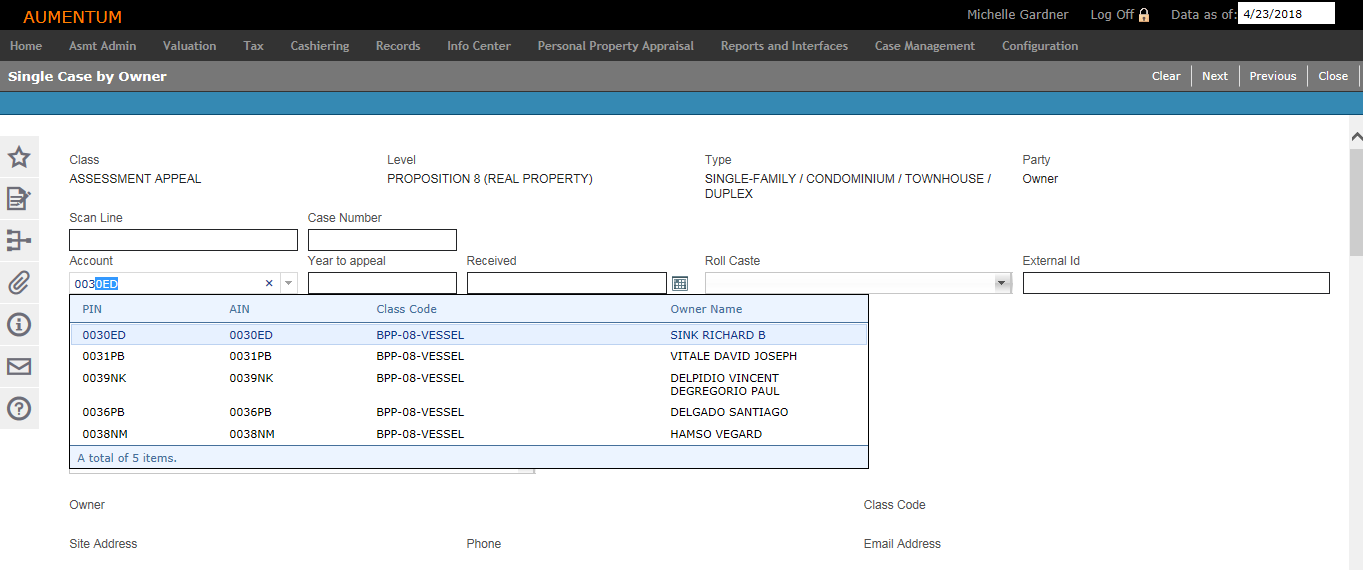
- On the Single Case by Owner screen, start typing a PIN or AIN in the Account field and make a selection from the dynamic list. The account owner's information populates the screen.
- Complete the user-defined fields configured for your jurisdiction.
-
Select the Override: Concluded case exists checkbox, if applicable.
-
If you have a scanner connected to your desktop, click in the Scan Line field and scan the case list barcode, which populates the Account and Year fields. The Owner, Site Address, Class Code and Total Value fields are also populated.
-
If you do not have scanning capabilities, manually enter the case list in the Account and Year fields The Owner, Site Address, Class Code and Total Value are also populated.
-
Enter the Year to Appeal.
-
Enter the owner's Opinion of Value. This may not be available if you enabled the Value Related checkbox in the Case Configuration task.
- Make a selection from the Supporting Assessment Event drop-down list to identify what assessment event established the value that exists on a more recent assessment event that is under appeal. See Prerequisites at the end of this topic.
-
Make a selection from the Reason for Protesting and Case Filing Party drop-down lists.
-
Optionally, click the Pencil icon to open the Edit Mailing Address screen and update the mailing address to which case correspondence is sent.
-
Click Next in the Command Item bar.
NOTE: A case number will be automatically assigned unless one is provided.
- On the Case Input Complete screen, view the case number created. It can be overridden if desired.
-
In the Enter Opinion panel, enter values as required. Click Clear to reset all the pre-populated opinion values to null.
NOTE: There must be one row with a value of 0 or greater to write an opinion. On the Case Detail screen, opinion values are displayed for only those components entered with a value.
-
Click Apply.
-
In the Command Item bar, click Previous to return to the Create Case Template Selection screen on the previous page.
- Click Close to end the task.
NOTE: This checkbox is only available when there is an exact match to the PIN and year for the specified case Class, Level and Type for which a concluded case exists in order to prevent a duplicate case from being created; otherwise, the checkbox is hidden from view.
NOTE: If there are existing cases that match the PIN/Tax Year, the Existing Case for PIN/Tax Year pop-up displays, showing the Case Number, Case Class-Level-Type, Appellant Name, Status and Protest Reason for the existing cases. This is for your information only; you can still proceed with adding the case. This information can be exported to Microsoft Excel.
NOTE: After a case is created and filed under an agency, it is also necessary to add the case to the agency in order for the powers of representation to be valid. Click Case Management > Agency Maintenance to complete this task.
OR
On the Case Input Value Entry screen, add value detail for the case.
NOTE: This next step is only available when the Value Related checkbox is selected in Case Configuration (see the Mapping tab) for the specific type of case you are adding. If the Value Related checkbox is not selected, the process for adding the new case ends on this screen (and upon clicking Save).
Tips
When you select to create a case for a PIN which already has a resolved/concluded case associated with it, this step of the case entry process displays an override checkbox - Override: Concluded case exists - to prevent the creation of a duplicated case. The checkbox is only available when there is an exact match to the PIN and year for the specified case Class, Level and Type for which a concluded case exists, otherwise, the checkbox is hidden from view.
When a case is created, Aumentum automatically assigns an appeal case number to the instance, which can be overridden during the workflow approval process.
Prerequisites
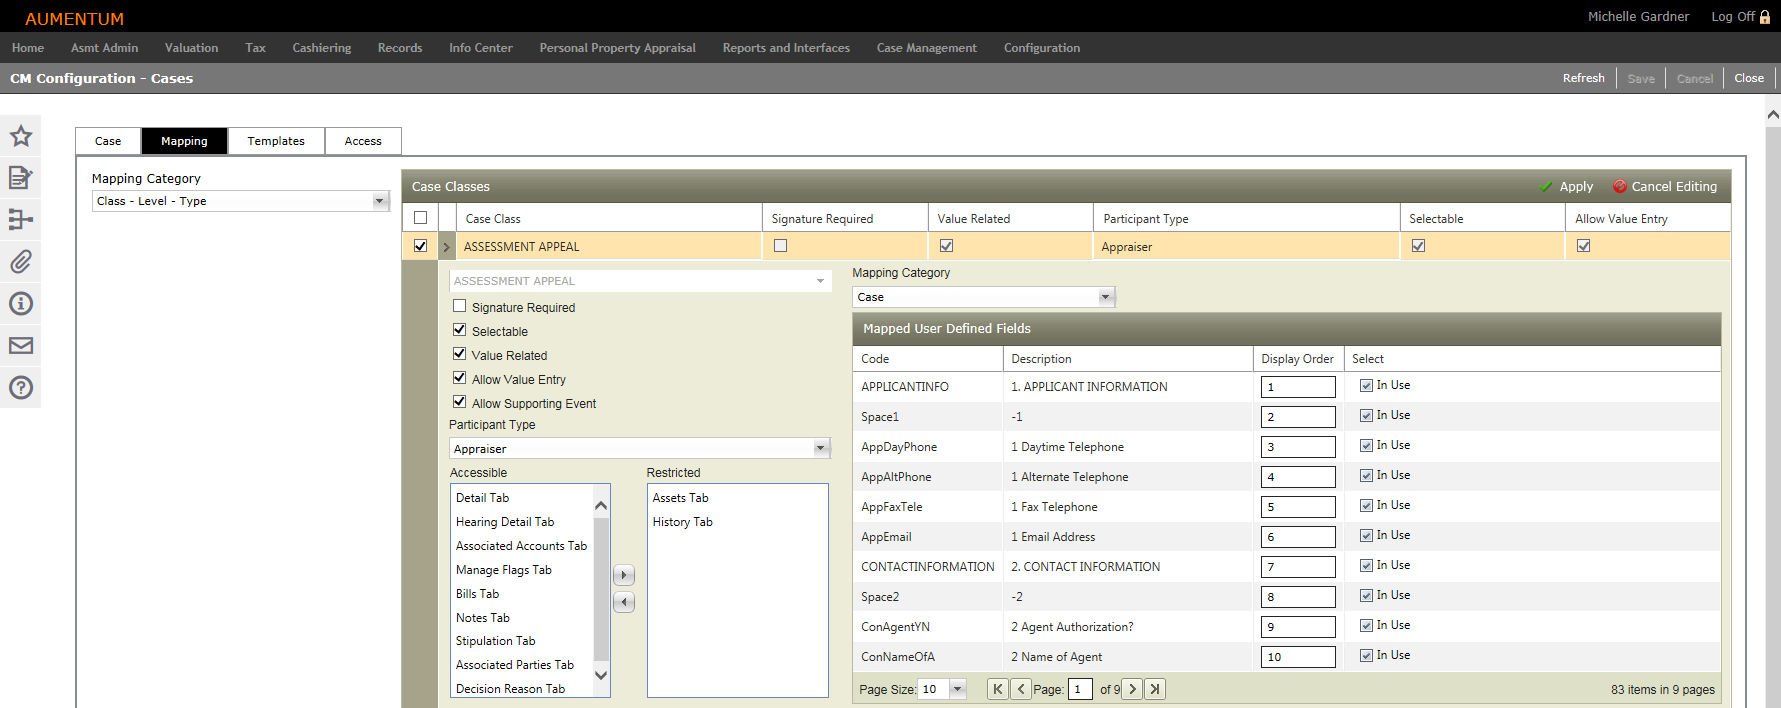
To enable the Supporting Assessment Event drop-down list, it must be selected in CM Configuration - Cases.
- Click Case Management > Configuration > Cases.
- On the CM Configuration - Cases screen, click the Mapping tab.
- Select an item in the Case Classes panel and click the Edit icon in the panel's title bar.
- On the left side of the panel, select the Allow Supporting Event checkbox.
- Click Apply in the panel's title bar.
- Click Save in the Command Item bar.
- Click Close to end the task.